")


Hello again Friends!
Today I’m gonna spend a little time talking about a topic that I see asked a lot, and searched a lot. To my absolute surprise, there is not really a quick concise guide that simply lays out best practices to record guitars properly. So, I am here to fill that void! By the end of this short post, you should be well equipped with the knowledge you need to record the best sounding guitars you possibly can!
Let’s dive straight into it.
Recording Electric Guitar
Electric guitars are a staple of modern music, and their unique sound is often the driving force behind many songs. When recording an electric guitar, there are several factors to consider, including the type of guitar, amplifier, and effects being used. Here are some tips for getting the best possible sound when recording electric guitar:
1. Choosing The Right Amplifier
The amplifier is an integral part of the electric guitar sound, and choosing the right one is essential. Different amplifiers can produce a variety of sounds, from warm and mellow to crunchy and distorted. Now, the amp you are already using is probably producing the tone that you like, and want to record because it sure would be silly to use a guitar amp that you hate! As much as actual guitar selection can affect the recording, a guitar amp can, and will, just as much. Choosing the right tool for the job is essential. A Marshall does not sound like a Mesa, just like an Orange doesn’t sound like a Peavey.
2. Mic Placement
Microphone placement is crucial when recording electric guitar. The most common method is to place a dynamic microphone, such as a Shure SM57, close to the center of speaker cone. This method is good for getting a very clear, well defined tone in the recording. This is known as placing a microphone “on-axis” with the speaker in the guitar amp/cabinet.
You can experiment with moving the mic “Off-Axis” to the sides, or up and down from center to get different tones on recording. Off-Axis tends to produce darker, beefier sounding tones, with the trade off being less clarity and high end sparkle. You could use two microphones, one on axis, and one off axis and blend both together to get the best of both worlds.
Some of our favorite tones are from a 3-mic setup, 1 microphone on the center of the cone, one at the far right edge of the cone, and one in the corner of our room. Blending those 3 together results in some fantastically full and beefy guitar tones.
There are also no limits to the type of microphone you can use to mic an amp. Whether it’s a SM57, or a Sennheiser 421. Large diaphragm condensers such as an AKG C214/414, Lewitt Pro 240, or a ribbon microphone such as a Royer 121. They all produce different results, and can be used in tandem to craft some great tones on “digital tape”
3. Room Acoustics
The acoustics of the room can also affect the sound of the electric guitar. A small, dead room can produce a dry and lifeless sound, while a large, reflective room can add a natural reverb to the sound. With how closely mic’d a guitar amp/cab is room acoustics can be less of a challenge than recording a source that is not amplified, such as an acoustic guitar or a vocal performance. However, it is still a factor to consider what it will do to your recordings no matter what you are capturing.
4. DI Recording (This Is Huge!)

Recording a DI (Direct Input) of your guitar, with your amp at the same time is a powerful technique that absolutely makes life in the production, editing, and mixing stage of your music infinitely easier. When you commit a guitar tone with an amp recording, or an amp sim plugin it softens the transient of your pick attack so much that it is essentially impossible to see when editing. That makes editing guitar takes, take much longer than it actually needs to. Aside from making your editor’s life easier, the most powerful reason to record a DI with your amp is the ability to Re-Amp your guitar tone in the production/mixing phase.
This is powerful because if you are unhappy with the tone that was recorded from your guitar amp, or if the environment that it was recorded in overpowers the recording, that dry DI straight from your guitar can save the day. Whether it is you, or an engineer/studio that you are working with, that DI can be sent out of the audio program through a re-amp box to feed a guitar amp. Then, that amp can be tweaked with the part being played without the pressure of recording a good take. If you take nothing else away from this post, I hope that you take this step to heart because it is in my opinion the single biggest thing that a bedroom guitarist/ amateur artist can do to level up their guitar game.
If you’ve never used a DI box it is SUPER simple and easy to use. You plug your guitar into the input of the DI box. The output on the others side will be xlr (some have 1/4″ outputs too) that you will plug into your audio interface/console. The DI box has a “Thru”-put as well, you will plug an instrument cable into this and then into your amp. Provided that you’ve already got your amp mic’d up and ready to go all you have to do is hit record and capture both your amp tone, and clean DI together!
Recording Acoustic Guitars
Acoustic guitars are a popular instrument in many genres, from folk and country to rock and pop. Recording an acoustic guitar can be a bit more challenging than an electric guitar, as the sound is much more delicate and nuanced. Here are some tips for getting the best possible sound when recording acoustic guitar:
1. Guitar Selection
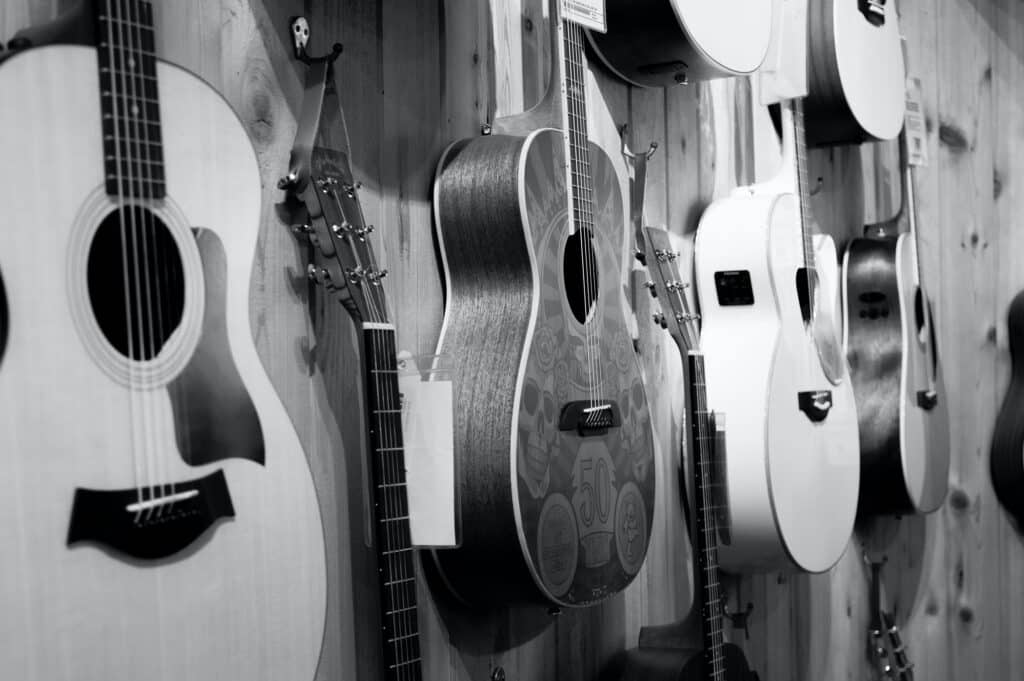
This, like amp selection for electric guitars, can play a significant role in the tone, and quality of tone, that you get out of your recording. Acoustic guitars come in different shapes, and sizes, which affects the sound in their own way. They are also made with various types of wood, and especially in acoustic guitars this can have a large impact in how the guitar sounds, and how it will sound in a recording. Take these factors into consideration when you want to record acoustic guitar
2. Mic Selection

Microphone placement is essential when recording acoustic guitar. A fairly common method is to take a pencil condenser mic, such as a Shure SM81 and place it about a foot or less away from the guitar pointed at the 12th fret. This will capture high end clarity, and give the sound a bit of sparkle as you record.
Another common method is to place a large diaphragm condenser microphone, such as a sE2200, about a foot away from the soundhole. This position captures the warmth and clarity of the guitar without picking up too much of the room sound. You can use dynamic microphones, such as the Shure SM57, or the Shure SM7B, or even a ribbon mic like the Royer 121. Condenser microphones make a superior choice as their sensitivity is much higher and they can pick up the subtle nuances of the guitar more easily than a dynamic microphone can.
We recommend using BOTH of these methods simultaneously, as well as recording through the guitar’s DI when available, especially when recording a more laid back song, or a song where the focus is just acoustic and/or vocals. This allows for a much fuller sounding recording, gives you more control and choice over tones, and makes the need for recording a “Double” much less necessary.
3. Room Acoustics
Just the same way it affects recording a guitar amp, room acoustics affect the recording of an acoustic guitar even more. The guitar is not amplified, so you are at the mercy of how the sound that comes out of the soundhole interacts with the physics of the room you are recording in. Remember: A large, reflective room can add a natural reverb to the sound, while a small, dead room can produce a dry and lifeless sound. Experiment with different rooms to find the right sound for your project.
4. Preamp Selection
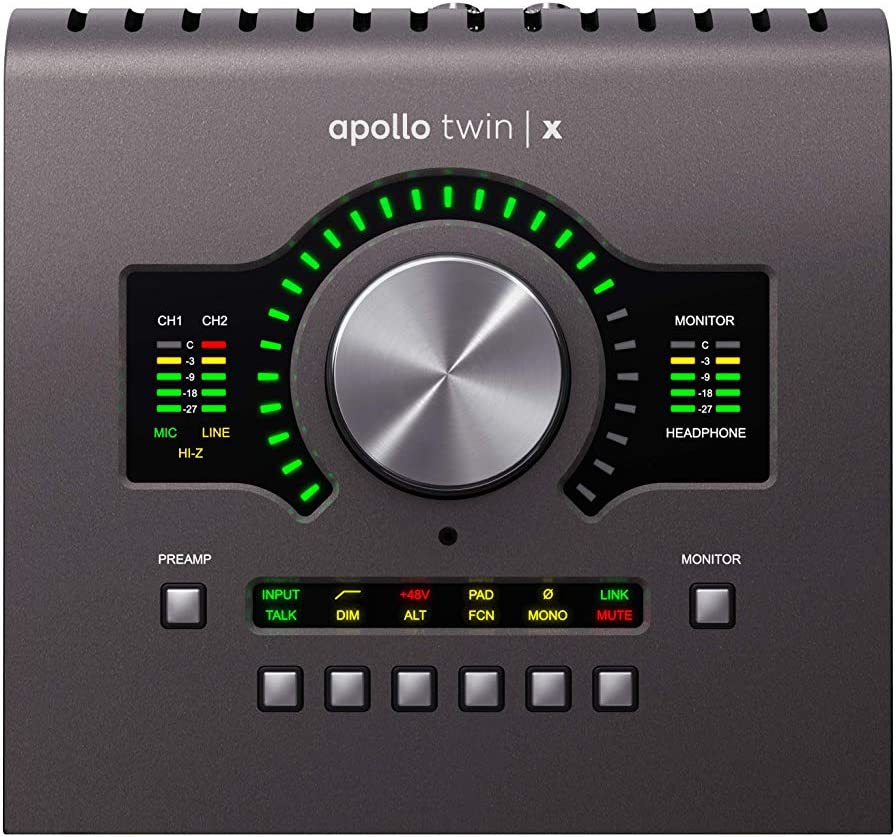
The preamp is an essential component of the recording chain, as it amplifies the microphone signal and shapes the tone. When recording acoustic guitar, choose a preamp that is transparent and adds minimal coloration to the sound. Popular options include the Universal Audio Apollo and the API 512c.
What Layers of Guitar Should You Record?
Here is where we notice people go wrong the most. While your favorite songs may sound like it’s just 2 guitars, to get a great record, most songs have MULTIPLE takes of each part to create a full sound. Not all of these parts are audible and are often blended in subtly just to reinforce.
As a general rule you should be recording doubles, octaves, alternative or “inverse” chords, drones, and sustains. While not all of these may be used in every song, you should record them all at the same time to prevent having to go back and do them later.
It’s important to note that this will require more work in the editing phase, as you’ll want all of these to be perfectly in time with each other, but the results will speak for themselves.
Doubles
Doubles are exactly what it sounds like, double your guitar. When mixing, we see alot of times artists only record 1 rhythm guitar and 1 lead and that’s it. 2 guitar tracks and it’s all good, but this can cause issues when mixing. To make room for vocals in a mix, engineers will pan sounds left or right in the stereo image, to allow the vocals to have their own space in the stereo field. When a guitar and vocal takes up the same space they compete with each other, but panning a single guitar to 1 side or the other will cause the track to sound unbalanced, which CAN work sometimes, but listeners are often times, not so forgiving to new sounds.
Doubling your guitar allows you to pan the same performance left and right leaving room in the center for kick, snare, and vocals, while making the track sound fuller and wider.
You can experiment with doubling with a different tone, similar tones, and alternative chords. We recommend doubling EVERY guitar part aside from guitar solos. Having 2 to 8 guitar tracks of the same part on hand when you hand it off to a mixing engineer will give them options, and will ultimately result in a more polished sound.
Stereo recorded guitars can substitute for doubles in songs where guitars are a complimentary element, like in some pop, or if it’s the ONLY element like in an intimate acoustic song. But if you’re in rock, or the song is driven by mostly guitars, doubles are a necessity, even if you don’t do any of the others in this list you should absolutely be doing doubles.
Octaves
Octaves in this context means 3 different things. Playing the main rhythm an octave lower, an octave higher, and “Octaves” as in the guitar fingering where you play the root note and then the same root note and octave higher (like the traditional power chord but skipping the 2nd string). These can create powerful doubles, fill out more of the sonic space in more sparse tracks, and even give you alternate options in the final mix.
Alternative or “Inverse” Chords
Find different fingerings to play the same chords, for instance if you played an Open G, Try a Barre Chord of look up a new way to play a G that you haven’t tried before. These work VERY well as doubles as well, the complimentary nature of different versions can really create a sonically pleasant experience for the listener, and hey, you may get to learn a new chord!
Drones
- Long Drones. These are just single note drones, normally the key’s root note. that will play over entire sections. For Instance a song in the key of G Major where the chord Progression is G, D, C, strike just a single note of G and hold it out sustained while the chord progression moves along. While traditional drones are sustained the whole time, you can also just play the root note over the entire progression following the strumming pattern and it can have some great results.
- Root Drones. These Drones are single notes sustained over the chord progression using just the root note. So if you were in G Major again, you’d follow the same G, D, C pattern but instead of staying on that G you’d move, when the chord progression moves.
My FAVORITE tool to record drones is the EBow, which creates a magnetic pulse that keeps the string ringing out. I’ts REALLY fun to play with and works really well for creating fantastic feedback tones as well. If you’ve never used one we highly recommend checking it out.
Sustains
This is one of those ones that don’t necessarily work on every song, but it can add some nice texture to a dull song sometimes. Sustains are just Holding out a chord in the progression. I consider there to be 3 types of sustain.
- Progressional Sustain – This is just holding out the chord in any given chord progression instead of strumming, this works more for slower songs, but you can try it on any guitar-driven song and see if it adds or subtracts.
- Transitional Sustain – This is Using a Sustain to Either Reinforce a Chorus or big element in the song. For example, at the Start of a chorus hit the First chord in the chorus and hold it until I naturally decays. This can add just a little bit more umph to the start of a part and just make it hit a little harder. The other side of transitional sustain is when moving from a chorus to a verse where you can either hold out the final chord of the chorus, or the first chord in the verse to just create a little space between the 2 and bring that energy back down.
- Feedback, Reversed, or Swelling Sustain – This is GREAT for building into a chorus (and works really well with a drone as well) Hit the Chord of a chorus (or whatever part of song you would like to use this on). Reverse the file and back it up to where it ends right when, or just before the Chorus begins. This creates tension, and a swell that can be very satisfying to the listener, much like a build in EDM music.
Now Go Record Some Great Sounding Guitars!
Recording electric and acoustic guitars requires different approaches, but with the right techniques and gear, you can achieve great results. Experiment with different microphones, amplifiers, and rooms to find the right sound for your project. Remember, there are no hard and fast rules for recording guitars, and the best approach may vary depending on the specific guitar, player, and song. The most important thing is to listen carefully to the sound and make adjustments as needed to achieve the desired tone and character.
In addition to the technical aspects of recording guitars, it’s also important to consider the musical context and the role of the guitar in the song. Whether it’s a soaring lead solo or a subtle rhythm part, the guitar should serve the song and contribute to the overall musical vision. Be open to experimentation to create a unique and memorable guitar sound that enhances the song.
Finally, it’s worth noting that the quality of the guitar and the player’s technique can have a significant impact on the final sound. While the right microphone placement and preamp selection can help capture the nuances of the guitar, a poorly maintained or poorly played guitar will still sound subpar. Practice does make perfect, and if you are struggling with the part you are trying to record there is zero shame in taking time to practice nailing it pass after pass. So that when you hit record to capture that take it ends up being perfect because you put that time in.
Recording electric and acoustic guitars requires attention to detail, experimentation, and an ear for tone and musicality. By following the tips outlined above and staying open to creative possibilities, you can capture the unique sound and character of each guitar and create compelling recordings that stand the test of time.
Until we meet again!
-John