Hello again my friends!
Mixing low end can make or break your track. Whether you’re working on punchy kicks, smooth basslines, or creating space in your mix, mastering the art of low-end mixing is crucial. In this guide, I’ll share 7 practical tips for mixing low end effectively to ensure your tracks sound polished and professional
Table of Contents
Importance of the Low End
Before we get into the nitty-gritty, let’s talk about why the low end is so important in a mix. Low frequencies are essential for providing warmth, depth, and power to your track. They create a solid foundation that supports the mid and high frequencies, giving your mix a sense of fullness and making it more engaging to the listener. When mixed well, the low end can elevate your track from good to amazing.
The low end covers the 20-250 Hz range, responsible for the sub-bass and bass frequencies that give tracks their depth and impact. Getting this balance right ensures your music translates well across all playback systems, from headphones to club speakers.
However, if the low end is not well-balanced, it can cause your mix to become muddy, boomy, or lacking in energy. It’s all about finding the sweet spot where the low frequencies are present and impactful without overpowering the rest of the mix.
Kick and Bass Relationship: Creating a Cohesive Low-End Foundation
One of the most critical aspects of mixing low end is managing the relationship between the kick drum and bass. These two elements often share a similar frequency range, and if not treated correctly, they can compete for space and cause your mix to become muddy or lack clarity. One approach to ensuring a well-defined low end is deciding whether the bass should sit “above” or “below” the kick drum in terms of driving the sub frequencies. Let’s discuss these two options and the techniques required to get the kick and bass to “lock” together into one powerful force.
A. Bass Sitting “Above” the Kick Drum

In this approach, the kick drum takes the lead in driving the sub frequencies, providing a strong, punchy foundation for your mix. The bass sits slightly above the kick in terms of frequency, which allows it to add warmth and sustain without competing for space in the sub frequencies.
To achieve this, start by carving out a small frequency pocket for the kick drum using EQ. You may want to boost the fundamental frequency of the kick (usually between 40-60 Hz) and add a slight dip in the same range on the bass track. Conversely, boost the bass in the low-mid frequencies (80-200 Hz) to give it presence and warmth, while cutting a bit in the same range on the kick drum.
Additionally, use sidechain compression to create space for the kick drum and help the bass “breathe” around it. By adjusting the attack and release settings, you can create a tight, cohesive low-end groove where the bass and kick work together as a single unit.
B. Bass Sitting “Below” the Kick Drum
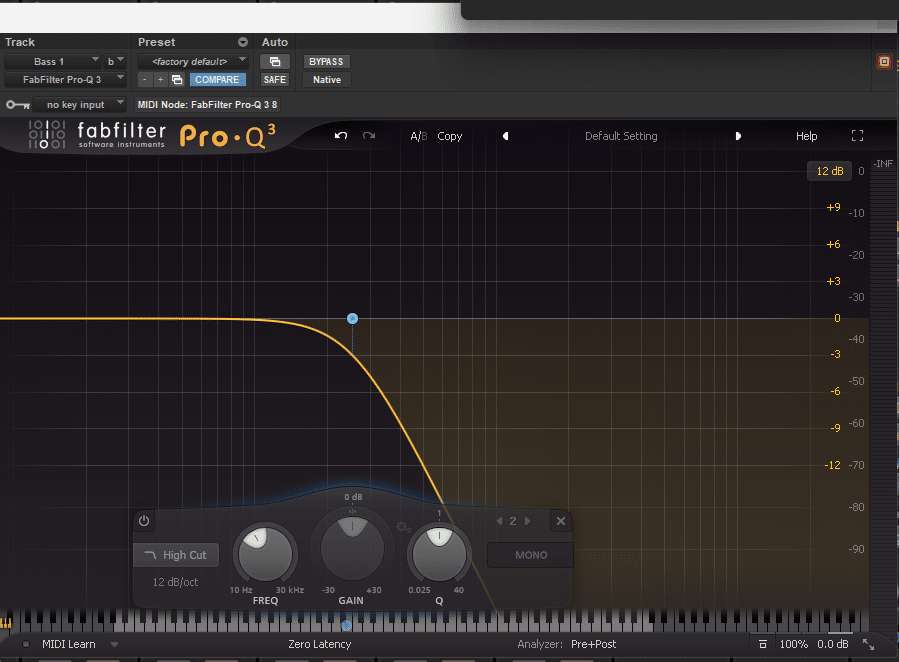
In this scenario, the bass takes the lead in driving the sub frequencies, providing a deep, rumbling foundation for your mix. The kick drum sits slightly above the bass in terms of frequency, focusing on providing punch and impact without competing for space in the lowest frequencies.
To achieve this, boost the fundamental frequency of the bass (usually between 40-60 Hz) and add a slight dip in the same range on the kick drum track. Conversely, boost the kick in the low-mid frequencies (80-200 Hz) to give it presence and punch, while cutting a bit in the same range on the bass.
Again, sidechain compression is essential for creating space and separation between the bass and kick. This time, you may want to use a slightly longer release setting to allow the bass to fully bloom around the kick drum, creating a powerful, enveloping low-end groove.
Regardless of whether your bass sits “above” or “below” the kick drum, the key to getting them to “lock” together is careful EQ and sidechain compression. By carving out space for each element in the frequency spectrum and using compression to create a rhythmic interplay between them, you can achieve a powerful, cohesive low-end foundation that drives your mix forward.
Remember that the choice between having the bass sit “above” or “below” the kick will depend on the genre, the specific sounds you’re working with, and your creative vision for the track. Experiment with both approaches and let your ears guide you towards the most suitable option for your mix.
Now that we’ve established that key foundational information, let’s move on to the 7 techniques to mixing low end.
1. Choosing the Right Elements
It’s important to ensure that you’re working with the right elements in your mix. Your kick drum and bassline are the primary low-end elements in most tracks, and it’s crucial that they work well together. When selecting your kick and bass sounds, try to choose samples or synths that complement each other in terms of tonality, attack, and sustain. This will make it easier to create a cohesive and well-defined low end in your mix.
2. Gain Staging and Level Balancing
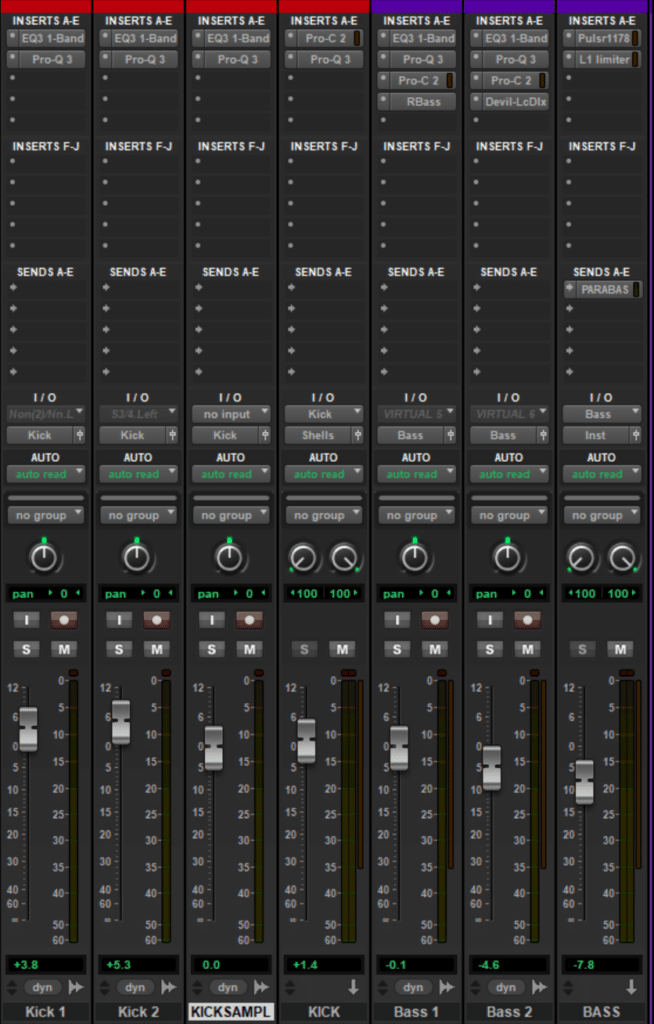
When it comes to mixing low end, it’s essential to start with proper gain staging and level balancing. This means ensuring that your kick and bass elements are at appropriate levels relative to each other and the rest of the mix. A common mistake is to push the low-end elements too hard, causing them to overpower the mix and create a boomy, unbalanced sound.
To avoid this, start by setting your levels conservatively and then gradually increase the volume of your kick and bass elements until they provide the desired impact and fullness. It’s important to frequently check your mix in mono and on various playback systems, as low frequencies can behave differently depending on the listening environment.
3. EQ Techniques for Mixing Low End
EQ is an essential tool for shaping the low end in your mix. Here are some EQ techniques you should use:
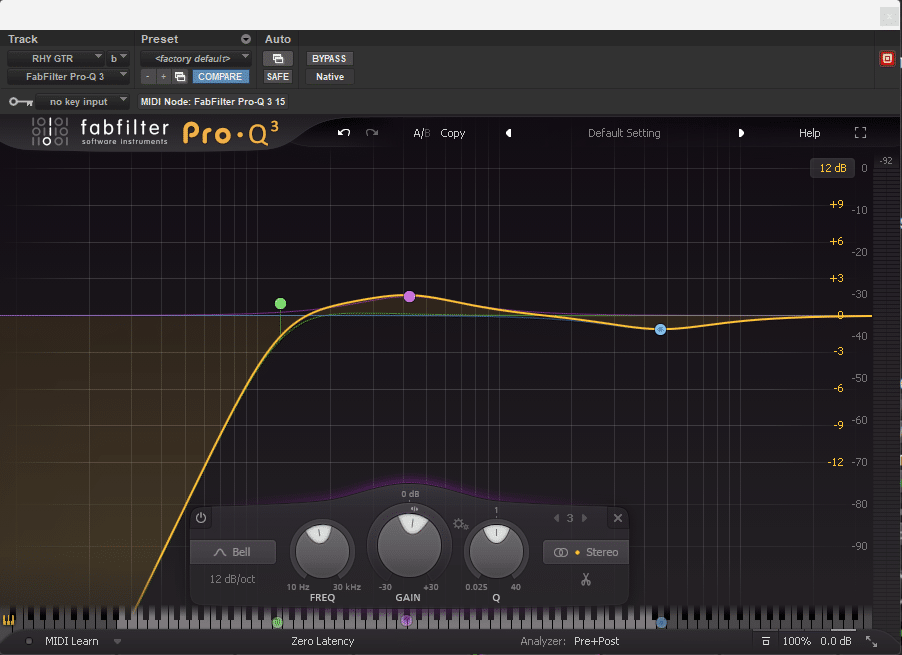
High-pass filter: Use a high-pass filter (HPF) to remove unnecessary low frequencies from non-low-end elements, such as vocals, guitars, and synths. This will help to create space for your kick and bass, preventing frequency build-up and muddiness.
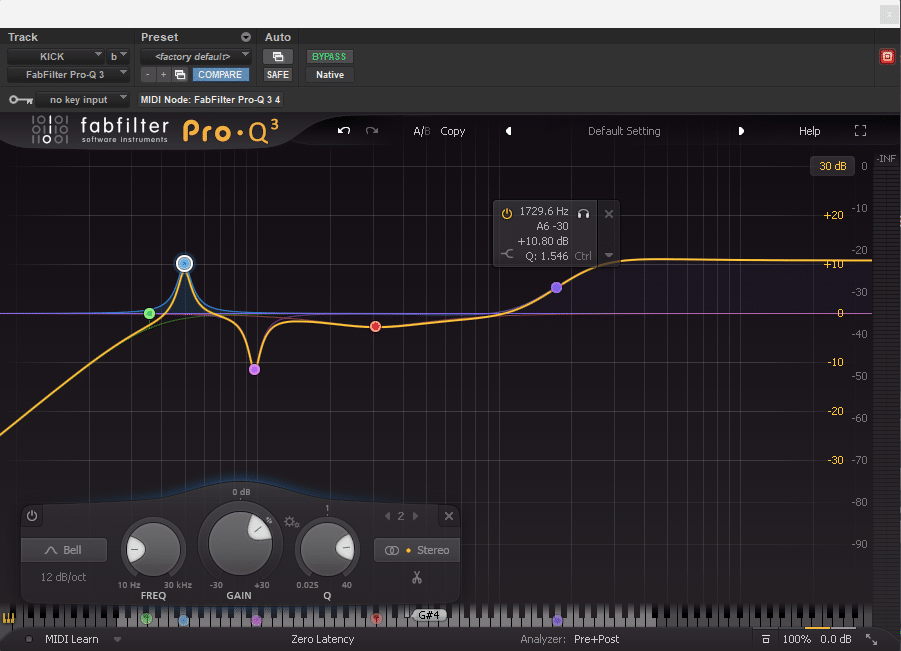
Low shelf or bell EQ: Boost or cut frequencies in the low end to add warmth, depth, or clarity to your mix. For example, you might want to boost the low-mid frequencies of your bassline to help it cut through the mix, or cut the low frequencies of your kick drum to tighten up the sound.
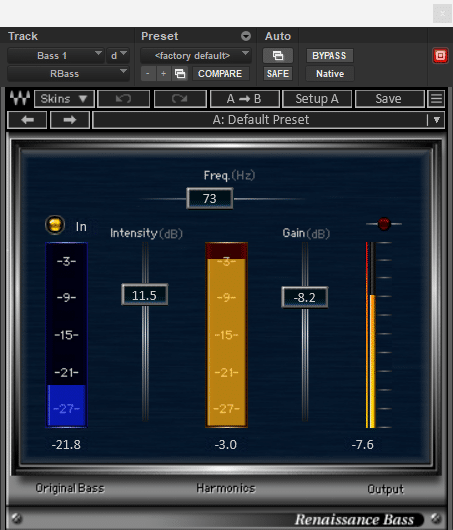
Harmonic enhancement: Add harmonics to your low-end elements using saturation or distortion plugins to give them more presence and character. Be subtle with this technique, as excessive harmonic enhancement can cause a mix to become harsh or fatiguing.
4. Sidechain Compression

Sidechain compression is a must-use technique for achieving a clean and well-defined low end in your mix. This technique involves using a compressor to “duck” the level of one element (usually the bass) whenever another element (typically the kick drum) is playing. This creates a sense of separation and space between the kick and bass, preventing them from clashing and creating a muddy mix.
To set up sidechain compression, insert a compressor on your bass track and configure its sidechain input to receive the audio signal from your kick drum track. Adjust the threshold, ratio, attack, and release settings so that the bass level is reduced slightly when the kick hits, then quickly returns to its normal level.
It’s important not to overdo sidechain compression, as excessive ducking can make your mix sound unnatural and pump too much. Use your ears and adjust the settings until you achieve a balanced, well-defined low end with a clear separation between the kick and bass.
5. Stereo Imaging for Low End
While stereo imaging can add depth and dimension to your mix, it’s crucial to be cautious with it when working with low frequencies. Excessive stereo width in the low end can cause phase issues, which can lead to a weak or muddy sound when the mix is played back in mono.
To avoid this, keep your low-end elements (kick, bass, and any other low-frequency elements) relatively narrow in the stereo field. You can use a mid/side EQ or stereo imaging plugin to narrow the stereo width of the low frequencies while maintaining width in the mids and highs.
6. Parallel Processing for Low End

Parallel processing is a powerful technique that can help you enhance the low end in your mix. By processing a duplicate of your low-frequency elements separately and blending them back in with the original, you can add warmth, depth, and character to your low end without affecting the clarity of your mix.
Try using parallel compression, distortion, or saturation to add weight and impact to your low-end elements. Remember to blend the processed signal back in with the original at a conservative level to maintain balance and avoid overpowering the mix.
7. Reference Tracks and Monitoring
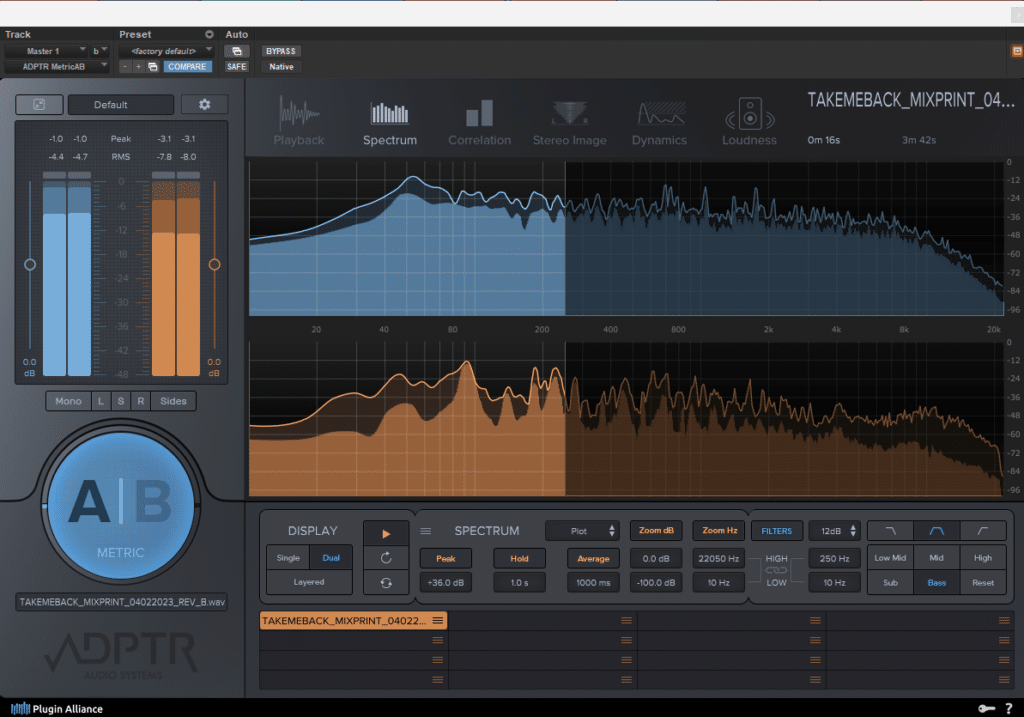
Using reference tracks and regularly checking your mix on different playback systems is essential when working with low end. Comparing your mix to professional tracks in a similar genre can help you identify any issues with your low end and make informed decisions about how to adjust your mix.
Listen to your mix on multiple systems, such as headphones, studio monitors, and consumer speakers, as well as in mono. This will give you a better understanding of how your low end translates to different playback environments and help you make the necessary adjustments to achieve a balanced and consistent mix.
Common Mistakes in Low-End Mixing
Now that we’ve covered some of the essential techniques for mixing low end, let’s discuss a few common pitfalls to avoid:
- Over-EQing: While EQ is a powerful tool, overusing it can cause your mix to become unbalanced or unnatural. Be cautious with EQ boosts and cuts, and always use your ears to guide your decisions.
- Overcompressing: While compression can help to control dynamics and create a more polished sound, overcompressing your low-end elements can lead to a lifeless, fatiguing mix. Use compression judiciously and always listen for any unwanted artifacts or pumping effects.
- Ignoring Phase Issues: Phase issues can wreak havoc on your low end, causing your mix to become weak or muddy. Always check the phase relationship between your low-frequency elements and address any issues by adjusting the timing, polarity, or stereo width of your tracks.
Lastly, it’s crucially important to have a proper listening environment when trying to mix low end effectively, lets take a look at how to achieve that:
The Importance of a Proper Monitoring Environment for Mixing Low End
When it comes to mixing low end, your monitoring environment plays a crucial role in your ability to make accurate and informed decisions. A well-treated room with accurate studio monitors can help you hear the nuances of your mix and enable you to create a balanced, powerful low end. In contrast, an untreated room or relying solely on headphones can lead to issues such as inaccurate frequency response, masking, and phasing problems that make it difficult to judge the low end of your mix.
Headphone Mixing: Limitations and Challenges

While headphones are a valuable tool for checking your mix and identifying issues that might not be apparent on speakers, they are not the best choice for focusing on the low end. There are several reasons for this:
- Frequency Response: Many headphones have an uneven frequency response, especially in the low-frequency range. This can lead to an inaccurate representation of the low end, causing you to make mixing decisions that may not translate well to other listening environments.
- Lack of Physical Impact: One of the key characteristics of low frequencies is their physical impact on the listener. When you’re mixing on headphones, you don’t get the same sense of energy and power that you would when listening on speakers in a room. This can make it challenging to gauge the true impact of your low end and lead to a mix that lacks energy or feels unbalanced.
- Stereo Imaging: Headphones create an unnatural stereo image, with the left and right channels isolated from each other. This can make it difficult to judge the spatial qualities of your mix, including the stereo width and depth of your low end.
Creating a Proper Monitoring Environment
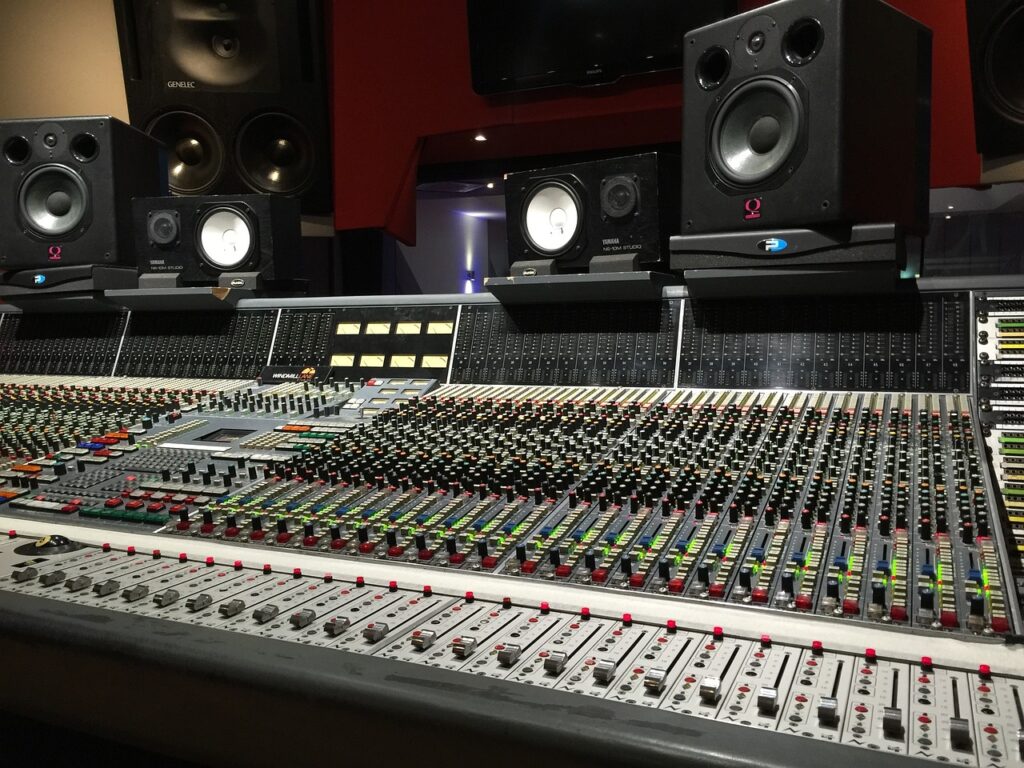
To mix the low end effectively, it’s essential to invest in a proper monitoring environment. Here are some key factors to consider:
- Acoustic Treatment: Ensure your mixing space is acoustically treated to minimize reflections and standing waves that can cause frequency build-up and masking. Use bass traps, absorbers, and diffusers to create a balanced listening environment with a more accurate frequency response.
- Studio Monitors: Invest in high-quality studio monitors with a flat frequency response and a strong low-frequency extension. This will help you hear the low end more accurately and make better mixing decisions.
- Monitor Placement and Positioning: Position your studio monitors at the correct distance and angle relative to your listening position, and consider using isolation pads or stands to decouple them from your desk or floor. This will minimize vibrations and reflections that can interfere with your perception of the low end.
- Subwoofer: If your studio monitors lack sufficient low-frequency extension, consider adding a subwoofer to your monitoring setup. A subwoofer can help you hear the lowest frequencies more accurately and make more informed decisions when mixing the low end.
- Room Calibration and Correction: Use room calibration software and hardware, such as Sonarworks or IK Multimedia’s ARC System, to measure and correct for any frequency imbalances in your listening environment. This will provide you with a more accurate monitoring setup and help you make better mixing decisions.
A proper monitoring environment is crucial for accurately mixing low end in your tracks. While headphones can be a valuable tool for checking your mix, they should not be your primary choice for focusing on the low end. Instead, invest in a well-treated room, accurate studio monitors, and the appropriate tools to create a monitoring environment that allows you to hear the low end clearly and make informed mixing decisions.
Tie It All Up With A 40Hz Bow
Mixing low end can be challenging, but with the right techniques and a keen ear, you can create a powerful, balanced mix that captivates your listeners. Remember to focus on selecting the right elements, gain staging, EQ, sidechain compression, and stereo imaging, while avoiding common pitfalls such as over-EQing, overcompressing, and ignoring phase issues. Using reference tracks and monitoring on various systems will also help you fine-tune your mix and achieve a consistent low end across different playback environments.
As you continue to hone your skills and develop your unique approach to mixing low end, keep in mind that practice and experience are essential. Experiment with different techniques, learn from your mistakes, and, most importantly, trust your ears. With dedication and a willingness to learn, you’ll soon master the art of mixing low end and take your productions to new heights.
Achieving clarity in your low-end is one of the biggest challenges in mixing, and even small missteps can muddy your entire track. From balancing bass frequencies to ensuring kick and bass cohesion, the low-end demands careful attention. At Twisby Records, we specialize in crafting mixes where every frequency finds its perfect place.

