
TL;DR:
- Mastering for Spotify involves preparing a track with –14 LUFS integrated loudness and a true peak ceiling of –1 dBTP. This ensures your music sounds as intended on the platform, as Spotify normalizes loudness and adjusts playback gain. Loudness beyond –14 LUFS gets turned down, which can make overly loud masters sound squashed and lifeless.
Mastering for Spotify is defined as the process of preparing your final audio file to meet Spotify’s loudness normalization target of –14 LUFS integrated loudness with a true peak ceiling of –1 dBTP. These two numbers are not suggestions. They are the technical floor and ceiling that determine how your track sounds to every listener on the platform. Get them right, and your music competes. Get them wrong, and Spotify’s playback engine corrects your master in ways you never intended. This guide walks you through the concepts, the workflow, and the mistakes that cost independent artists the most.
What is mastering for Spotify, and why does it matter?
Audio mastering is the final stage of music production. It is the process of preparing and transferring recorded audio from a source to a data storage device, the master, from which all copies will be produced. For streaming, that definition now includes meeting platform-specific loudness and peak standards.

Spotify uses a loudness normalization system that adjusts playback gain in real time without altering your uploaded file. Tracks louder than –14 LUFS get turned down. Tracks quieter than –14 LUFS are usually left at their native volume. That asymmetry changes everything about how you should approach your master.
The standard industry term for this process is “mastering to streaming specifications.” The informal phrase “mastering for Spotify” captures the same idea, but knowing the formal term helps when you work with engineers or read technical documentation. Both phrases describe the same goal: a master that sounds its best under Spotify’s normalization rules.
Twisbyrecords has spent over 35 years helping independent artists navigate exactly this kind of technical challenge. The platform’s rules are not obstacles. They are a framework you can use to your advantage.
Understanding LUFS and true peak: the metrics behind Spotify’s normalization
LUFS stands for Loudness Units relative to Full Scale. It is a measurement standard developed to reflect how humans perceive loudness rather than how loud a signal actually is in raw decibels. Integrated LUFS measures the average loudness across the entire track from start to finish. That full-track average is what Spotify reads when it decides how to adjust your playback gain.
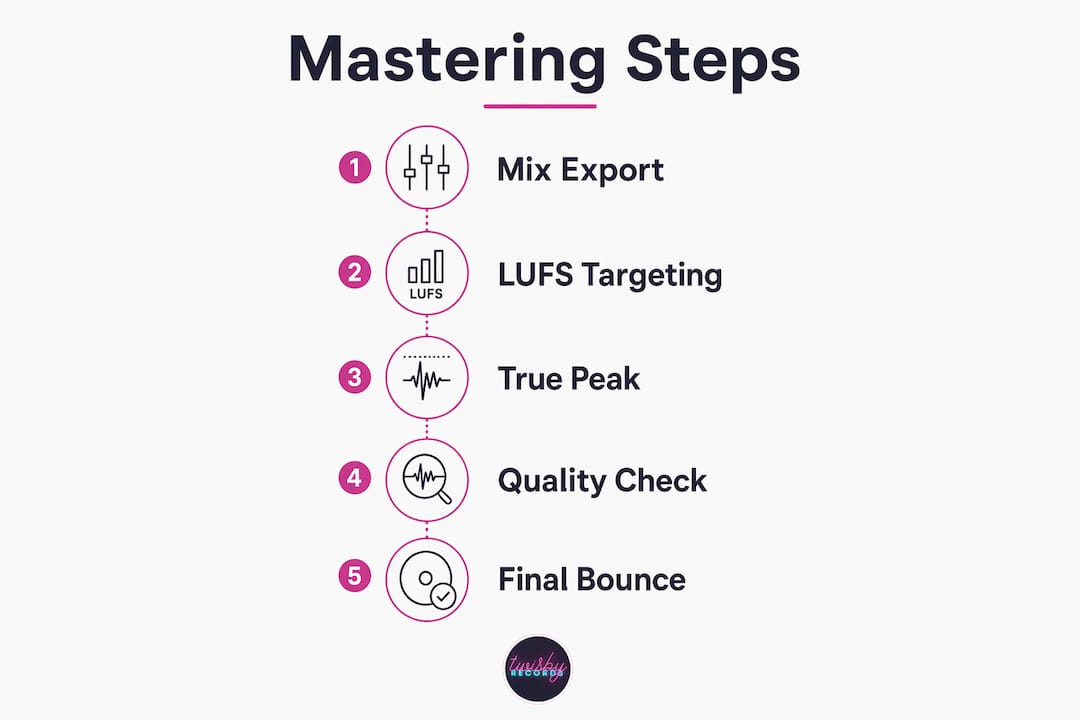
Short-term LUFS and momentary LUFS update in real time during playback. They are useful for monitoring, but they are not what Spotify uses for normalization. Integrated LUFS measurement across the entire track length is the only number that matters for your upload decision.
True peak is a separate measurement. It captures the highest level your audio reaches between digital samples, not just at the sample points your DAW meter shows. This distinction matters because:
- Standard DAW meters show sample peak, which can miss inter-sample peaks by 1–3 dB.
- Lossy codecs like Ogg Vorbis and AAC, which Spotify uses for delivery, can increase peak levels during encoding.
- A master that sits at 0 dBFS sample peak can clip audibly after codec transcoding.
The industry standard true peak ceiling for streaming is –1 dBTP. Some engineers push that to –0.5 dBTP for extra safety, especially on tracks with sharp transients.
For metering, Youlean Loudness Meter 2 is a free plugin that measures integrated LUFS, short-term LUFS, true peak, and loudness range in real time. FabFilter Pro-L 2 includes a true peak limiter with integrated LUFS readout built in. Either tool gives you the visibility you need to master with confidence.
Pro Tip: Always check your integrated LUFS reading after your final bounce, not during playback. The number changes as more of the track plays, so a mid-song reading will not match your final upload value.
Why mastering louder than –14 LUFS won’t win on Spotify
The loudness war was a real phenomenon in the CD era. Mastering engineers pushed levels higher and higher to make tracks sound louder on radio and in stores. Streaming normalization ended that arms race. Mastering louder than –14 LUFS on Spotify does not make your track sound louder to listeners. It makes it sound worse.
Here is what actually happens when you upload a hot master:
- A track mastered at –8 LUFS gets turned down by 6 dB at playback.
- That 6 dB of gain reduction is applied to the entire signal, including all the limiting and compression you used to push it loud.
- The result is a track that sounds squashed and lifeless compared to a well-mastered –14 LUFS version.
Spotify’s Normal mode is the playback baseline for the vast majority of listeners, targeting –14 LUFS. A –16 LUFS master with lighter limiting can actually sound louder and more open than a heavily limited –14 LUFS master after normalization. The crest factor, the difference between peak and average levels, gives the track punch and energy that survives the normalization process intact.
Genre context matters here. Classical and jazz recordings often maintain a loudness range of 12–16 LU, preserving the full dynamic arc of a performance. Pop and EDM typically use a loudness range of 4–6 LU, with heavier limiting that suits the genre’s energy. Neither approach is wrong. The mistake is applying pop limiting to a folk record, or leaving a dance track with so much dynamic range that it feels thin in a playlist context.
Targeting a loudness range between –14 and –16 LUFS covers Spotify and Apple Music simultaneously. Apple Music normalizes to –16 LUFS with Sound Check enabled by default. A master in that window sounds correct on both platforms without any additional adjustments.
How to master your tracks step by step for Spotify
A clean mastering workflow starts before you open your mastering session. The mix you hand off to mastering determines how much headroom and flexibility you have to work with.
-
Prepare your mix with headroom. Export your mix at –6 dBFS peak or lower. This gives your mastering chain room to work without the limiter doing all the heavy lifting. If your mix is already hitting 0 dBFS, pull down the master fader before you export.
-
Set up your loudness meter first. Load Youlean Loudness Meter 2 or your preferred integrated LUFS meter on the master bus before you add any processing. Watch the integrated LUFS reading as you work so you know where you are at every stage.
-
Apply EQ and compression for tone and dynamics. Use EQ to address any frequency imbalances in the mix. Use compression to glue the elements together and shape the overall dynamic feel. Keep your loudness range appropriate for the genre. For pop, aim for 6–8 LU. For acoustic or classical, stay above 10 LU.
-
Set your true peak limiter last. Place your limiter at the end of the chain. Set the true peak ceiling to –1 dBTP. Bring the input gain up until your integrated LUFS reading lands between –14 and –16 LUFS. Do not push harder than the genre requires.
-
Bounce and run a codec test. Export your master as a 24-bit WAV file. Then encode a copy to Ogg Vorbis or AAC and check the true peak of the encoded file. Professional mastering workflows always include this step because codec transcoding can push peaks above 0 dBFS even when your WAV file is clean.
-
Listen on multiple playback systems. Check your master on studio monitors, earbuds, phone speakers, and a car stereo if possible. A master that sounds great on monitors but harsh on earbuds has a frequency balance problem that no amount of LUFS targeting will fix.
| Step | Target | Tool |
|---|---|---|
| Mix export headroom | –6 dBFS peak or lower | DAW master fader |
| Integrated LUFS | –14 to –16 LUFS | Youlean Loudness Meter 2 |
| True peak ceiling | –1 dBTP | FabFilter Pro-L 2 |
| Codec test | No clipping post-encode | Ogg Vorbis or AAC encoder |
| Playback check | Consistent across devices | Monitors, earbuds, phone |
Pro Tip: If you are mastering for both Spotify and Apple Music in the same session, target –16 LUFS integrated. Your track will play at native volume on Apple Music and receive only a small gain reduction on Spotify, keeping the master as dynamic as possible on both platforms.
Common mistakes when mastering for Spotify
Most mastering errors made by independent artists fall into a small set of repeatable patterns. Knowing them in advance saves you a full revision cycle.
- Over-limiting the master. Pushing your limiter until the integrated LUFS reads –8 or –9 LUFS destroys dynamic range and gains nothing on Spotify. The platform turns it down anyway.
- Ignoring true peak. Inter-sample peaks caused by codec compression are invisible on standard DAW meters. A track that looks clean at –1 dBFS sample peak can clip audibly after Ogg Vorbis encoding.
- Using short-term LUFS instead of integrated LUFS. Short-term readings fluctuate constantly. Mastering decisions based on short-term LUFS produce inconsistent results across tracks.
- Mastering every track to the exact same LUFS. An album with a quiet acoustic intro and a loud rock closer should not have both tracks at identical integrated LUFS. The album context matters. A 1–2 LU variation between tracks is normal and often correct.
- Skipping the multi-device listening test. Frequency balance problems that are inaudible on flat studio monitors become obvious on consumer earbuds. Always check before you upload.
Proper audio mastering still plays a critical role in how your music gets perceived and recommended on platforms. Listener engagement algorithms factor in skip rates and sound quality, meaning a poorly mastered track does not just sound bad. It performs worse in Spotify’s recommendation system.
Understanding that connection between sound quality and algorithmic performance changes how you think about mastering. It is not just a technical checkbox. It is part of your release strategy.
Key Takeaways
Mastering for Spotify requires targeting –14 LUFS integrated loudness and a –1 dBTP true peak ceiling, with genre-appropriate dynamic range preserved throughout the process.
| Point | Details |
|---|---|
| Target –14 LUFS integrated | Spotify normalizes to this level; masters louder than this get turned down at playback. |
| Set true peak at –1 dBTP | Codec transcoding raises peaks; a –1 dBTP ceiling prevents audible clipping after encoding. |
| Preserve dynamic range | A lighter master at –16 LUFS can sound more open and punchy than a heavily limited –14 LUFS master. |
| Run a codec test | Always encode a test copy to Ogg Vorbis or AAC and check true peak before uploading. |
| Match loudness range to genre | Classical and jazz use 12–16 LU; pop and EDM use 4–6 LU. Apply the right standard for your music. |
Why loudness normalization changed mastering forever
I have been working in audio for over 35 years, and the shift to streaming normalization is the single biggest change I have seen in how mastering decisions get made. For decades, the loudness war pushed engineers to crush dynamics in pursuit of a louder master. Streaming ended that. And honestly, the music sounds better for it.
What I tell every independent artist I work with is this: the end of the loudness war means your job is now to protect the musicality of your track, not to maximize its level. A well-mastered record with real dynamic range will outlast a brick-walled master in a playlist. Listeners skip flat, fatiguing tracks. They replay ones that breathe.
The part most DIY artists miss is that mastering is still a creative decision, not just a technical one. Hitting –14 LUFS is the floor, not the goal. The goal is a master that serves the song. Sometimes that means –13 LUFS for a dense hip-hop track. Sometimes it means –17 LUFS for a sparse acoustic record. The numbers guide you. They do not replace your ears.
If you are considering handling this yourself, read about why DIY mastering carries real risks before you commit. The technical knowledge is learnable. The calibrated listening environment and years of reference experience are harder to replicate on your own.
— Kreg
Twisbyrecords mastering services for independent artists
Twisbyrecords offers professional mastering services built specifically around streaming platform standards, including Spotify’s –14 LUFS target and –1 dBTP true peak ceiling. Every master includes codec testing to catch inter-sample peaks before your track goes live, and genre-specific processing so your music sounds right in its playlist context, not just technically correct.

With Apple Digital Masters certification and over 35 years of hands-on experience, Twisbyrecords delivers masters that hold up across every playback system your listeners use. Submission is straightforward online, and you receive detailed feedback with every project. Artists consistently highlight the quick turnaround and the difference a properly mastered track makes in listener retention. See the full range of mixing and mastering options and find the service that fits your release.
FAQ
What LUFS should I target when mastering for Spotify?
Target –14 LUFS integrated loudness. Spotify normalizes playback to this level, so masters louder than –14 LUFS get turned down, while quieter masters often play at their native volume.
What is the true peak ceiling for Spotify?
The industry standard true peak ceiling for Spotify is –1 dBTP. Some engineers use –0.5 dBTP for added safety, since lossy codec encoding can raise peak levels after your master is uploaded.
Does mastering louder make my track sound better on Spotify?
No. Spotify’s normalization turns loud masters down at playback. A heavily limited master at –8 LUFS sounds squashed and lifeless after the gain reduction is applied. A dynamic master at –14 to –16 LUFS sounds more open and competitive.
Should I master differently for Spotify and Apple Music?
Targeting –16 LUFS integrated covers both platforms well. Apple Music normalizes to –16 LUFS, and Spotify applies only a small gain reduction to a –16 LUFS master, keeping your track as dynamic as possible on both services.
Why does my track clip after uploading to Spotify?
Codec transcoding to Ogg Vorbis or AAC can push inter-sample peaks above 0 dBFS even when your WAV file looks clean. Always run a codec test after your final bounce and verify true peak on the encoded file before uploading.