

Export full-length, session-aligned WAV stems at your session sample rate and 24-bit with the master bus bypassed, labeled and packaged with a reference mix and session notes. That single sentence covers the core of what every mixing engineer needs to open your files and get to work. The details below tell you exactly how to execute it across every major DAW, so your mixer spends time on the music, not on fixing your delivery.
Here is the short version before we go deep:
- Export WAV or AIFF, 24-bit, at the session sample rate (44.1 kHz, 48 kHz, or whatever your project runs at)
- Every stem starts at bar 1 and runs the full length of the song, including effect tails
- Bypass all master-bus processing; peaks should sit around −3 to −6 dBFS
- Name files clearly:
SongTitle_Instrument_Variant_01.wav - Group into folders: /Drums /Bass /Vocals /Guitars /Synths /FX /Returns
- Include
Reference_Mix.wavandSESSION_INFO.txtwith BPM, key, and time signature - Compress everything into one ZIP:
SongTitle_Stems_Date.zip
Poorly prepared stems are the single most common reason a mixer sends files back before touching a fader. Get this right once, and you will never waste a revision cycle on a technical error again.
Key Takeaways
Properly exported stems, starting at bar 1 in WAV or AIFF at 24-bit with the master bus bypassed and a reference mix included, are what allow a mixing engineer to open your session and start working immediately.
| Point | Details |
|---|---|
| Format and bit depth | Export WAV or AIFF at 24-bit and your session’s native sample rate; never use MP3 for professional mixing deliveries. |
| Start alignment | Every stem must begin at bar 1 and run the full song length, including reverb and delay tails. |
| Master bus headroom | Bypass all master-bus processing before export; peaks should sit at −3 to −6 dBFS. |
| Naming and delivery | Use clear names like SongName_Vocal_Lead_01.wav, include Reference_Mix.wav and SESSION_INFO.txt, and ZIP everything. |
| Twisbyrecords | Twisbyrecords includes a pre-mix stem review on every project, catching export errors before mixing begins. |
Table of Contents
- What export settings actually matter for stems
- How to prepare your session before you export
- How to name files and organize your delivery folder
- DAW-specific steps for exporting stems
- How to run a quality control check before you send
- How to deliver stems and what to say to your mixing engineer
- Common mistakes and a checklist to run before you send
- Twisbyrecords expert checklist and studio tips
- Why clean stems protect your music, not just your mixer’s time
- Ready to send stems? Twisbyrecords can take it from here
- Sources
- FAQ
What export settings actually matter for stems
Format is not a preference, it is a commitment. Lossless WAV or AIFF at 24-bit is the professional standard for audio stems for mixing. MP3 and other lossy formats introduce compression artifacts that compound through the mixing chain. Your mixer will notice, even if you do not.
Format and bit depth:
- WAV is universally compatible; AIFF is equally lossless and preferred by some Logic Pro users
- 24-bit is the standard for stems; only use 32-bit float if your mixer explicitly requests it
- Avoid MP3, AAC, or any lossy format for professional mixing deliveries
Sample rate:
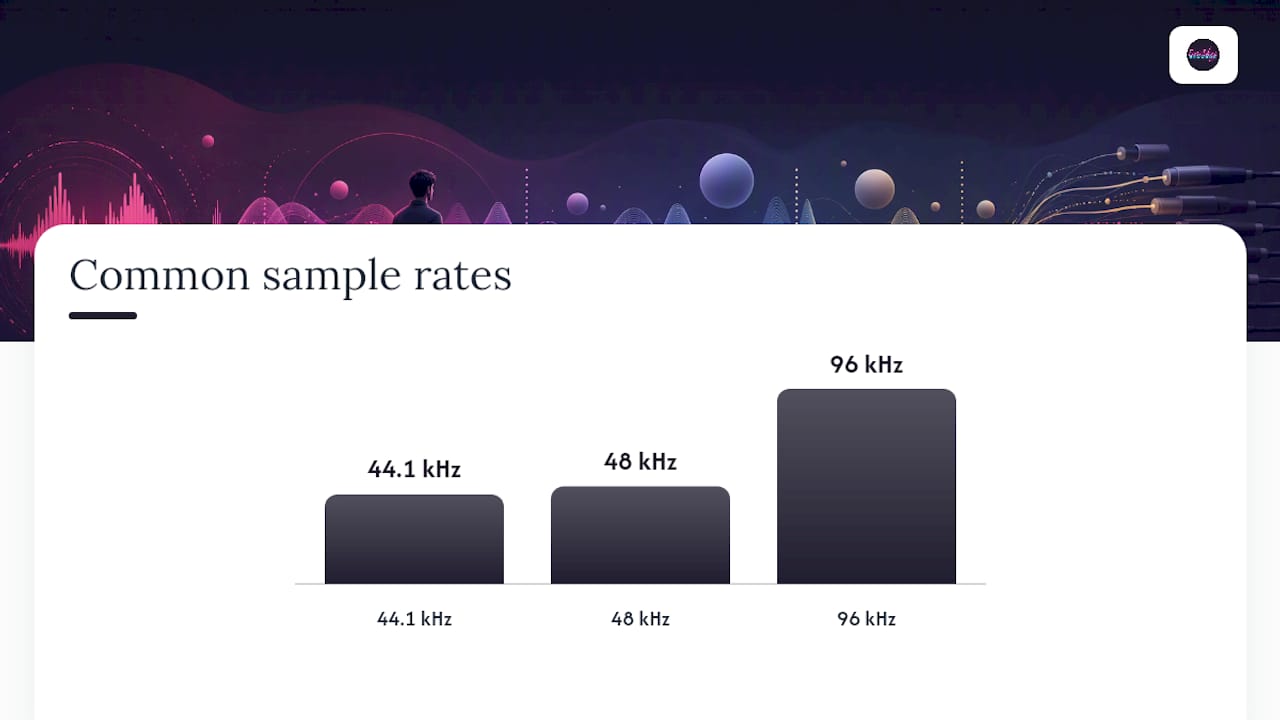
- Export at your session’s native sample rate, whether that is 44.1 kHz, 48 kHz, or 96 kHz
- Do not let your DAW auto-resample on export unless the mixer specifically asks for a different rate
- Mismatched sample rates cause pitch and timing drift when imported elsewhere, which is one of the most disorienting problems for an engineer to diagnose
Mono vs. stereo and interleaved files:
- Export mono for single-source elements: kick, snare, mono DI bass, center-panned leads
- Export stereo for buses, FX returns, stereo instruments, and any element with a stereo field
- Use interleaved stereo files (both channels in one file) for convenience; only split to dual-mono if your mixer requests it
Dithering:
- Do not apply dither when exporting stems at the same bit depth as your session
- Dithering is the mastering engineer’s responsibility at the final output stage
Understanding the science behind sample rate and bit depth choices helps you make confident decisions here rather than guessing.
Pro Tip: If a mixer asks for an unusual rate or bit depth, ask why before you re-export everything. Sometimes stems are headed to a video post-production pipeline or a collaborator on a different system, and knowing that context saves you from a second round of exports.
How to prepare your session before you export
Save a backup copy of your session before you change anything. That one step protects you if something goes wrong mid-export. Once you have a backup, work through this prep sequence.
Session cleanup:
- Delete or archive unused and muted tracks; they add confusion and file size
- Listen through for clicks, pops, or noise that you may have ignored during production
- Remove any placeholder regions or test recordings that were never meant to be in the final mix
Master bus:
- Bypass every plugin on your master bus: limiters, compressors, EQ, saturation, all of it
- The mixer needs headroom to work; peaks around −3 to −6 dBFS give them that room
- Leaving a limiter on the master bus is one of the most common errors engineers flag, and it compresses the dynamics before the mixer can shape them
Processing decisions:
- Keep corrective EQ and compression that is integral to a sound (a de-esser on a vocal, a high-pass on a muddy guitar) and print it with the stem
- Remove time-based effects like reverb and delay from individual tracks unless you also export a separate wet version
- If you used shared reverb or delay returns, print those returns as their own stems so the mixer can recreate your spatial field
Exporting both a dry and a wet version of a creatively essential effect gives the mixer maximum flexibility without losing your intended sound. A heavily processed vocal chop or a signature reverb tail is worth printing separately.
Fader and automation:
- Export post-fader so track automation, mutes, and volume rides are baked in
- Be consistent: if one stem is post-fader, all of them should be
For a complete session prep walkthrough, the song prep guide at Twisbyrecords covers the full checklist in detail.
Pro Tip: After exporting your dry stems, go back and export a second pass of two or three key elements with their creative effects printed. Label them clearly as _WET variants. Your mixer will thank you.
How to name files and organize your delivery folder
Clear naming and folder structure materially reduce confusion and rework for the mixing engineer. The goal is that your mixer can open the folder and immediately know what every file is without listening to it.
Naming convention:
- Template:
SongTitle_Instrument_Variant_01.wav - Examples:
SongName_Vocal_Lead_01.wav,SongName_Drums_KickTop.wav,SongName_Guitar_Rhythm_Left.wav - Avoid DAW default names like “Audio 1” or “Track 3” — they are meaningless to anyone else
- No spaces in file names; use underscores or hyphens throughout
Folder structure:
SongTitle_Stems_Date/
  /Drums
  /Bass
  /Vocals
  /Guitars
  /Synths
  /FX
  /Returns
  /Bounces
  Reference_Mix.wav
  SESSION_INFO.txt
What to include in the delivery package:
Reference_Mix.wav: your stereo mix before bypassing the master bus, so the mixer knows your intended directionSESSION_INFO.txt: BPM, key, time signature, sample rate, bit depth, any tuning notes, comped takes, and important effects you want preserved
Include a reference mix every time, without exception. A mixer working without one is guessing at your vision. The reference mix is not a target to copy; it is a map of your intent. If your lead vocal has a specific pitch correction that defines the performance, note it in SESSION_INFO.txt. If the drop is supposed to hit harder than the verse, say so. The more context you give, the less revision you need.
When you are deciding whether to send grouped stems or individual multitracks, the multitracks vs. stems explainer at Twisbyrecords lays out exactly when each approach makes sense.
DAW-specific steps for exporting stems
The golden rule across every DAW is that every stem must start at the same point, usually bar 1, and run the full length of the song. Set your export range to bar 1 through the song end plus one or two bars for effect tails, then follow the steps below for your host.
Ableton Live
Set Render Start to the session start and Render Length to the full arrangement, then choose “All Individual Tracks” under Rendered Track. Turn off Normalize. Use “Include return and master effects” only when you intentionally want those printed. As of Live 12, the Bounce command can commit track or group processing directly, which is useful for printing bus glue before export.
Logic Pro
Go to File > Export > All Tracks as Audio Files. Confirm the start point is bar 1, set file type to WAV or AIFF, choose your bit depth, and select interleaved stereo for buses. For individual tracks, use Bounce in Place to print processing before the main export.
Pro Tools
Use Bounce to Disk or Track Bounce for individual tracks. Confirm the Bounce Source matches the output you want, extend the render range past the last note to capture reverb and delay tails, and choose interleaved stereo or split mono based on your mixer’s preference. Offline bounce is faster for large sessions.
REAPER
Open the Render dialog and use the custom render matrix to select individual tracks or buses. Set the project start and end to span the full song. REAPER’s matrix view makes it easy to render multiple stems in one pass without re-routing anything.
Cubase
Go to File > Export > Audio Mixdown and use the Channel Batch Export option. This renders each selected channel as a separate file in one pass. Confirm that each channel routes to the main output and that the export range covers the full song.
Studio One
Select the tracks or buses you want to export, then use Song > Export Stems. Set sample rate and bit depth to match your project settings and export the full song length. Studio One’s stem export dialog is one of the most straightforward in any DAW.
After exporting in any DAW, do a quick reimport test in a blank session before you send anything.
How to run a quality control check before you send
A fast sanity check catches the mistakes that cause most re-exports. Run through this sequence every time.
- Open a new blank session set to the same sample rate and bit depth as your exported stems.
- Import all stems at the same start point (bar 1).
- Play the session and compare it to your
Reference_Mix.wav— the stems should sum to roughly the same sound, minus master-bus limiting. - Listen for missing elements, unexpected silence, phase issues, or incorrect lengths.
- Check for clipped peaks; any file hitting 0 dBFS needs to be re-exported with the master bus properly bypassed.
- Verify that file names match their content and that
SESSION_INFO.txthas the correct BPM, key, and sample rate. - If anything is wrong, fix it in your saved backup session and re-export only the affected stems.
Common things the reimport catches:
- A reverb return that was muted and never exported
- A stem that starts two bars late because the export range was set incorrectly
- A file that clipped because the master limiter was still active
- A mono stem accidentally exported as a silent second channel
Include a short verification note in your delivery: “Reimported and sums to reference mix; master bus bypassed; peaks at or below −3 dBFS.” That one line tells the engineer you did the work.
How to deliver stems and what to say to your mixing engineer
Compress everything into a single ZIP file. Name it SongTitle_Stems_Date.zip so the engineer knows exactly what it is from the file name alone.
Delivery options:
- WeTransfer, Dropbox, or Google Drive for most file sizes
- SFTP for large sessions when the studio provides a server address
- Direct project file upload if the studio requests it
What to include in your message:
- What you want changed and what must stay the same
- Your reference tracks for the mix direction (see the reference tracks guide for how to choose them)
- Your preferred communication method for revisions
- Any passwords or folder access instructions for the transfer link
A clear delivery note cuts revision cycles in half. Keep it short: a subject line, a bullet list of critical notes, and the download link. If the vocal is comped but you kept two alternate takes in the folder, say so. If the synth pad has a specific reverb tail that defines the chorus, mention it.
Common mistakes and a checklist to run before you send
These are the errors that cause the most re-export requests, according to StemSlicer’s prep checklist:
- Trimming start points: every stem must start at bar 1, not at the first note
- Normalizing stems: normalization changes relative levels between tracks and destroys the mix balance
- Leaving master-bus limiting on: the mixer cannot undo printed limiting
- Mismatched sample rates: a 48 kHz stem in a 44.1 kHz session plays back at the wrong pitch and speed
- Unclear file names: “Audio 1.wav” tells the engineer nothing
- Missing effect tails: a reverb that cuts off mid-decay sounds like a technical error, not a creative choice
Pre-send checklist (copy this into your DAW notes or delivery email):
- [ ] WAV or AIFF, 24-bit
- [ ] Sample rate matches session
- [ ] All stems start at bar 1
- [ ] All stems run full song length, including tails
- [ ] Master bus bypassed; peaks at −3 to −6 dBFS
- [ ] No normalization applied
- [ ]
Reference_Mix.wavincluded - [ ]
SESSION_INFO.txtincluded (BPM, key, time signature, sample rate, bit depth, notes) - [ ] Files reimported and sum to reference mix
- [ ] ZIP with correct folder structure
- [ ] Delivery link sent with access instructions
Twisbyrecords expert checklist and studio tips
At Twisbyrecords, with over 35 years of experience and Apple Digital Masters certification, the team reviews stems from independent artists every week. These are the points that separate a clean delivery from one that needs a follow-up call.
Twisbyrecords stem checklist:
- Headroom at −3 to −6 dBFS on every stem, no exceptions
- Full-length export from bar 1, including reverb and delay tails
- At least one wet stem included when a creative effect is essential to the musical idea
- Comped lead vocal included as a single file, with alternate raw takes in a separate subfolder
SESSION_INFO.txtpresent and complete
Verification template Twisbyrecords uses on receipt:
“Reimport check: sum match to Reference_Mix (yes/no); master-bus bypassed (yes/no); sample rate and bit depth confirmed; any manual fades or edits noted.”
If you want to speed up the import process on the studio side, include a short CSV manifest listing every file name, its track type (mono/stereo), and its length. Automated tools like StemSlicer can detect silence, trim tails appropriately, and export ready-to-open project files, which removes long silent regions and speeds up the whole handoff.
Pro Tip: Color-code your export folders or add a one-line description next to each file name in your CSV manifest. When an assistant is importing 40 stems into a new session, that context saves real time.
Why clean stems protect your music, not just your mixer’s time
Here is something most articles on this topic miss: the way you prepare your stems is a creative decision, not just a technical one. When a mixer receives a session where the vocal is buried under printed reverb, the kick has a limiter baked in, and three tracks are named “Audio 7,” they spend the first hour of your session undoing problems instead of making decisions. That hour comes out of your budget or your turnaround time, and it often comes out of the energy the engineer brings to your record.
Clean stems are not about following rules for their own sake. They are about giving your mixer the clearest possible signal of what you built, so they can make it better. The reference mix tells them where you were headed. The session notes tell them what matters most to you. The headroom tells them you trust them to do their job. Every one of those things is a creative act.
Independent artists often underestimate how much the delivery package shapes the mix. A mixer who opens a folder and immediately understands the session is already in the right headspace. One who spends 20 minutes figuring out which file is the lead vocal is not. That difference is not trivial, and it is entirely within your control.
Ready to send stems? Twisbyrecords can take it from here
Getting your stems export-ready is the hard part. Once the files are clean, the mixing process should move fast.

Twisbyrecords offers professional mixing and mastering for independent artists, with a pre-mix stem review built into every project. Before a fader moves, the team checks your delivery against the checklist above, flags any issues, and confirms the session is ready to mix. No back-and-forth, no surprise re-export requests. With Apple Digital Masters certification and more than 35 years of studio experience, Twisbyrecords works specifically with DIY and independent artists who need a polished result without the overhead of a traditional studio. Mastering and targeted streaming promotion are available as add-ons. To get started, review the full services and submit your project.
Sources
- How to Prepare Stems for a Mixing Engineer: The Complete Checklist | StemSlicer
- Importing and exporting stems
- How to Bounce Stems in Pro Tools
- How to Bounce Stems in Any DAW: A Clear Guide
FAQ
How do I export stems in Logic Pro for mixing?
Go to File > Export > All Tracks as Audio Files, confirm the start point is bar 1, set the format to WAV or AIFF at 24-bit, and select interleaved stereo for bus tracks. Bypass your master bus before exporting.
How do I export stems in Ableton Live for mixing?
In the Export Audio/Video dialog, set Render Start to the session start, Render Length to the full arrangement, and Rendered Track to All Individual Tracks. Turn off Normalize, and leave “Include return and master effects” off unless you want those printed.
How do I send stems to a mixing engineer?
Compress all stems into a single ZIP file named SongTitle_Stems_Date.zip, upload it to WeTransfer, Dropbox, or Google Drive, and send the link with a short note covering BPM, key, time signature, and any critical creative choices. Include Reference_Mix.wav and SESSION_INFO.txt inside the ZIP.
What format should I use to export stems?
Export as WAV or AIFF at 24-bit and your session’s native sample rate. Avoid MP3 and other lossy formats for professional mixing deliveries, as compression artifacts compound through the mixing chain.
What are stems in music production?
Stems are grouped or individual audio exports of the separate elements in a song, such as drums, bass, vocals, and guitars, rendered as separate files so a mixing engineer can balance and process each element independently.









