


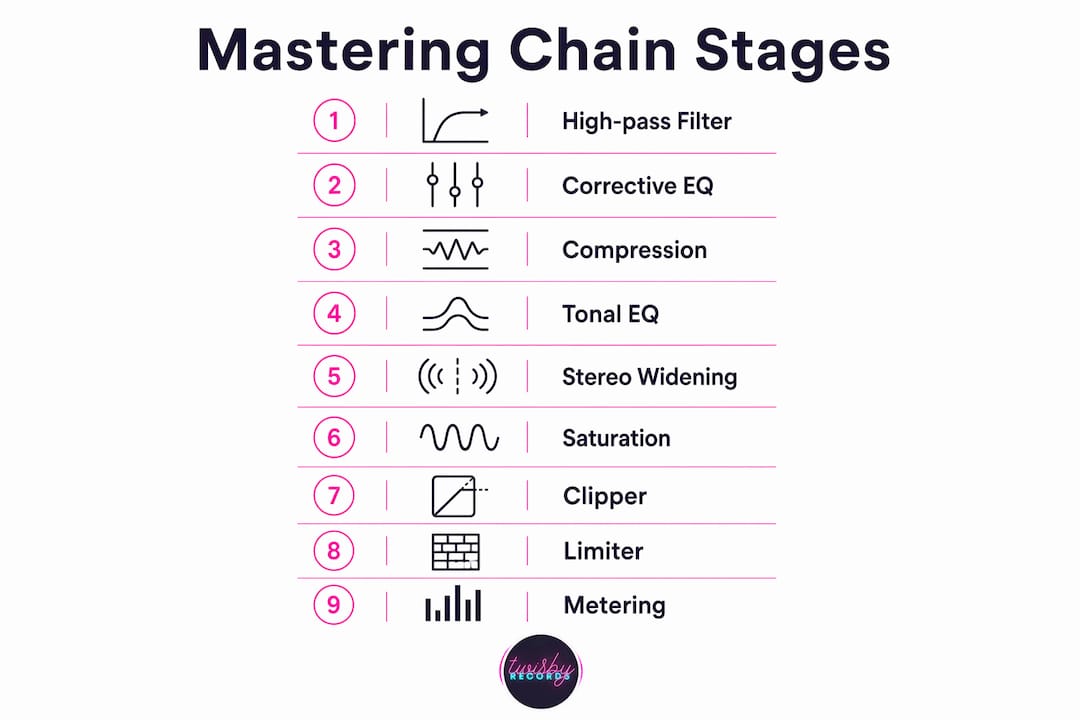
The correct mastering chain order is: high-pass filter (optional) → corrective EQ → compression → tonal EQ → stereo widening → saturation → clipper (optional) → limiter. That sequence is not arbitrary. Every stage feeds the next a cleaner, better-prepared signal, and changing the order changes the outcome, sometimes dramatically.
Here is the standard chain at a glance:
- High-pass filter (optional): Removes subsonic rumble below 20–30 Hz before any downstream processor reacts to it
- Corrective EQ: Surgical cuts to fix mud, harshness, or resonances before compression
- Compression: Glues the mix and controls 1–3 dB of macro dynamics on a clean signal
- Tonal/sweetening EQ: Broad shaping for warmth, air, or presence after the compressor has settled dynamics
- Stereo widening (optional): Width decisions made on a stable, compressed signal
- Saturation (optional): Harmonic character and perceived loudness as the final creative layer
- Clipper (optional): Shaves transient peaks so the limiter works less
- Limiter (always last): Sets the true-peak ceiling and final loudness target; nothing processes after it except a metering plugin
Streaming platforms target an integrated loudness level suitable for most music, while club-oriented tracks target a higher loudness range. Your limiter and metering setup at the chain’s end is what gets you there without distortion.
Table of Contents
- What each stage in the mastering chain actually does
- When and why you should change the default order
- How vocal-heavy tracks change your chain priorities
- What 35 years of mastering experience actually teaches you
- Analog vs. digital processors: what actually changes in your chain
- Twisbyrecords handles your mastering chain so you do not have to guess
- FAQ
- Key Takeaways
What each stage in the mastering chain actually does
Understanding why each processor sits where it does makes the whole chain click. Let’s walk through each slot.
Stage roles and typical settings
| Slot | Processor | Optional? | Primary job |
|---|---|---|---|
| 1 | High-pass filter | Yes | Cut sub-rumble below 20–30 Hz |
| 2 | Corrective EQ | Usually | Surgical cuts: mud, boxiness, harshness |
| 3 | Compression | Almost always | 1–3 dB of macro glue on a clean signal |
| 4 | Tonal EQ | Usually | Broad shaping: warmth, air, presence |
| 5 | Stereo widening | Yes | Width on a dynamically stable signal |
| 6 | Saturation | Yes | Harmonic character and perceived loudness |
| 7 | Clipper | Yes | Shave peaks before the limiter |
| 8 | Limiter | Always | True-peak ceiling and loudness target |
High-pass filter removes energy the listener never hears but that compressors and limiters absolutely react to. A gentle cut at 20–30 Hz costs you nothing perceptually and saves your dynamics processors from chasing phantom low-end energy.
Corrective EQ is surgical, not musical. Tools like FabFilter Pro-Q excel here because of their spectrum analyzer and precise bell and notch shapes. Cut the problem before compression, because a harsh 3 kHz peak fed into a compressor causes the whole track to duck every time that frequency spikes. Fix it first.
Compression sits between the two EQ stages for a specific reason: corrective EQ hands it a clean signal, and tonal EQ then shapes the already-glued result. A moderate ratio with light gain reduction on the loudest moments is the standard starting point. The SSL G-Master Buss Compressor is a classic choice here for its ability to add cohesion without sounding heavy-handed. The Universal Audio LA-2A works beautifully for program-dependent, musical gain reduction on material that needs a warmer, more organic feel.

Tonal EQ is where you make the master sound bigger, warmer, or more open. Broad shelves and gentle bell boosts live here. Waves SSL Channel or a mastering-grade EQ like FabFilter Pro-Q in linear-phase mode are common picks for this stage.
Stereo widening goes after compression because the compressor has already settled the dynamics. Widening a signal that is still moving dynamically means you are constantly chasing a shifting stereo image. Post-compression, you can make an informed, stable decision.

Saturation adds harmonic content that the ear reads as thickness and loudness without raising the peak meter much. Placing saturation late in the chain maximizes tone control, because you have already corrected and compressed the signal. Izotope Ozone’s Exciter module is a widely used option here, offering multiband harmonic control so you can add presence to the highs without muddying the lows.
Clipper is optional but useful on dense, transient-heavy material. It shaves peaks before they hit the limiter, letting you push loudness without the limiter working so hard that it pumps.
Limiter is the only stage with a hard rule: nothing goes after it except a metering plugin. Its job is to set the true-peak ceiling, typically –1.0 dBTP for streaming, and push integrated loudness toward your target. Always use a true-peak limiter, not a standard peak limiter. Standard peak limiters miss inter-sample peaks that cause distortion on lossy codecs like MP3 and AAC.
Metering at the chain’s end is how you verify the master is actually where you think it is. LUFS and true-peak meters confirm your integrated loudness and peak ceiling before you export. Keep the limiter ceiling at –1 dBTP to protect against codec distortion on streaming platforms.
Gain staging before any plugin touches the signal matters more than most producers realize. Peak input levels around –6 to –3 dBFS give compressors and limiters the headroom to work cleanly. Too hot going in and your compressor overworks; too quiet and you lose resolution.
When and why you should change the default order
The default chain works on the majority of material. The other 10% genuinely calls for a deviation, and knowing when to deviate is what separates a thoughtful engineer from someone following a checklist.
Three legitimate reasons to break the standard sequence:
- Saturator before compressor: On rock, indie, or heavily driven material, running saturation first lets the compressor react to the already-thickened transients. The result is a more glued, cohesive feel that sounds like the saturation is baked into the body of the track rather than sitting on top.
- Tonal EQ before compressor: When the mix has a clear tonal lean you want the compressor to lock in, moving the tonal EQ upstream means those EQ moves get glued into the mix rather than floating above it.
- Two compressors in series: One compressor before the EQ pair for broadband glue, one after for bus-style movement. Each should pull no more than 1 dB of gain reduction. This approach suits dense, layered productions where a single compressor would have to work too hard to achieve both goals.
What to avoid absolutely:
- Placing any EQ or saturation after the limiter. Any boost you make after the limiter pushes peaks back above the ceiling you just set, undoing your true-peak protection entirely.
- Stacking too many optional stages. If you are using many plugins and something sounds wrong, the answer is often to remove some and start again. Fewer processors, each set correctly, beats a packed chain every time.
Pro Tip: Always A/B a reordered chain against the default. If the deviation does not clearly win on a calibrated playback system, go back to the standard sequence. Your ears on a good monitoring setup are the final judge, not the plugin order on screen.
Order is a functional tool, not a rigid rule, but every change has a cause-and-effect consequence. Measure those effects carefully before committing.
For hip hop and trap productions specifically, the sequencing of processors follows similar logic but with extra attention to low-end control. Trap beat mixing best practices often call for tighter compression earlier in the chain to manage 808 dynamics before any tonal shaping happens.
How vocal-heavy tracks change your chain priorities
Vocal-dominant tracks, think singer-songwriter records, R&B, or pop with exposed lead vocals, require you to think about the mastering chain in relation to what the vocal needs most.
The vocal processing order mirrors the mastering chain in miniature:
- Subtractive EQ first: Cut proximity effect buildup, room resonances, and any harsh consonant frequencies before compression touches the vocal
- Compression next: Tame the dynamic range so the vocal sits consistently in the mix
- Additive EQ after compression: Open up presence, air, and warmth on a dynamically stable signal
- De-esser: Placement depends on the sibilance character. If sibilance is consistent across the whole performance, a de-esser before compression prevents the compressor from reacting to every “s” and “t.” If sibilance is inconsistent or only appears on certain phrases, placing the de-esser after compression gives you more control
Within the full mastering chain context, vocal-heavy tracks often need less stereo widening (a wide master can push the vocal off-center) and more careful tonal EQ work in the 2–5 kHz presence range. The vocal chain parallels the mastering chain because the underlying logic is identical: fix problems first, shape character second, control peaks last.
For layered vocal arrangements, the principles of vocal layering technique feed directly into how you approach the mastering chain. A dense vocal stack needs more corrective EQ work before compression than a single lead vocal does.
Pro Tip: On vocal-heavy masters, reference your mix against a commercially released track in the same genre before touching the limiter. If the vocal sits differently in the frequency balance, address it at the tonal EQ stage, not by pushing the limiter harder.
What 35 years of mastering experience actually teaches you
At Twisbyrecords, the most consistent lesson across decades of mastering work is this: the chain is a means to an end, not the end itself.
That mindset is why chain bloat is one of the most common mistakes in independent mastering. When a track needs five corrective processors just to sound acceptable, the problem is usually in the mix, not the mastering chain. Mastering is finishing work, not reconstruction.
The Apple Digital Masters certification that Twisbyrecords holds requires a specific standard of true-peak compliance and codec transparency. That standard reinforces what good gain staging and limiter placement already demand: clean signal flow from input to output, with no surprises at the codec stage.
Monitoring environment shapes every chain decision you make. A room with an untreated low-end buildup will cause you to cut bass that does not need cutting. A bright room will make you pull highs that are actually fine. Before trusting your chain decisions, trust your room, or at minimum, cross-reference on headphones and a secondary playback system.
Pro Tip: Gain-match every plugin you insert. Bypass it, listen, re-engage it, and if it sounds louder rather than better, you are hearing the volume increase, not the processing. Gain matching is the only way to hear what a plugin is actually doing.
Understanding mastering for streaming platforms is inseparable from understanding chain order. The limiter’s ceiling, the metering at the chain’s end, and the true-peak compliance of every stage upstream all determine whether your master survives loudness normalization intact.
Analog vs. digital processors: what actually changes in your chain
The fundamental chain order stays the same whether you are running an all-digital plugin chain or routing through hardware. What changes is how you manage the practical realities of each format.
Digital processors are phase-coherent, recallable, and consistent. Linear-phase EQ plugins like FabFilter Pro-Q in linear-phase mode introduce no phase shift, which matters on dense, complex material. The tradeoff is pre-ringing on transients, which is why minimum-phase mode is often preferable for surgical corrective cuts. Digital compression, whether emulating the SSL G-Master Buss Compressor or the LA-2A, gives you precise control over attack and release without the variability of hardware.
Analog processors introduce harmonic coloration, transformer saturation, and subtle nonlinearities that many engineers find musically pleasing. The tradeoff is that analog gear requires careful gain staging at every stage of the chain, because the signal is physically passing through electronics that can clip or distort if levels are too hot. The –6 to –3 dBFS input guideline applies even more strictly in an analog chain.
When mixing analog and digital in the same chain, the most common approach is to use analog hardware for the compression and saturation stages, where its nonlinear character is most audible and desirable, and digital EQ for corrective work, where precision and phase coherence matter most. The chain order logic does not change: corrective work first, compression in the middle, tonal shaping and character after, limiter last.
One practical consideration: analog hardware introduces latency and level variation that requires careful calibration. If your corrective EQ is digital and your compressor is analog, the signal leaving the digital EQ needs to hit the hardware compressor at the right level. Metering at each stage handoff keeps the gain staging consistent across the hybrid chain.
Twisbyrecords handles your mastering chain so you do not have to guess
Getting the signal chain right on your own takes time, a treated room, calibrated monitors, and years of critical listening experience. Most independent artists are better served putting that energy into the music itself.

Twisbyrecords brings over 35 years of mastering experience and Apple Digital Masters certification to every project, with a personalized approach that treats your track as its own problem to solve, not a template to fill. The chain order, the gain staging, the limiter ceiling for your target platform, and the monitoring decisions are all handled by engineers who have done this across every genre. You get a polished, streaming-ready master without the guesswork of building and debugging a chain yourself.
If your track needs more than mastering, Twisbyrecords also offers mixing and mastering packages that address the mix before the mastering chain ever touches it. That matters because, as this guide makes clear, a mastering chain cannot fix a broken mix. Starting with a clean, well-balanced mix is what lets the chain do its job.
Get a quote for your next release at Twisbyrecords mastering services and hear what a properly built chain does for your music.
FAQ
What order should my mastering chain be in?
The standard order is high-pass filter, corrective EQ, compression, tonal EQ, stereo widening, saturation, clipper, and limiter. The limiter is always last, and corrective tools always go before compression so the compressor reacts to a clean signal.
Where does saturation go in a mastering chain?
Saturation is placed after tonal EQ and stereo widening, just before the clipper or limiter. This placement ensures you are adding harmonic character to an already corrected and compressed signal, not amplifying problems.
What is the best order for a vocal processing chain?
The vocal chain follows the same logic as mastering: subtractive EQ first, compression next, then additive EQ, then de-essing. De-esser placement can go before or after compression depending on whether the sibilance is consistent or sporadic across the performance.
Does the limiter always have to be last?
Yes. Any processing after the limiter pushes peaks above the true-peak ceiling you just set, causing potential distortion on lossy codecs like MP3 and AAC. The only exception is a metering plugin, which monitors the signal without altering it.
Can Twisbyrecords handle mastering for streaming platforms?
Yes. Twisbyrecords holds Apple Digital Masters certification and masters to platform-specific loudness targets, including the –14 LUFS integrated standard common across major streaming services, with true-peak compliance built into every master.
Key Takeaways
The correct mastering chain order places corrective tools before compression, tonal and character tools after, and the limiter unconditionally last, with gain staging at –6 to –3 dBFS peak input keeping every stage clean.
| Point | Details |
|---|---|
| Corrective EQ before compression | Fix problem frequencies first so the compressor reacts to a clean, balanced signal. |
| Limiter is always last | Nothing processes after the limiter except a metering plugin; violations cause true-peak distortion. |
| Gain staging at –6 to –3 dBFS | Proper input levels prevent compressors from overworking and limiters from distorting. |
| Saturation goes near the end | Place saturation after tonal EQ and stereo widening to sweeten an already-corrected signal. |
| Twisbyrecords for polished masters | Decades of experience and professional certification applied to every independent artist’s project. |









