


TL;DR:
- Mix bus processing involves applying compression, EQ, saturation, and limiting to the stereo output to create cohesion and subtle tonal shaping before mastering. It should be used gently, focusing on glue and harmonic density, while avoiding fixing source problems and excessive gain reduction. Proper routing, metering, and moderation are essential for achieving a polished, balanced final sound.
Mix bus processing is the practice of applying a signal chain, typically compressor → broad EQ → gentle saturation → limiter, across your stereo summing output to create “glue” and subtle tonal shaping before the track reaches mastering. Start here: route all your tracks and subgroups to a dedicated stereo mix bus, insert a glue compressor with a mild ratio, slow attack, and auto or tempo-aware release, then dial the threshold until you hear subtle gain reduction on the loudest hits. That single move, A/B’d against bypass with level-matched playback, is the fastest way to hear what the mix bus actually does to your music.
For headroom, keep your summed signal hitting the first bus processor at a healthy level below clipping. Aim for a pre-master integrated loudness around -14 LUFS and keep true peak below -1 dBTP to ensure headroom for mastering. Target summed peaks at -6 to -10 dBFS before the first bus processor, and use 1–2 dB gain reduction for glue or 3–6 dB for peak control with appropriate compressor ratios.
Table of Contents
- What mix bus processing actually does for your mix
- How to set up a mix bus in your DAW
- The recommended mix-bus signal chain, explained
- Metering and loudness targets before you send to mastering
- How mix-bus processing differs from mastering
- Common mistakes that ruin mix-bus processing (and how to fix them)
- Pro workflow, numerical presets, and plugin recommendations
- Key Takeaways
- A studio perspective on mix-bus processing
- Twisbyrecords mixing services for independent artists
- Useful sources for going deeper
- FAQ
What mix bus processing actually does for your mix
The mix bus, also called the master bus or 2-bus, is the final stereo summing channel that receives every track and subgroup before export. Mix bus processing applies processors to that single stereo output, meaning every instrument in your session is affected simultaneously.
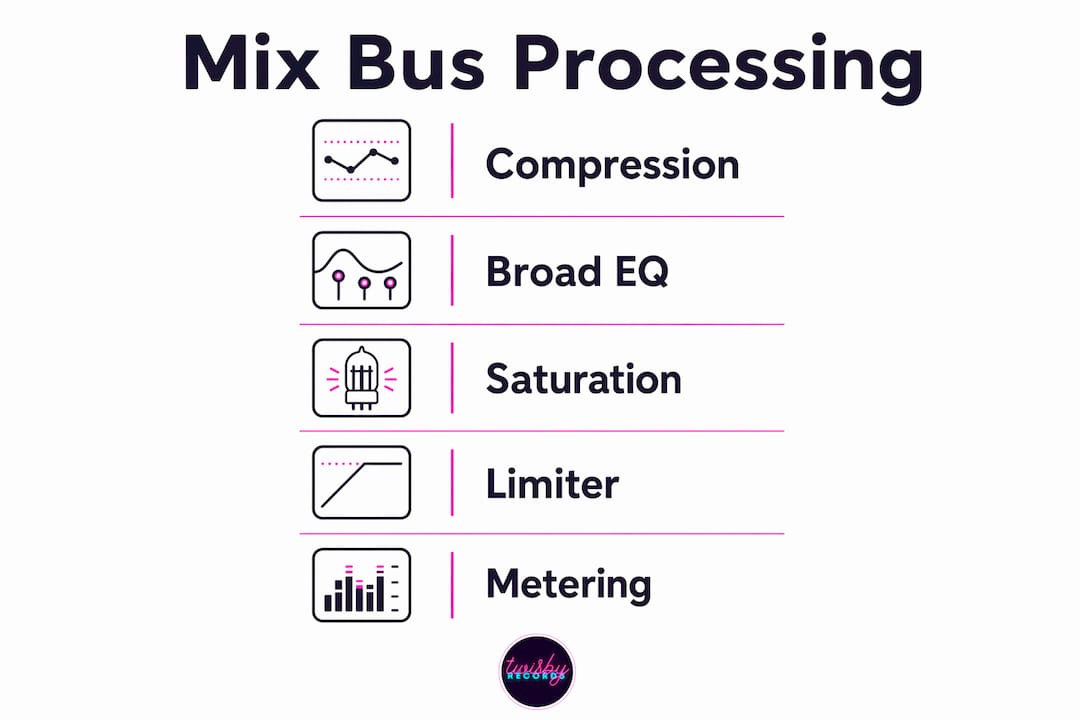
The primary goals are four things: glue (the perceptual coupling where instruments breathe together), tonal shaping, subtle harmonic density, and limited peak control. Think of it as a vibe stage, not a surgical one. You are coloring and unifying a mix that is already well balanced, not rescuing one that isn’t.
What belongs on the mix bus vs. what doesn’t:
- Do: apply subtle broad EQ to unify tone, gentle compression to couple transients, light saturation for warmth
- Do: use a limiter as a safety ceiling before export
- Don’t: try to fix a muddy kick, a resonant vocal, or a harsh snare on the bus. Those are track-level problems that bus processing will only amplify
- Don’t: push heavy gain reduction expecting it to replace proper gain staging upstream
LUFS (Loudness Units Full Scale) is the objective handoff metric most mastering engineers and streaming platforms use. Getting comfortable reading integrated LUFS on your mix bus output is one of the most practical habits you can build.
How to set up a mix bus in your DAW
Routing is the foundation. Get this wrong and every processor you add afterward is working on a flawed signal.
Routing steps:
- Create a stereo aux channel (or use the DAW master fader in Logic Pro, Ableton Live, or Pro Tools).
- Route all individual tracks and subgroup outputs to this channel. Check that FX returns (reverb, delay) are also feeding the bus unless you are deliberately keeping them on a separate stem for mastering.
- Set your summed output level so peaks land around -6 to -10 dBFS before any bus processor touches the signal. This is your gain-staging target.
- Set your meters to read integrated LUFS and RMS alongside peak, so you are watching loudness, not just transients.
What to include vs. exclude:
- Include all instrument tracks, drum subgroups, vocal subgroups, and FX returns
- Exclude control-room monitoring inserts, reference track channels, and any stem-specific processing you want isolated for a stem master delivery
When to start: The conservative approach is to build your static mix first, get levels and panning settled, then engage the bus chain. Experts recommend adding bus processing incrementally once the static mix is in place, so you are not compensating for upstream problems downstream. The alternative, “mix into” or top-down mixing, keeps the bus chain active from the start and uses it as a tonal blueprint. That workflow can speed up decision-making, but it requires you to know your processors well enough to avoid chasing your own tail. See the DAW routing guide for platform-specific steps.
Pro Tip: Before inserting any processors, bounce a dry reference of your static mix. It takes 30 seconds and gives you an honest before/after comparison once the bus chain is in place.
The recommended mix-bus signal chain, explained
Order matters because each stage changes the signal the next stage sees. Compression alters the envelope for EQ; saturation generates harmonics that affect how the limiter behaves. Here is the canonical chain most engineers use, with starting settings for each stage.
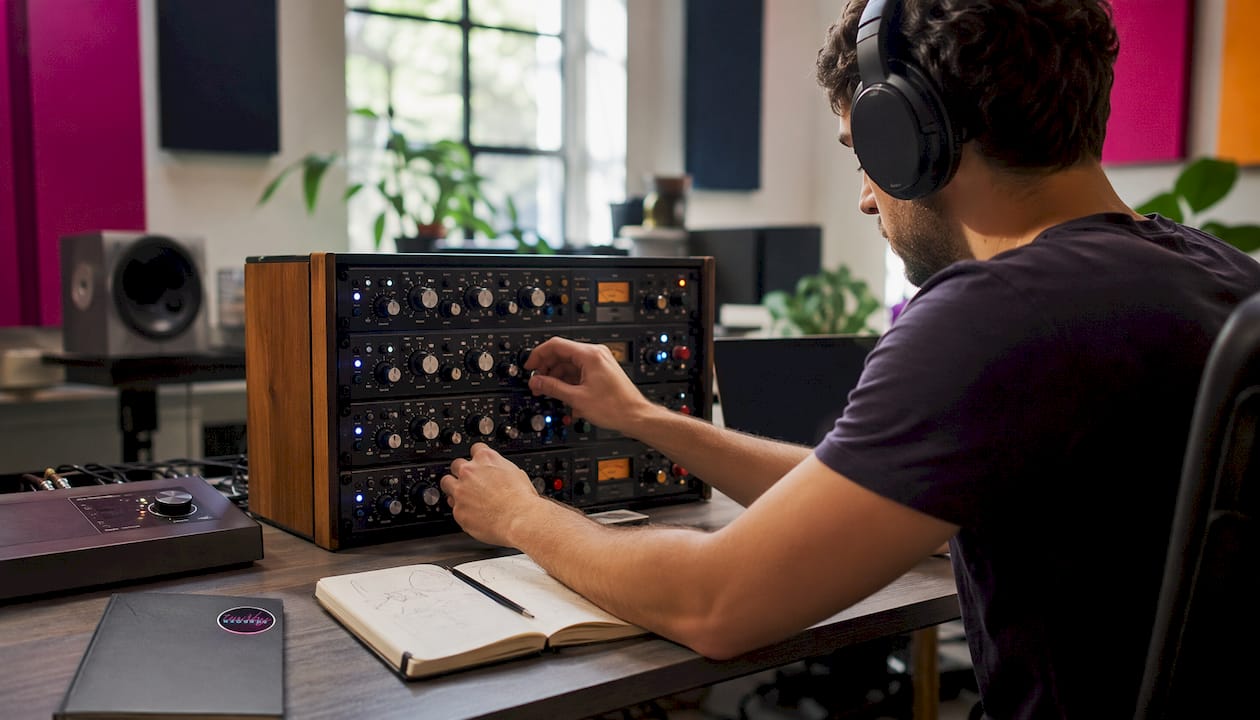
Compressor (glue stage)
Glue and peak control are different jobs. Glue uses slow ratios (1.5:1–2:1) and long releases, often tempo-relative, to create a non-audible compression action that still couples the mix. Peak control uses higher ratios (3:1–4:1) and faster releases to catch transients. Trying to do both with one aggressive setting causes audible pumping.
For glue, slow ratios and release times longer than one beat often produce the coupling effect without the listener ever hearing the compressor work. Attack around 10–30 ms lets transients through before gain reduction kicks in. Use a VCA-style bus compressor (SSL-style) for tight, punchy glue, or an optical/vari-mu for a smoother, more musical feel.
Pro side-chain move:
around 100–150 Hz to the compressor’s detector circuit. This prevents kick and sub energy from over-triggering broadband gain reduction, which preserves low-end punch while the compressor still glues the mids and highs. More on mixing low end and why this matters for the whole mix.
Broad EQ
Bus EQ is tonal shaping, not problem-solving. Use wide Q values and keep moves to ±1–3 dB. A gentle high-shelf boost (around 10–16 kHz, +1–2 dB) can open up air without harshness. A slight low-shelf cut or boost shapes the weight of the whole mix. Mid/side EQ is worth exploring for stereo balance: boost the sides in the high-mids for width, or cut the sides in the low-mids to tighten up the mono image. Use it conservatively. For a deeper look at mid-side processing, Twisbyrecords has a dedicated guide.
Saturation and harmonic color
Tape and console emulations add warmth by generating even-order harmonics and gently compressing transients. Input-driven saturation (where you push the input gain to increase harmonic content) gives you more control than fixed-drive designs. Aim for a subtle thickening effect, not audible distortion. Tube saturators tend to increase perceived RMS while reducing peak energy, which can make a mix feel louder without measuring louder. Keep the mix knob available; you will likely want to blend the saturated signal at 70–90% rather than 100%.
Limiter/ceiling
The limiter is last in the chain and functions as a safety ceiling, not a loudness tool. Set the ceiling at -1 dBTP or lower. At this stage you are not pushing for loudness; you are preventing inter-sample peaks from clipping downstream converters or streaming encoders. Leave the loudness push to mastering.
| Processor | Starting Ratio/Setting | Gain Reduction Target | Attack | Release |
|---|---|---|---|---|
| Glue compressor | 1.5:1–2:1 | 1–2 dB | 10–30 ms | Auto or tempo-relative |
| Peak compressor | 3:1–4:1 | 3–6 dB | 5–15 ms | 100–150 ms |
| Broad EQ | Wide Q | ±1–3 dB | — | — |
| Tape/console saturation | Input drive: subtle | Perceived warmth only | — | — |
| Limiter ceiling | — | Safety only | — | -1 dBTP ceiling |
Metering and loudness targets before you send to mastering
Concrete targets remove guesswork and give your mastering engineer a predictable starting point.

| Meter Type | Target | Purpose |
|---|---|---|
| Integrated LUFS | Around -14 LUFS | Pre-master streaming reference |
| True peak | Below -1 dBTP | Prevent inter-sample clipping |
| Summed input level | -6 to -10 dBFS | Headroom into first bus processor |
| Bus compressor GR | 1–2 dB (glue) / 3–6 dB (peak) | Coupling vs. transient control |
| PLR / dynamic range | Higher = more dynamics retained | Diagnostic for over-compression |
Use reference tracks level-matched to your mix when A/B testing. Loudness bias is real: a louder signal almost always sounds better in a quick comparison, which means you will misjudge your bus processing unless you match levels first. A reference mixing guide from Mix Analyzer covers the level-matching workflow in detail.
A PLR (Peak-to-Loudness Ratio) meter tells you how much dynamic range your mix retains after processing. If the PLR drops sharply after you engage the bus chain, you are compressing too hard or saturating too aggressively. Headroom matters because bus processing shifts meter readings: a compressor adds perceived loudness even at 1–2 dB GR, and saturation raises RMS further. Both effects compound, so check your integrated LUFS reading after each processor you add, not just at the end.
How mix-bus processing differs from mastering
These two stages share some tools but serve different purposes. Confusing them leads to scope overlap that makes both the mix and the master worse.
Mix bus: creative vibe and glue. You are shaping the character of the mix, coupling instruments, and adding harmonic color. The decisions here are artistic and reversible (you can bypass the chain and re-export).
Mastering: final loudness, tonal polishing, format-specific prep, and distribution encoding checks. A mastering engineer works on a finalized mix and optimizes it for every playback system and platform. They handle extreme surgical EQ, the final loudness push, inter-sample peak control, and format-specific delivery (streaming, CD, vinyl).
What to leave for mastering:
- Final loudness maximization
- Distribution-specific encoding checks (streaming normalization, CD Red Book compliance)
- Extreme surgical EQ to fix a tonal problem that survived mixing
- Final inter-sample peak control beyond your -1 dBTP safety ceiling
Practical handoff checklist: deliver a mix at -6 to -10 dBFS with your bus chain noted (or bypassed if the mastering engineer prefers a dry mix), include your LUFS and true-peak readings, and flag any intentional bus coloration so the mastering engineer knows what is creative choice vs. what is fixable. If the master needs major structural fixes, deliver stems. For more on where mastering’s limits actually are, this breakdown is worth reading before you send files.
Common mistakes that ruin mix-bus processing (and how to fix them)
Most problems on the mix bus trace back to one of three errors: doing too much, doing it too fast, or trying to fix the wrong problem at the wrong stage.
- Trying to fix track-level problems on the bus. If the kick is muddy, fix the kick. Bus processing amplifies every flaw in the source material. A resonant vocal or a harsh synth will sound worse after bus compression, not better.
- Attack time too fast. A fast attack on a bus compressor kills transients across the entire mix. Start at 10–30 ms and slow down from there until the mix feels alive again.
- Release time too fast. Fast release causes pumping, where the gain reduction audibly breathes in and out with the music. Tempo-relative release times longer than one beat typically avoid this.
- Over-saturating. Saturation raises RMS and adds harmonics. Too much and you lose clarity, smear transients, and make the mix feel congested. If you can hear the saturation, dial it back.
- Boosting a high shelf without checking mono. A high-shelf boost on the bus can sound great in stereo and harsh or phasey in mono. Always check your mix in mono after any bus EQ move.
- Stacking too much gain reduction in one compressor. Two compressors each doing 1 dB of GR is more transparent than one doing 3 dB. Stack light rather than push hard.
- Skipping the A/B bypass check. Every bus processing decision should be auditioned against a level-matched bypass. Without that check, you are mixing by hope, not by ear.
Diagnostic checklist: bypass the full chain and A/B at matched loudness; solo problematic subgroups to find the source of any pumping; check the phase correlation meter (aim to stay above 0, ideally closer to +1); and use a PLR meter to confirm you are not crushing dynamics.
Pro workflow, numerical presets, and plugin recommendations
The professional approach is to prepare a solid static mix first, then engage the bus chain lightly, then revisit track-level decisions in light of what the bus reveals. Top-down mixing (keeping the bus chain active from the start) is a legitimate workflow, but it requires deep familiarity with how each processor behaves under different mix conditions. For most intermediate producers, the static-mix-first approach is safer and more educational.
Numerical presets to paste into your session:
| Parameter | Conservative Start | More Aggressive |
|---|---|---|
| Compressor ratio | 1.5:1 | 2:1–4:1 |
| Attack | 10–30 ms | 10–15 ms |
| Release | Auto or tempo-aware release | around 100–150 ms (tempo-aware) |
| EQ shelf boost (high) | +1–2 dB boost around 10–16 kHz | +2–3 dB at 10 kHz |
| EQ shelf cut (low-mid) | slight low-shelf cut or boost | small midrange cuts |
| Saturation input drive | Subtle (just touching) | Moderate (audible warmth) |
| Limiter ceiling | -1 dBTP | -1 dBTP or lower |
Plugin category recommendations:
- VCA-style bus compressors (SSL-type): tight, punchy glue; great for rock, pop, hip-hop
- Optical compressors: musical, program-dependent smoothing; works well on acoustic and folk
- Vari-mu / tube compressors: vintage warmth and depth; suits jazz, soul, and singer-songwriter
- Multiband or spectral bus compressors: per-band processing avoids broadband cross-frequency ducking, preserving high-frequency content while controlling lows; useful for EDM, metal, or any mix with heavy low-end content
- Stock plugins: you do not need to spend money to get results. Stock compressors and EQs in Logic Pro, Ableton, and Pro Tools are capable of professional-grade bus processing. Check the best mixing plugins roundup for third-party options when you are ready to go further.
Subtlety method: find a setting you like, bounce the mix, then dial the plugin’s mix knob back by 10–15% and bounce again. Take a break, come back, and compare both at matched loudness. You will often prefer the subtler pass.
Pro Tip: Export a quick bounce after adding each processor in the chain. Play it on headphones, laptop speakers, and a phone. If something sounds wrong on one system, the bus chain is likely over-processing a frequency range that system emphasizes.
Key Takeaways
Effective mix bus processing starts with a solid static mix, gentle gain reduction (1–2 dB), and processors applied in the right order: compressor, EQ, saturation, then limiter.
| Point | Details |
|---|---|
| Set headroom first | Keep summed peaks at -6 to -10 dBFS before the first bus processor. |
| Glue vs. peak control | Use 1–2 dB gain reduction for glue (1.5:1–2:1 ratio); 3–6 dB for peak control (3:1–4:1). |
| LUFS and true peak targets | Aim for a pre-master integrated loudness of around -14 LUFS and true peak below -1 dBTP. |
| A/B with level-match | Always bypass the full chain at matched loudness before finalizing any bus setting. |
| Twisbyrecords mixing service | Twisbyrecords applies a transparent, level-matched bus chain with iterative revisions for independent artists. |
A studio perspective on mix-bus processing
Most producers I see struggle with the mix bus for the same reason: they treat it as a problem-solver instead of a finishing coat. They pile on compression trying to make a thin mix feel full, or they push saturation hoping it will add the warmth that was never tracked in the first place. The bus can’t do that work. What it can do, when used right, is take a mix that is already working and make it feel like a record.
The glue-first framing matters more than people give it credit for. When instruments share the same gain-reduction movement, even at 1 dB, they start to breathe together. That perceptual coupling is what separates a mix that sounds like a collection of tracks from one that sounds like a band in a room. You don’t need an expensive compressor to get there. You need patience, a slow release time, and the discipline to stop before you’ve gone too far.
One thing I’d push back on in most guides: the advice to “add the bus compressor early and mix into it.” That’s sound advice for an experienced engineer who knows exactly what a specific compressor does to a specific genre. For an intermediate producer still developing their ear, it’s a trap. You end up compensating at the track level for what the bus is doing, and by the end of the session you have no idea which decisions were yours and which were the compressor’s. Build the static mix first. Get it to a place you’re proud of. Then engage the bus chain and let it reveal what’s left to do.
The other underrated move is the bounce-and-dial-back method. Set a saturation or compression amount that feels right, bounce it, reduce the mix knob by 10–15%, bounce again, and compare at matched loudness. More often than not, the subtler version is the one you’d actually release.
Twisbyrecords mixing services for independent artists
If you’d rather have an experienced engineer handle the bus chain while you focus on the music, Twisbyrecords offers hands-on mixing with a transparent mix-bus setup, level-matched pre-masters, and iterative revisions built into every project. With 35+ years of experience and Apple Digital Masters certification, the team works with DIY and independent artists who need a polished, release-ready sound without the overhead of a traditional studio.

Clients get a personalized signal chain tailored to their genre, preview bounces for approval before final delivery, and optional advertising packages to grow their audience on streaming platforms after the mix is done. The process is straightforward: visit the services page, submit your rough mix, and request a quote. Fast turnaround, clear communication, and no guesswork about what’s happening to your audio.
Useful sources for going deeper
- Everything You Need to Know About Mix Bus Processing — Mastering the Mix’s practical overview; contains the numeric glue/peak targets (1–2 dB and 3–6 dB GR) and the static-mix-first workflow recommendation.
- Mix Bus Compression Without Pumping — KERN Audio’s guide to tempo-relative release times, stacking compressors, and spectral/multiband options for avoiding cross-frequency pumping.
- Essential Tips for Mix Bus Processing — iZotope’s five-tip breakdown covering plugin familiarity, the mix-knob subtlety method, and PLR metering.
- Mix Bus Processing 101 — Music Production Wiki’s signal-chain explainer; useful for understanding why processor order matters.
- Mix Bus Processing Introduction — Sonible’s guide to reference tracks, level-matching, and LUFS-based A/B testing.
- Mix Analyzer Blog — Partner resource for automated LUFS/phase analysis and pre-master diagnostics; useful if you want a second set of ears on your metering before sending to mastering.
- Side-Chain Filtering Demo — Practical video demonstration of applying a 100–150 Hz HPF to the compressor detector to preserve low-end punch on the bus.
FAQ
What is mix bus processing?
Mix bus processing applies a signal chain (compressor, EQ, saturation, limiter) to the stereo summing output of your mix to create glue, tonal cohesion, and subtle harmonic density before mastering.
How much gain reduction should a mix bus compressor apply?
Aim for 1–2 dB gain reduction for glue with a ratio of 1.5:1–2:1, or 3–6 dB gain reduction at 3:1–4:1 if you need peak control. Excessive gain reduction can lead to audible pumping or diminished dynamics.
What LUFS target should I hit before sending to mastering?
Aim for a pre-master integrated loudness of around -14 LUFS and true peak below -1 dBTP to provide enough headroom for mastering.
Should I use stock plugins or buy third-party tools for the mix bus?
Stock plugins in Logic Pro, Ableton, and Pro Tools are fully capable of professional bus processing. Third-party options add character and workflow features, but they are not required to get results.
What is the difference between mix bus processing and mastering?
Mix bus processing shapes the vibe and glue of the mix creatively; mastering handles final loudness, format-specific delivery, and distribution encoding. Twisbyrecords handles both as separate, clearly scoped stages for every project.









