
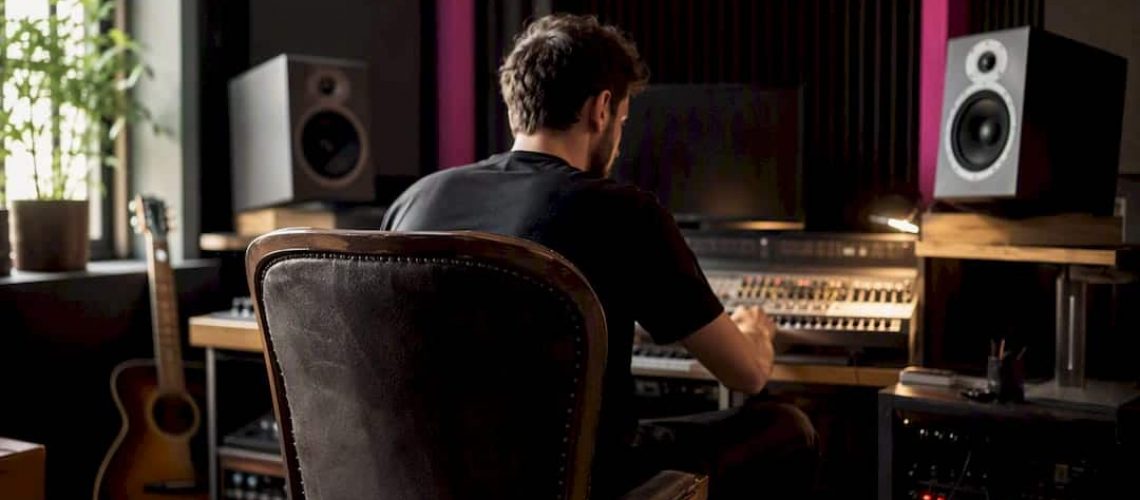

Start with your monitors and a mono check. Most translation problems trace back to monitor placement, and a mono/low-volume test will expose whatever placement doesn’t fix. Fix the room first, confirm with your ears second, and only then start reaching for EQ.
Here’s the fast version. Run these three checks before you touch another plugin:
- Mono check: sum your mix to mono. If instruments vanish or the low end collapses, you have a phase problem, not a tonal one.
- Low-volume check: turn the monitors down to conversation level. If the vocal disappears or the bass takes over, your balance is built for loud volume only.
- Device swap: play the mix on your phone speaker or a pair of earbuds. Muddiness there almost always points back to an untreated midrange.
I’ve spent many years mixing and mastering records at Twisby Records, and the pattern never changes: engineers chase gear before they chase placement. Get the monitors right, run the checks above, then read on for why they work and what to do with what you hear.
Key Takeaways
Fixing mix translation issues starts with monitor placement and a mono check, not with EQ, because most imbalances are perceptual or acoustic before they’re tonal.
| Point | Details |
|---|---|
| Placement beats gear | Monitor position and listening spot solve more translation issues than new speakers or plugins. |
| Mono check comes first | Summing to mono instantly reveals phase and stereo problems that hide on full-range monitors. |
| Midrange drives translation | Most cheap systems reproduce midrange consistently, so vocal and midrange balance matter more than bass. |
| Level-match every reference | Compare your mix to references at matched loudness or the comparison misleads your ear. |
| Verify before you master | Confirm LUFS, true peak, phase correlation, and a multi-device pass before sending a mix to mastering. |
Table of Contents
- What Causes Mix Translation Issues in the First Place?
- What’s Actually Causing Your Mix to Fall Apart?
- Which Quick Tests Actually Diagnose Translation Problems?
- How Do You Set Up Monitors Without Spending on Treatment?
- How Do You A/B Against Reference Tracks the Right Way?
- How Do You Fix Muddiness, Boominess, and Thin Vocals?
- What’s the Final Verification Checklist Before You Call a Mix Done?
- Why Trust This Process (and When to Bring In a Pro)
- Ready to Skip the Guesswork?
- Why the Cheap Fixes Beat the Expensive Ones
- Sources
- FAQ
What Causes Mix Translation Issues in the First Place?
Mix translation is how consistently a mix holds its balance, tone, and impact when it moves from your studio monitors to a car stereo, a phone speaker, or a pair of earbuds. A mix “translates well” when the vocal still sits on top, the bass doesn’t disappear, and nothing sounds harsh or hollow no matter where it plays. Most novice mixes fail this test not because the mixing decisions were wrong, but because they were only ever judged on one system, at one volume, in one room.
Your ears don’t hear frequencies at a flat, consistent level. Equal-loudness contours, often called Fletcher-Munson curves, map how sensitive human hearing is to different frequencies at different volumes. At low volume, your ears become far less sensitive to sub-bass and high treble, and far more focused on the midrange. Crank the same mix up loud, and suddenly the bass feels huge and the highs feel sharp, even though nothing in the audio changed. This is why a mix that sounds massive at 2 a.m. on your monitors can sound thin and boxy at a friend’s barbecue.
Playback systems compound the problem because none of them reproduce the same frequency range. A car system might roll off below 60 Hz and boost the upper midrange to cut through road noise. Earbuds often have an exaggerated bass hump to compensate for a lack of physical driver size. Laptop speakers frequently can’t reproduce anything below 150 or 200 Hz at all. None of these systems are “wrong.” They’re just different, and no single mix decision will make your track sound identical on all of them.
That’s the goal to let go of early. Engineers don’t aim for a mix that sounds the same everywhere. They aim for a mix that conveys the right energy and balance well enough across a handful of representative systems. Chasing sonic identity across every device is a losing game. Chasing consistency of intent is achievable, and it’s the standard worth holding yourself to.
What’s Actually Causing Your Mix to Fall Apart?
Translation failures usually come from one of four places, and each one has a distinct fingerprint. Learning to recognize the symptom saves you hours of guessing.
Room acoustics are the most common root cause, and they’re the one beginners overlook first. Untreated rooms create standing waves and reflections that boost or cancel specific frequencies at your listening position. You might be hearing a bass note that’s 6 dB louder than it actually is, simply because you’re sitting in a room mode. Monitor placement and listening position matter more here than achieving a perfectly flat room response, and fixing the room is almost always cheaper than replacing your ears’ judgment with better gear.
Low end and mono compatibility cause the second most common failure. Wide stereo bass, sub content panned off-center, or excessive low end below 80 Hz will often collapse, phase-cancel, or simply vanish once a mix is summed to mono, which is exactly what happens on a huge share of Bluetooth speakers and phone speakers. This is also where masking shows up: a bass guitar and a kick drum fighting for the same 100 to 200 Hz range will smear into mud on small speakers, even if they sound separated on full-range monitors.
Phase and stereo imaging issues hide well on studio monitors and fall apart everywhere else. Two mic’d sources that aren’t phase-aligned, or a stereo widener pushed too far, can thin out your mix or make it sound hollow the moment it’s summed to mono.
Reference and testing gaps are the quiet failure. If you only ever check your mix at one volume, on one system, you will never catch these problems until a listener does it for you:
- Checking the mix only at loud, comfortable monitoring volume
- Never summing to mono during the mix, only after
- Skipping cheap-speaker checks because “that’s not how people should listen”
- Trusting one reference track instead of two or three across genres
Which Quick Tests Actually Diagnose Translation Problems?
Run this sequence in order. Each step tells you something different, and skipping ahead wastes time chasing the wrong fix.
- Mono check first. Sum to mono and listen for anything that drops out or thins. If the bass disappears, you likely have a phase or panning problem in the low end, not a tonal one.
- Low-volume check second. Pull your monitors down to background level. If the vocal buries or the low end swells out of proportion, your balance decisions were made too loud.
- Earbuds or phone speaker third. This exposes midrange masking fast. Muddiness here usually means two elements are competing in the 200 to 500 Hz range.
- Laptop speakers fourth. These have almost no bass extension, so they test whether your mix still reads as full using only midrange and upper content.
- Car test last. The car test remains a diagnostic tool, not a target — it reveals imbalance, it doesn’t tell you to make every mix sound like it’s built for a car stereo.
When a test flags a problem, fix balance and structural issues first: adjust fader levels, apply a high-pass filter to clear unnecessary low end, or make a narrow EQ cut at the specific frequency causing the clash. Avoid broad tonal boosts across a whole band. A wide 3 dB boost at “warm low mids” will fix one system and break three others.
Pro Tip: Some playback systems are simply unfixable targets. A blown car speaker or a $10 earbud with a cracked driver isn’t a translation problem you can solve with EQ. If a system sounds broken on every reference track you own, not just yours, stop chasing it.
How Do You Set Up Monitors Without Spending on Treatment?
Most translation problems get solved by moving your monitors six inches, not by buying acoustic panels. Set up an equilateral triangle: your two monitors and your head should form three equal sides, typically 3 to 4 feet apart depending on room size. The tweeters should sit at ear height when you’re seated in your mixing position, angled slightly inward so the sound axis crosses right at your ears.
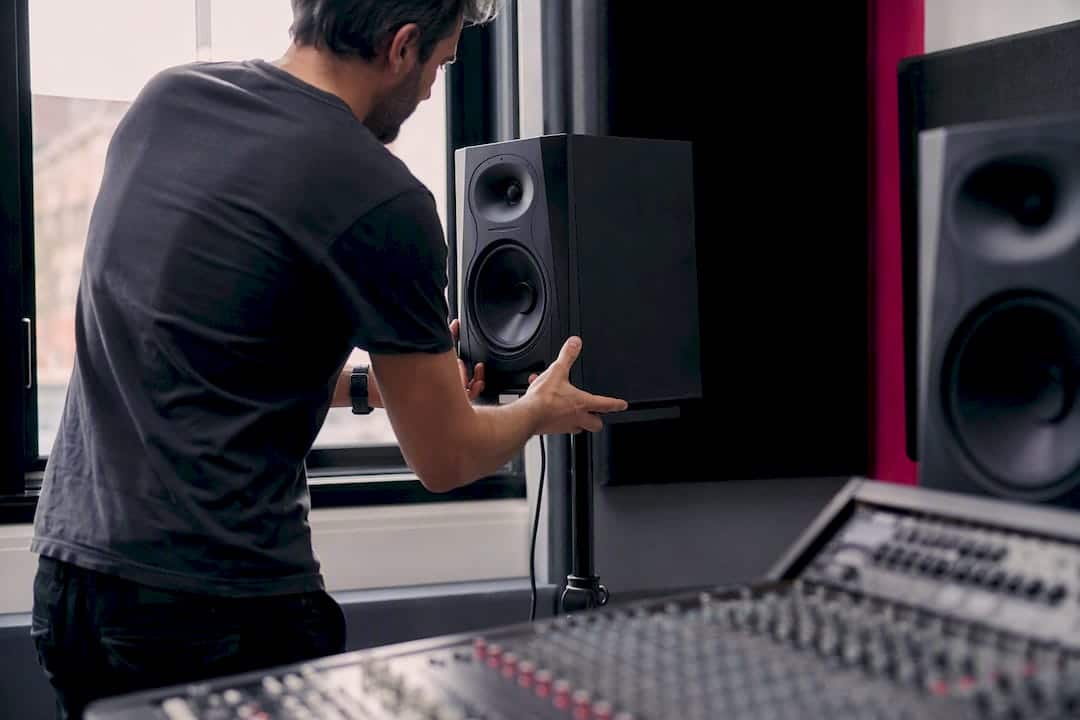
Distance from the back wall matters more than most beginners realize. Monitors pushed flush against a wall build up bass energy through reinforcement, which tricks you into cutting low end you didn’t need to cut. Pull them out 12 to 18 inches from the wall if your room allows it, and you’ll hear a more honest low end immediately.
Finding your sweet spot is a five-minute exercise: play a track with a clear, familiar low end and walk slowly around your listening area. You’ll find spots where the bass swells and spots where it thins out. That’s usually a room mode, and sitting in the wrong one is the single biggest reason mixers add or cut bass that didn’t need touching in the first place.
Once placement is dialed in, minimal acoustic treatment goes a long way. Two things give you the most return for the least money:
- First-reflection panels at the points on your side walls and ceiling where sound bounces directly to your ears, since these reflections smear stereo imaging and high-frequency detail.
- Corner bass traps, even basic foam or fiberglass ones, placed in the corners behind and beside your monitors to tame the low-frequency buildup that room corners naturally create.
Spend on isolation booths, custom-built rooms, or expensive diffusers only after placement and these two basics are handled. Our home studio mixing guide walks through room setup in more depth if you’re starting from an untreated space.
Pro Tip: If you can’t move your monitors farther from a wall, try angling them slightly instead. A small toe-in adjustment can correct an imaging problem that would otherwise take an afternoon of trial-and-error EQ to chase.
How Do You A/B Against Reference Tracks the Right Way?
Pick references that match your genre and production style, not just songs you love. A reference track works because it shows you what a professionally mixed and mastered version of your kind of music sounds like on the systems you’re testing. Choose two or three commercially released masters, ideally from artists with a similar arrangement density and vocal style to your own track.
Level-matching is the step almost everyone skips, and it ruins the comparison every time. Loudness differences between your rough mix and a polished commercial master will trick your ear into thinking the louder track sounds better, fuller, and punchier, regardless of whether the actual balance is better. Use a loudness meter or simply ride the fader by ear until both tracks sit at a similar perceived volume before you judge anything else.
Once levels match, run the A/B across the same devices from your quick-check sequence:
- On monitors, compare overall tonal balance and stereo width.
- On earbuds or phone speakers, compare midrange clarity and vocal presence.
- In the car, compare low-end weight and whether the mix holds together at road noise volume.
Keep a running note of what the reference does differently at each stage. If your vocal buries on earbuds but the reference’s doesn’t, that’s your fix target, not a vague sense that “it needs more energy.” Our curated reference track shortlist is a solid starting point if you don’t already have go-to comparisons for your genre.
How Do You Fix Muddiness, Boominess, and Thin Vocals?
Each symptom has a specific fix. Guessing with broad EQ moves almost always creates a new problem while it solves the old one.
Muddiness usually lives in the 200 to 500 Hz range, where too many instruments overlap. Instead of scooping that whole band on the mix bus, find the specific instrument causing the clash and apply a narrow subtractive EQ cut, often just 1 to 2 dB wide and deep, right at the offending frequency. A high-pass filter on anything that doesn’t need low end, guitars, vocals, most synths, clears space without you touching a single fader.
Boominess is almost always a low-end buildup from either room reinforcement or an actual mix decision. Check with the mono test first. If the bass thins in mono, you have a phase issue between your bass and kick, and you’ll need to check their phase relationship or nudge one slightly in time. If the bass just feels too big everywhere, a gentle high-pass on non-bass elements combined with multiband compression on the low end will control the buildup without flattening the punch.
Thinness on small speakers is often a midrange problem in disguise. Because most consumer playback systems reproduce midrange frequencies fairly consistently, a mix that’s thin on a laptop or earbuds usually needs more presence in the 1 to 4 kHz range, not more bass. Boosting bass to compensate for thinness on a device that can’t reproduce bass anyway wastes the move entirely.
Vocal inconsistency across systems is a level-automation problem more often than an EQ one. If your vocal disappears on quiet playback but sits fine on monitors, automate the vocal fader up during dense sections instead of relying on a compressor to do all the work. Parallel compression, blending a heavily compressed copy of the vocal underneath the dry track, adds consistency and presence without squashing the natural dynamics.
Stereo issues show up fastest in the mono check. If elements vanish or the image collapses, check phase alignment on doubled or mic’d sources first, then reconsider how wide your stereo effects are pushed. A wide chorus or delay that sounds great in stereo can cancel itself out entirely in mono.
One honest limitation: mastering cannot reliably fix a mix with real phase problems or a fundamentally unbalanced arrangement. Mastering polishes a mix that’s already structurally sound. It doesn’t rebuild one. If your prep work is solid before you even start mixing, you’ll avoid most of these fixes altogether, which our song prep guide covers in detail.
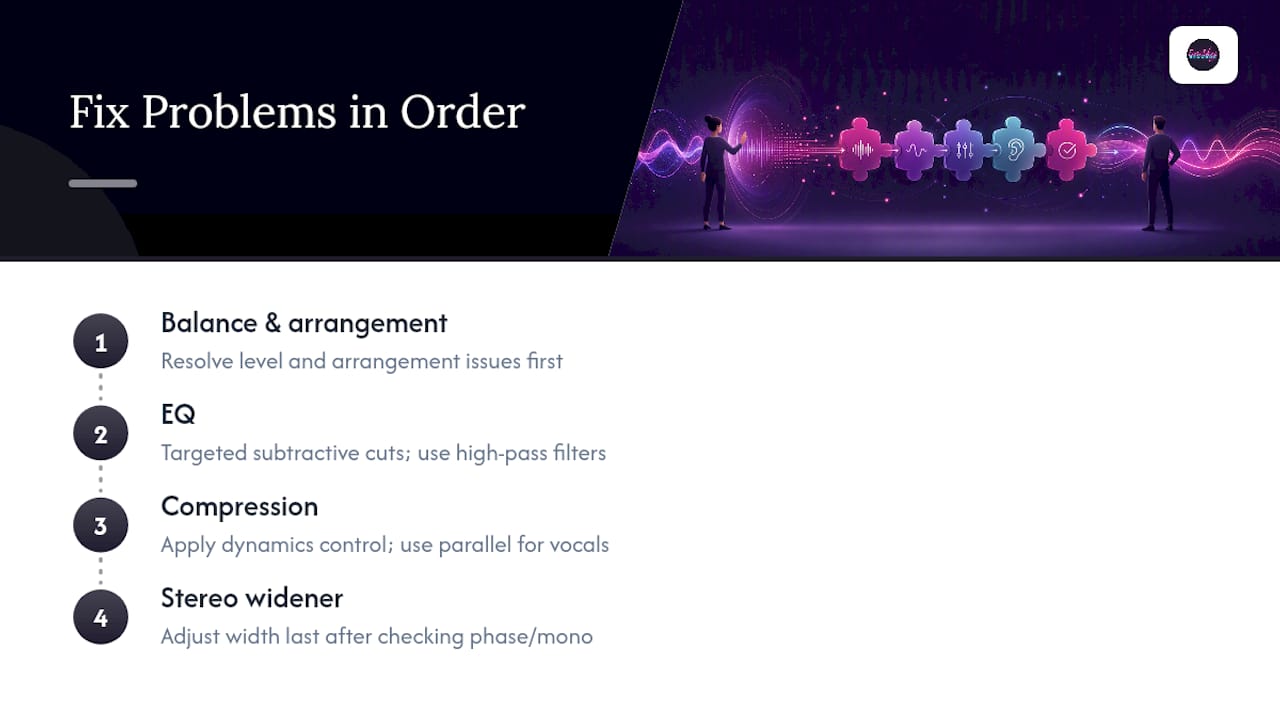
Pro Tip: Solve problems in the order they were created. Fix balance and arrangement issues before EQ, fix EQ before compression, and fix compression before you touch a stereo widener. Reversing that order means you’re building fixes on top of a shaky foundation.
What’s the Final Verification Checklist Before You Call a Mix Done?
A mix is ready when it passes both the numbers and your ears. Run this sequence as your last step before bouncing a final file.
- Check LUFS integrated loudness. Most streaming platforms target around negative 14 LUFS; know where your rough mix sits so you’re not judging loudness against a mastered reference unfairly.
- Check true peak. Keep true peak below negative 1 dBTP to avoid clipping introduced during format conversion or streaming encoding.
- Check phase correlation. A correlation meter reading consistently near positive 1 means your stereo content is in phase; readings drifting toward negative 1 signal a mono-collapse risk.
- Sum to mono and listen. Confirm nothing important disappears or thins dramatically.
- Run the device pass. Monitors, earbuds, laptop speakers, car, in that order, noting anything that breaks at each stage.
- Log what you hear. A simple notes file of what changed on each device turns guesswork into a repeatable process for your next mix.
Combining these technical checks with a multi-device subjective pass is the closest thing to a reliable verification workflow available to a home mixer.
| Check | What “Passing” Looks Like |
|---|---|
| LUFS integrated | Sits near your target platform loudness, not wildly under or over |
| True peak | Stays below negative 1 dBTP |
| Phase correlation | Reads consistently near positive 1, not drifting negative |
| Mono sum | No instrument disappears or thins dramatically |
| Device pass | Vocal and low end hold up on earbuds, laptop, and car |
If every row holds, the mix is ready to move to mastering. If two or more rows fail, go back to the surgical fixes above before you touch a loudness target.
Why Trust This Process (and When to Bring In a Pro)
This routine isn’t theory. It’s the same sequence Twisby Records runs on every client mix, before a single file goes to mastering. With 35-plus years behind the console and Apple Digital Masters certification on delivered work, the checks in this guide, placement, mono, low-volume, multi-device passes, are the baseline, not the finish line, for a professional-grade mix.
DIY mixing solves most translation problems once you know what to listen for. What it doesn’t always solve is time. A novice running this checklist might spend a full weekend chasing one stubborn phase issue that an experienced ear catches in minutes. That’s the real value of hiring out: not magic ears, but pattern recognition built from thousands of mixes. If you’ve run every check here and your mix still won’t sit right, or you’d rather spend your time writing the next song instead of debugging this one, that’s the point to bring in outside help. Our guide to choosing a mixing engineer covers what to look for when you’re ready to make that call.
Ready to Skip the Guesswork?
Running the checklist above will fix a real share of translation problems on your own. But if you’ve placed your monitors, checked mono, matched levels against references, and your mix still falls apart on a phone speaker, the fastest fix is often a second set of trained ears. Twisby Records offers professional mixing and mastering services built around exactly this kind of translation testing, and if your mix is already solid and just needs the final polish, our mastering service applies Apple Digital Masters certified standards before your track goes to streaming.
Why the Cheap Fixes Beat the Expensive Ones
Novices consistently overinvest in the wrong problem. They buy new monitors before moving the ones they have six inches. They buy acoustic panels before finding their room’s actual sweet spot. The research on mix translation keeps landing on the same point: placement and listening habits solve more problems than money does.
The conventional advice oversells “flat room” chasing. A perfectly flat frequency response doesn’t matter if you’re sitting in a bass null created by your room’s dimensions. Fix the seat before you fix the walls.
If there’s one habit worth building before any other, it’s the mono and low-volume check, run on every single mix, every single time, before you touch a fader for “final” tweaks. It costs nothing, takes thirty seconds, and catches the two failures, phase collapse and volume-dependent balance, that cause most translation complaints in the first place. Everything else on this list is refinement. That check is the floor.
Sources
The equal-loudness contour explanation on Wikipedia covers why volume changes what your ears perceive as balanced. Sound On Sound’s guide to mix translation makes the case for prioritizing monitor placement over a perfectly flat room. Audio Issues’ breakdown of multi-device listening explains why checks like the car test are diagnostic tools, not literal targets. Acoustics Insider’s podcast on fixing home studio translation backs the case for cheap fixes before expensive treatment.
- Tips to help your mix translate | Sound On Sound
- Equal-loudness contour — Wikipedia
- Podcast: Fix Home Studio Mix Translation Issues with Simple Tips | Acoustics Insider
FAQ
Why Isn’t My Mix Translating Across Different Systems?
Your mix likely sounds fine on one system because it was only judged on one system, at one volume, in an untreated room. Run the mono, low-volume, and device checks above to find the actual cause instead of guessing.
What Is Mix Translation?
Mix translation is how well a mix keeps its balance, tone, and impact when played on different systems, like car speakers, earbuds, and laptop speakers, instead of only on studio monitors.
What Are the Most Common Mixing Mistakes That Hurt Translation?
The biggest ones are mixing at only one volume, skipping the mono check until after the mix is finished, letting excess low end build up unchecked, and relying on a single reference track without level-matching it first.
Which Playback Systems Are Hardest to Translate To?
There’s no single objectively worst system, since each one alters sound differently. Car stereos, phone speakers, and cheap earbuds each roll off or emphasize different frequency ranges, which is exactly why testing on more than one matters.









