
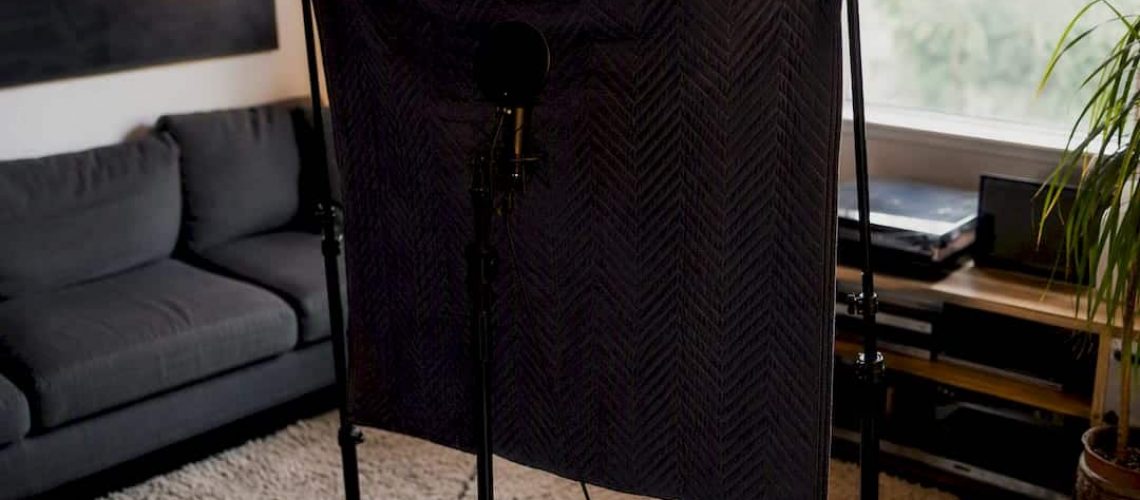

For home vocal recordings, the single biggest sonic improvement per dollar comes from treating first reflections behind the singer and behind the microphone, then adding corner bass traps for low-frequency control. That combination fixes the “boxy,” phased sound that no amount of mixing can undo later, since untreated rooms create resonant reflections that are genuinely hard to remove in post-production.
Start here, tonight, before you touch a compressor plugin:
- Hang a heavy moving blanket or duvet on the wall directly behind the singer.
- Place a portable panel or folded blanket behind the microphone, facing the singer.
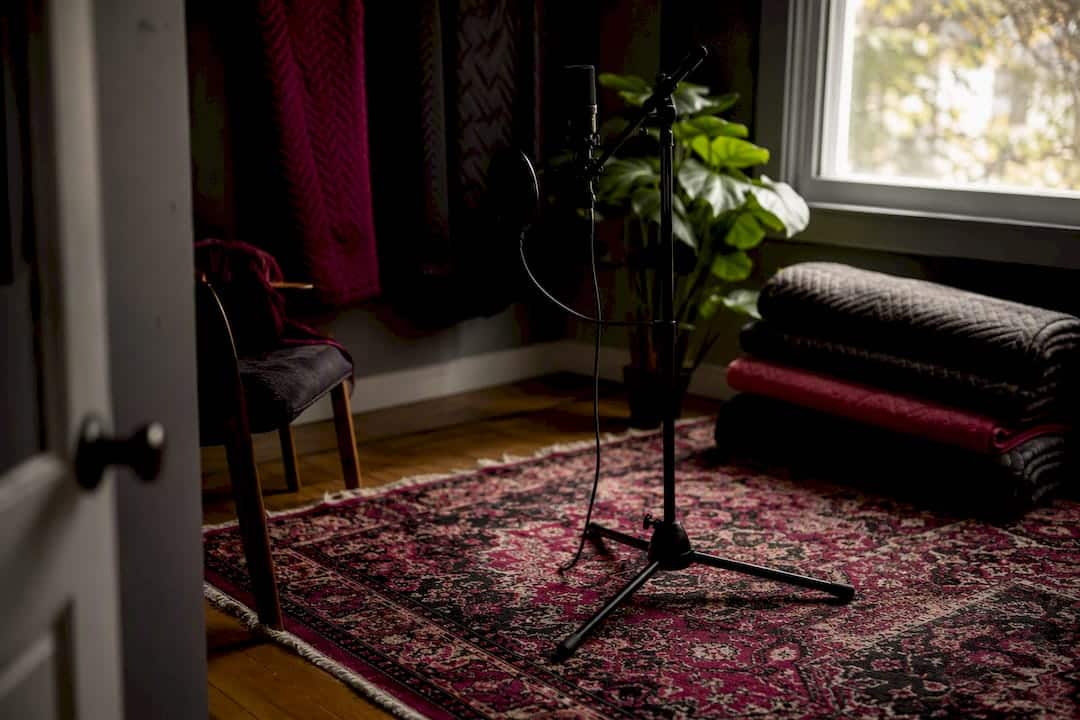
- Lay a thick rug or blanket on the floor under the mic stand to kill floor bounce.
Statistic Callout: Even a modest addition of absorption in a typical bedroom can noticeably reduce the comb filtering that makes vocals sound thin or hollow, according to Cloud Atelier’s room treatment math.
Key Takeaways
The most effective vocal acoustic setup treats first reflections behind the singer and mic before spending money on anything else, then adds corner bass traps only if boominess remains.
| Point | Details |
|---|---|
| Treat first reflections first | Blankets or panels behind the singer and behind the mic fix the most audible problems for the least cost. |
| Use the clap test to diagnose | A long ringing tail means untreated flutter echo; a short dry sound means you’re close to done. |
| Buy thickness, not just panels | 3 to 4 inch broadband absorbers control the 200 to 400 Hz boxy range that thin foam misses entirely. |
| Rugs fix floor reflections cheaply | A single thick rug under the mic stand often removes more harshness than another wall panel. |
| Separate noise problems from acoustics | HVAC hum and background noise need powering down or sealing, not more absorption panels. |
Table of Contents
- Quick Setup Checklist: Step-by-Step Vocal Recording Space Setup
- DIY and Low-Cost Options That Actually Work
- When to Buy Real Panels (and What to Look For)
- How Do Mic Placement and Technique Work With Your Room?
- How Much Acoustic Treatment Do You Actually Need?
- Twisbyrecords’ Studio-Tested Priority List
- Why Room Dimensions and Shape Matter More Than You’d Think
- How Ceiling Height and Floor Reflections Shape Vocal Clarity
- Where Should Your Monitor Speakers Sit Relative to Treatment?
- Don’t Ignore HVAC Hum and Background Noise
- What Actually Moves the Needle on Vocal Recordings
- Sources
- FAQ
Quick Setup Checklist: Step-by-Step Vocal Recording Space Setup
Getting a dry, controllable vocal sound isn’t about buying gear first. It’s about sequencing the fixes in the right order and testing as you go. Here’s the pass we recommend to every artist who asks Twisbyrecords how to fix a boomy home recording.
- Pick your room. Choose the smallest, quietest, most furnished room available. Carpeted bedrooms with closets full of clothes beat tiled bathrooms or empty offices every time. Face the singer toward the long wall, not into a corner, and keep them out of the exact center of the room where standing waves peak.
- Treat behind the singer first. Hang a blanket, duvet, or moving pad on the wall the singer faces away from.
- Treat behind the mic second. A panel or blanket facing the singer catches the reflection bouncing back off that wall before it reaches the capsule.
- Add a rug under the mic stand. Floor reflections cause as much smearing as wall reflections, and they’re the easiest fix on this list.
- Add corner traps if the room still sounds boomy. Save this step for last since it’s usually the least urgent for vocals specifically.
- Record a 15 second test clip and listen on headphones. Comb filtering sounds like a hollow, phasey “swoosh” under the voice. Boominess sounds like a low-frequency ring that hangs after each word.
Mount blankets with a hook and stand-mounted clamp system, not thumbtacks into drywall, and never cover an HVAC vent or block a doorway you’d need in an emergency.
Pro Tip: Clip a blanket to two mic stands positioned a few feet apart to create a fast, adjustable rear baffle you can angle or remove between sessions instead of committing to permanent wall damage.
DIY and Low-Cost Options That Actually Work
You don’t need a contractor to get a usable vocal chain from a spare bedroom. Moving blankets, an old duvet, and a walk-in closet solve most of the problem for under $50, and improvised setups often achieve results comparable to permanent booths at a fraction of the cost.
- Moving blankets and duvets rigged as rear and side baffles work well when hung a few inches off the wall rather than flush against it, since that air gap extends their useful range into lower frequencies.
- Open-closet recording (mic pointed into an open closet full of clothes) often outperforms recording inside the closet, since clothes hanging loosely absorb far more than a cramped, boxy enclosure where the mic sits inches from clothing on every side.
- Portable reflection filters solve reflections arriving from the sides and rear of the mic, but they perform best paired with a separate rear baffle behind the singer, not as a standalone fix.
- Cost-to-frequency tradeoff: thin blankets and foam control highs and upper mids only; low-mid boxiness (200 to 400 Hz) needs denser material, doubled-up blankets, or a few inches of standoff distance from the wall.
When to Buy Real Panels (and What to Look For)
Once DIY materials hit their ceiling, real panels earn their keep, but only if you buy the right thickness. Thin foam tiles from hardware stores provide almost nothing below roughly 250 to 400 Hz, which is exactly the band that makes vocals sound boxy or nasal.
- Choose 3 to 4 inch broadband absorbers (rigid fiberglass or mineral wool) over 1 to 2 inch foam. Thicker panels catch lower frequencies that thin foam simply passes through.
- If budget forces thinner panels, mount them 1 to 2 inches off the wall on furring strips. That air gap lowers the effective absorption frequency without spending more on material.
- For corners, use vertical floor-to-ceiling bass traps rather than small foam wedges. Tri-corner traps spanning wall-to-wall-to-ceiling junctions handle more low-frequency buildup than a single wall-corner trap.
- A ceiling cloud sized roughly 2 by 4 feet, centered above the mic and singer, closes off the last major first-reflection path in small rooms with low ceilings.
- Portable booths trade some absorption efficiency for repeatability. Since the treated zone travels with you, every session in a new room sounds consistent, which matters more than raw performance for touring or multi-location artists.
Statistic Callout: Four 2 inch fiberglass panels deliver substantially more absorption at 1 kHz compared to an equivalent area of foam wedges, per Cloud Atelier’s measurements. That gap is why panel thickness matters more than panel count.
How Do Mic Placement and Technique Work With Your Room?
Treatment and technique aren’t separate problems. They’re the same problem approached from two sides, and fixing mic placement often buys you as much clarity as another panel would.
- Find first reflections with the mirror method. Sit where the singer stands and have someone slide a mirror along each side wall, the ceiling, and the floor. Wherever you see the mic reflected, that’s a reflection point worth treating.
- Set mic distance for the vocal style. Six to eight inches works for controlled pop and R&B vocals; a foot or more suits belting or aggressive rock vocals to avoid proximity buildup and plosive overload.
- Use close miking to improve your direct-to-reverberant ratio. Doubling the distance from 6 to 12 inches cuts direct sound roughly 6 dB relative to room reflections, so moving closer is a legitimate tonal tool, not just a proximity trick.
- Choose a cardioid dynamic mic in an untreated room. Dynamics reject more off-axis room noise than condensers, making them the safer choice until your first reflections are handled. Save condensers for after treatment, when they can capture detail without also capturing the room.
- Compensate for proximity effect with EQ or distance, not by backing off the treatment plan.
How Much Acoustic Treatment Do You Actually Need?
Rules of thumb beat guesswork here. A typical 12 square meter bedroom with a reverb time (RT60) around 0.6 seconds at 1 kHz needs added absorption, such as several fiberglass panels, to bring RT60 down to a vocal-friendly level.
| Room Condition | What to Do |
|---|---|
| Slap echo on hand clap | Add first-reflection panels behind singer and mic |
| Boomy, ringing low end | Add corner bass traps, 2 to 4 per room |
| Dead but boxy sound | Reduce coverage; you’ve likely over-damped highs while leaving low-mids untouched |
| Comb filtering on headphones | Increase panel-to-wall spacing or add thickness |
Clap once, sharply, in the middle of the room. A long, ringing tail means untreated flutter echo. A short, dry “tock” with no ring means you’re close to done. For vocal booths, aim for 40 to 60 percent wall coverage; going much higher risks an unnaturally dead, claustrophobic sound that makes performers sing flatter and quieter than they would in a lively room, per guidance on treating vocal booths and live rooms.
Twisbyrecords’ Studio-Tested Priority List
We tell every independent artist the same thing before they open a DAW: clean capture beats clever mixing every time. A mix engineer can sculpt a great vocal take. No plugin chain fully undoes comb filtering baked into the recording, which is why we push clients toward fixing acoustics before chasing gear.
Our priority order on a client session:
- Confirm the room passes a basic clap test before we ever touch a preamp.
- Check that gain staging isn’t clipping before spending time on placement, since clipped vocals can’t be fixed by any amount of acoustic treatment.
- Balance dryness against comfort. A booth so dead it feels like singing into a pillow tends to produce stiff, quieter performances.
- Bring in remote mixing or mastering once the room is handled and the performance is strong. That’s the point where professional engineering adds the most value.
A vocal take recorded in a slightly imperfect but comfortable room, sung with full commitment, will always mix better than a technically perfect take sung stiff and quiet because the singer felt boxed in.
Why Room Dimensions and Shape Matter More Than You’d Think
A perfect cube is the worst possible shape for recording vocals. When length, width, and height are equal or close multiples of each other, sound waves reinforce the same frequencies over and over, creating exaggerated bass buildup and dead spots that no amount of surface treatment fully cures. This is why a lot of home studios in square spare bedrooms fight boominess that seems to resist every panel added.
Rectangular rooms with non-matching dimension ratios distribute standing waves more evenly across the frequency spectrum, which is part of why professional studios avoid square control rooms entirely. You can’t usually change your room’s shape, but you can work with it: position the singer and mic away from the exact center and away from corners, where modal buildup peaks hardest. Diagonal placement across a square room, rather than facing a flat wall straight on, sometimes reduces the worst resonances without adding a single panel.
Room volume matters too. A small closet under 20 square feet reflects sound so quickly that reflections arrive almost simultaneously with the direct signal, creating a boxy, compressed tone that treatment alone can’t fully open up. A slightly larger room, even a modest 10 by 12 foot bedroom, gives reflections more time to decay naturally and gives your acoustic treatment more room to actually work. If you have a choice between two rooms, choose the one with irregular dimensions and a bit more air over the smallest, most symmetrical option.
How Ceiling Height and Floor Reflections Shape Vocal Clarity
Low ceilings are an underrated problem in home vocal setups. Standard 8 foot ceilings put the reflection point close enough to the mic that it arrives almost instantly, which is exactly the kind of early reflection responsible for comb filtering and a thin, phasey top end. Rooms with 9 or 10 foot ceilings give that reflection more travel time, which naturally softens its impact even before you add a ceiling cloud.
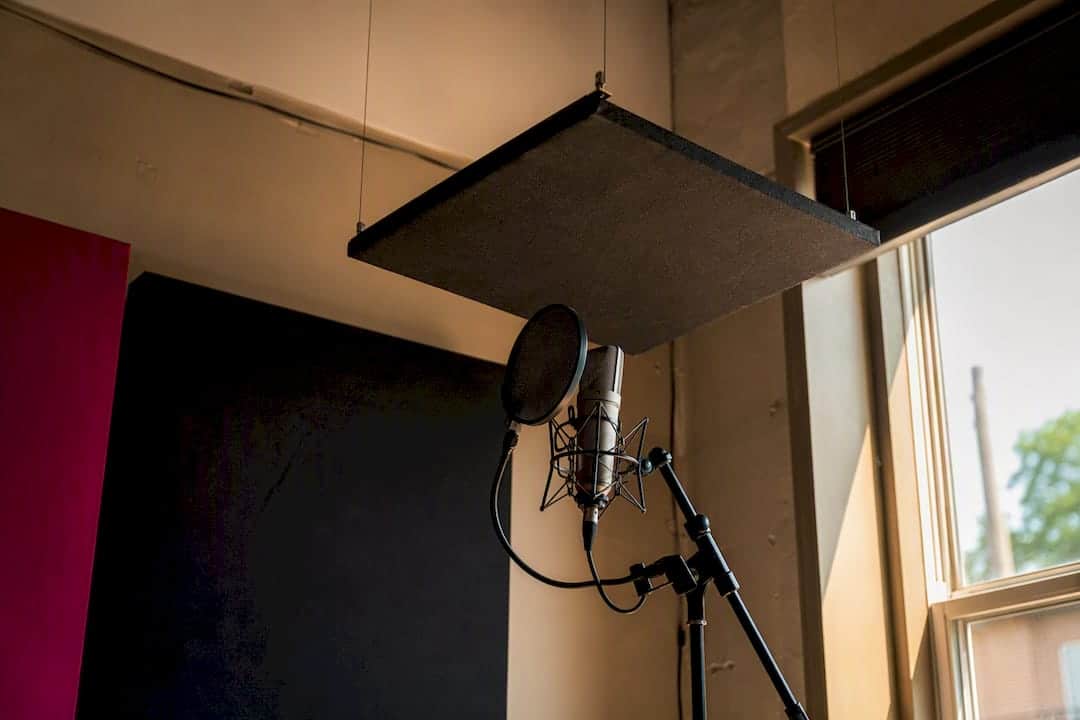
If your ceiling is standard height or lower, a ceiling cloud isn’t optional. It’s one of the highest-leverage single additions available, because it closes off a reflection path most home recordists never think to treat.
Floors deserve equal attention, and this is the fix people skip because it feels too simple to matter. Hardwood, tile, and laminate floors bounce sound almost as aggressively as a bare wall, sending a hard reflection straight up into the mic capsule from just a few feet away. A single thick area rug under the mic stand and the singer’s feet often removes more harshness than an entire wall of foam. If you’re recording over hard flooring with no rug budget yet, even a folded moving blanket laid flat under the mic stand makes an audible difference in a five-minute test.
Where Should Your Monitor Speakers Sit Relative to Treatment?
Monitor placement is easy to overlook once the vocal booth side of the room is sorted, but it affects your judgment of the very recordings you just made. Speakers should sit outside the direct treated zone used for tracking, ideally against or near the front wall, forming an equilateral triangle with your listening position, not crammed into the same corner as your bass traps.
If your monitors fire directly into the same first-reflection points you treated for vocals, you’re now listening through the room’s coloration while mixing, which can lead you to make EQ decisions that sound wrong the moment you play the mix back on headphones or in a car. Treat the reflection points behind and beside your mix position separately from the vocal booth zone, even in a single small room serving both purposes. A pair of small side panels flanking your monitors, plus a rug or panel at the first reflection point on each side wall, keeps your mixing judgment honest.
Keep monitors and any vocal absorption on independent, intentional axes. A room set up only for tracking, with panels angled to catch vocal reflections, won’t necessarily give your ears an accurate picture when you switch to mixing in the same chair.
Don’t Ignore HVAC Hum and Background Noise
Acoustic treatment controls reflections. It does nothing for noise that’s already in the room before the singer opens their mouth, and that distinction trips up a lot of home recordists chasing panels when the real problem is a rattling air vent. HVAC systems, refrigerators, and even fluorescent light ballasts introduce a low, steady hum that a cardioid mic picks up regardless of how well the walls are treated.
Before adding another panel, run a 30 second silent recording with everything in the room powered on normally, then listen on headphones at a higher-than-usual volume. If you hear a hum, buzz, or rumble, treatment won’t fix it. Turning off the HVAC system and any nearby appliances during takes, then turning them back on between takes, solves this at zero cost.
Weatherstripping around a door, a draft snake at the base, and a rug to break up hard floor reflections handle both noise leakage and acoustic reflection at once, which makes them some of the best dollar-for-dollar investments in this entire guide. If your recording space shares a wall with a noisy street or a housemate’s living room, that’s a soundproofing problem, distinct from acoustic treatment, and it usually requires mass (extra drywall, door sweeps, sealed gaps) rather than absorption panels.
What Actually Moves the Needle on Vocal Recordings
Most advice on this topic front-loads product recommendations before addressing the room itself, and that ordering costs readers money. The research behind this guide points in the other direction: room and placement decisions, which cost nothing, solve a larger share of the problem than any panel purchase.
The conventional wisdom oversells foam. A wall of egg-crate foam looks like serious treatment and does almost nothing below 400 Hz, which is precisely the range that makes home vocals sound boxy. If you take one thing from this guide, let it be that thickness and placement beat quantity. Four properly placed 2 inch panels outperform a dozen foam tiles.
The other underrated factor is performer comfort. A room damped into total silence often produces a worse take than a slightly live room where the singer feels free to commit. Twisbyrecords sees this constantly in client sessions: the technically “correct” acoustic setup sometimes produces a flatter, quieter performance than a room with a little life left in it. Chase clarity, not silence. Then bring in real mixing and mastering once the capture is solid.
Sources
- Acoustic treatment for voice-over work & vocal booths — Acoustics Insider
- SE Electronics Reflexion Filter — Sound On Sound
- Recording vocals at home — Cloud Atelier
FAQ
Is Acoustic Treatment Worth It for Home Vocal Recording?
Yes. Untreated rooms introduce reflections that create boxy, phased, or thin vocal tones that are very difficult to correct after the fact, so a modest amount of treatment before recording saves far more time than fixing it in the mix.
What Are the Two Primary Types of Acoustic Treatment?
Absorption and diffusion are the two primary types. For home vocal recording, absorption behind the singer and microphone takes priority, with diffusion added later for a more balanced room.
How Much Acoustic Treatment Do I Need for Vocals?
A typical 12 square meter bedroom needs roughly four 2 inch fiberglass panels, about 12 sabins, to bring RT60 at 1 kHz down from 0.6 seconds to around 0.25 seconds. Use the clap test to confirm: a short, dry sound means you’ve done enough.
Do Vocal Isolation Booths and Reflection Filters Actually Work?
They help, but reflection filters perform best paired with a separate baffle behind the singer rather than used alone, since a filter alone only addresses reflections near the mic, not reflections bouncing off the wall behind the performer.
What’s the Fastest, Cheapest Fix for a Boomy Bedroom Recording?
Hang a heavy moving blanket or duvet behind the singer and lay a thick rug under the mic stand. Both changes cost under $50 combined and address the two most audible reflection points in a typical bedroom.









