
TL;DR:
- Consistent, dry vocal recordings are essential for professional mixing, and room treatment outweighs gear upgrades.
- Proper mic placement, room management, and careful level setting lead to better performances and easier post-production.
Record dry, close, and controlled — that’s the whole game. When you capture clean vocal takes at home, a mixing engineer can shape them into something commercial. When you don’t, no amount of processing saves a roomy, clipped, or inconsistent performance. Twisbyrecords, with 35+ years of experience and Apple Digital Masters certification, sees this difference on every project.
Quick-start checklist:
- Mic 6–12 inches (15–30 cm) from your mouth
- Pop filter 2–4 inches from the capsule
- Record a few seconds of room tone before every session
- Aim for vocal peaks between −18 and −12 dBFS
- Export 24-bit WAV, dry, with clear file names
Table of Contents
- What you need to record vocals at home today
- How to pick the right mic and place it for the cleanest take
- Why your room matters more than your mic
- How to set levels and monitor without ruining the take
- How to run a session and comp like an engineer
- What files to send your mixing engineer
- DIY finishing vs. hiring a pro: a quick decision check
- How to manage headphone bleed during tracking
- What to look for in an audio interface
- Vocal warm-up and health before you hit record
- Using low-cut filters and light compression during recording
- Key Takeaways
- The one thing that changes everything about home tracking
- Twisbyrecords: professional finishing for your home-recorded vocals
- FAQ
What you need to record vocals at home today
Minimum viable gear, in priority order:
- Microphone: dynamic for untreated rooms, large-diaphragm condenser if you can treat the space
- Audio interface: phantom power (+48V), at least one combo XLR input, headphone output
- Headphones: closed-back only (Sony MDR-7506 or Audio-Technica ATH-M50x are reliable standards)
- Pop filter: any nylon or metal mesh filter; a DIY nylon-stocking frame works fine
- Mic stand and XLR cable: floor stand preferred over desk stand for isolation
- DAW: set to 24-bit, 44.1 kHz or 48 kHz; create an armed mono track, enable direct monitoring, save a session template
Signal flow: mic → pop filter → XLR → interface → DAW. Enable +48V phantom power only for condensers. Check our honest gear recommendations if you’re still deciding what to buy.
How to pick the right mic and place it for the cleanest take
Dynamic vs. condenser: If your room is untreated, a dynamic mic is the smarter call. Its moving-coil design naturally rejects room reflections and handles loud transients without harshness. A large-diaphragm condenser captures more detail and air, but that sensitivity also picks up every flutter and flutter in an untreated space. Room acoustics often matter more than mic price at the entry-to-mid level, so match the mic to your room, not to a spec sheet.
Exact placement:
- Start 6–12 inches from the capsule; closer (3–4 in) boosts low-end via proximity effect — use it intentionally, not by accident
- Beyond 10 inches, you start capturing room reflections that are hard to remove later
- Position the mic slightly above nose level, angled down toward the mouth — this reduces plosive blasts and sibilance naturally
Pop filter and angle: Place the filter 2–4 inches from the mic and tilt the mic 15–20° off-axis. That small angle cuts harsh sibilants without losing vocal clarity, because sibilant energy is highly directional while fundamental vocal tone radiates broadly.
Polar pattern and mounting: Cardioid is the standard for home vocal recording — it rejects sound from behind the capsule. Always use a shock mount to isolate the mic from stand vibration and floor rumble.
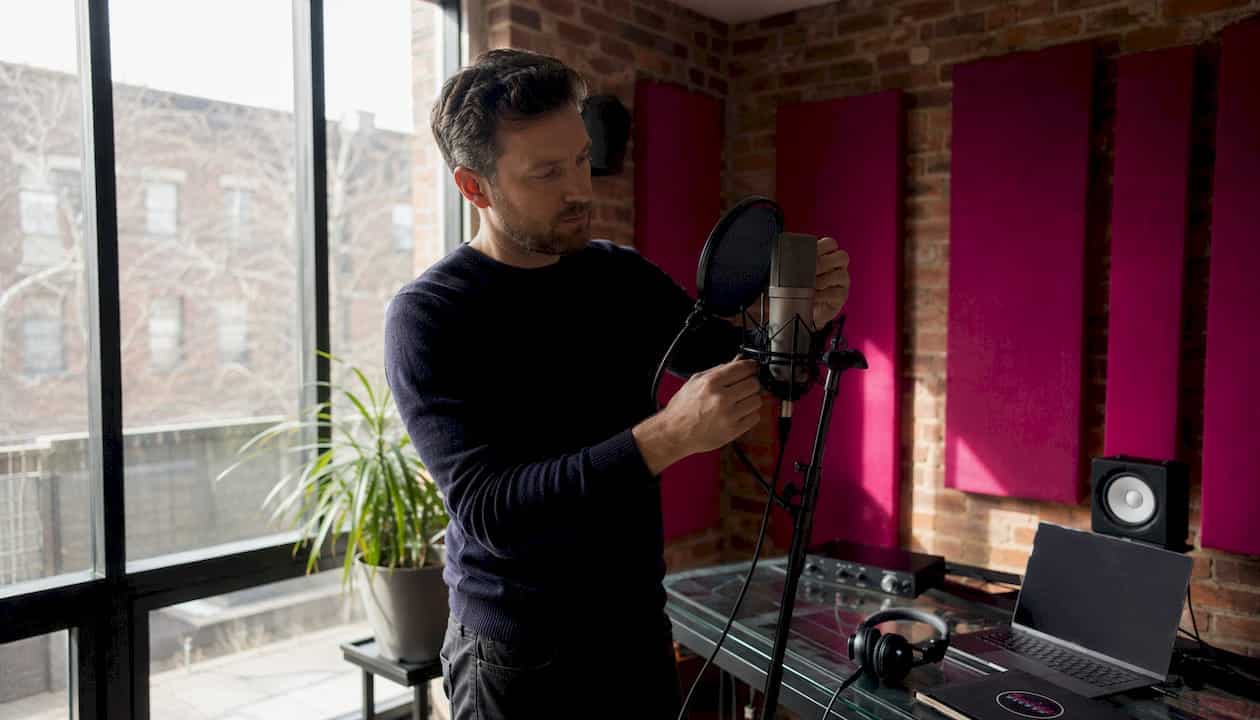
Pro Tip: Mark the floor with tape at your ideal distance and use the pop filter as a physical depth stop. Distance drift between takes is one of the most common problems mixing engineers deal with on home recordings.
Why your room matters more than your mic
A lower-cost mic in a treated space outperforms an expensive mic in a reflective room — consistently. Treat the room before you spend another dollar on gear.
DIY fixes that actually work:
- Record in an open closet with hanging clothes; point the mic toward the clothes, not into the back wall — avoid fully enclosing yourself, which creates resonant boxiness
- Hang thick blankets behind and to the sides of the mic
- Put a rug under the recording position; draw curtains over windows
- Drape a blanket over a reflective desk if it’s in the mic’s pickup zone
Reflection filters (like the Primacoustic VoxGuard or Aston Halo) help when full-room treatment isn’t possible, but they only address reflections from behind the mic. You still need absorption behind and around the singer.
Placement in the room: Avoid the geometric center, where standing waves converge. Offset slightly toward a treated wall, with the singer facing into the room. Don’t record with your back to a bare wall or a window.
Pro Tip: Capture 3–5 seconds of room tone (silence, no singing) at the start of every session. That noise profile makes digital noise reduction far more effective in post than guessing the noise floor later.
How to set levels and monitor without ruining the take
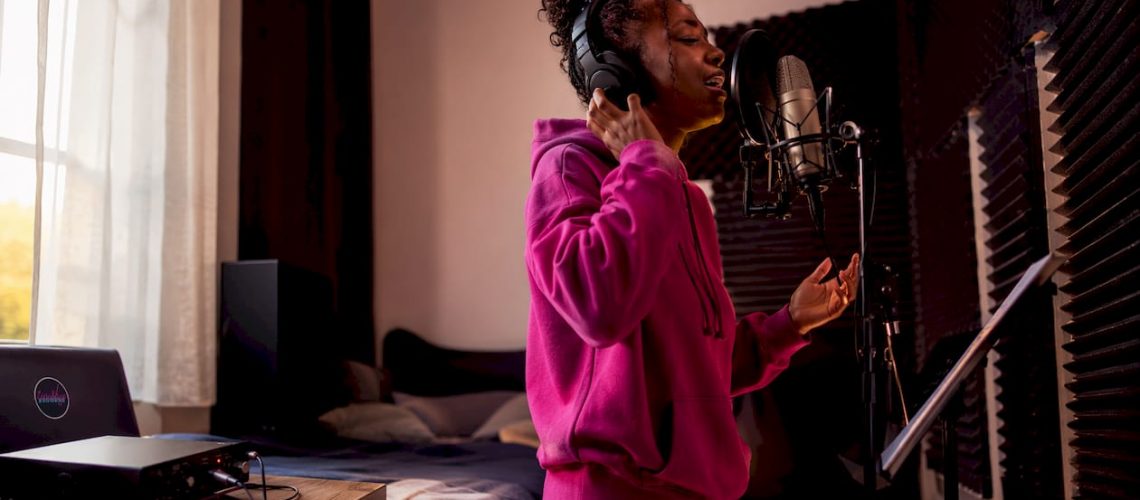
Clipping is permanent. Aim for vocal peaks between −18 and −12 dBFS — that’s the industry-standard headroom range for 24-bit recording. You don’t need hot levels; 24-bit gives you plenty of resolution at conservative gains.
Gain-staging checklist:
- Do a loudest-phrase test before committing to a take
- Watch DAW peak meters; back off the interface gain if you see red
- Prefer too much headroom to too little — quiet takes can be brought up; clipped takes cannot
- Kill HVAC, close windows, and record during quiet hours to control the noise floor
Monitoring: Always use closed-back headphones during tracking. Open-back headphones and studio monitors leak into the mic and ruin the take. Keep headphone volume moderate — singing too loud to hear yourself over a blasting mix pushes your performance in ways that hurt consistency. Enable direct monitoring on your interface or set your DAW buffer low (64–128 samples) to keep latency under control. See our guide on stopping vocal clipping for a deeper look at gain decisions.
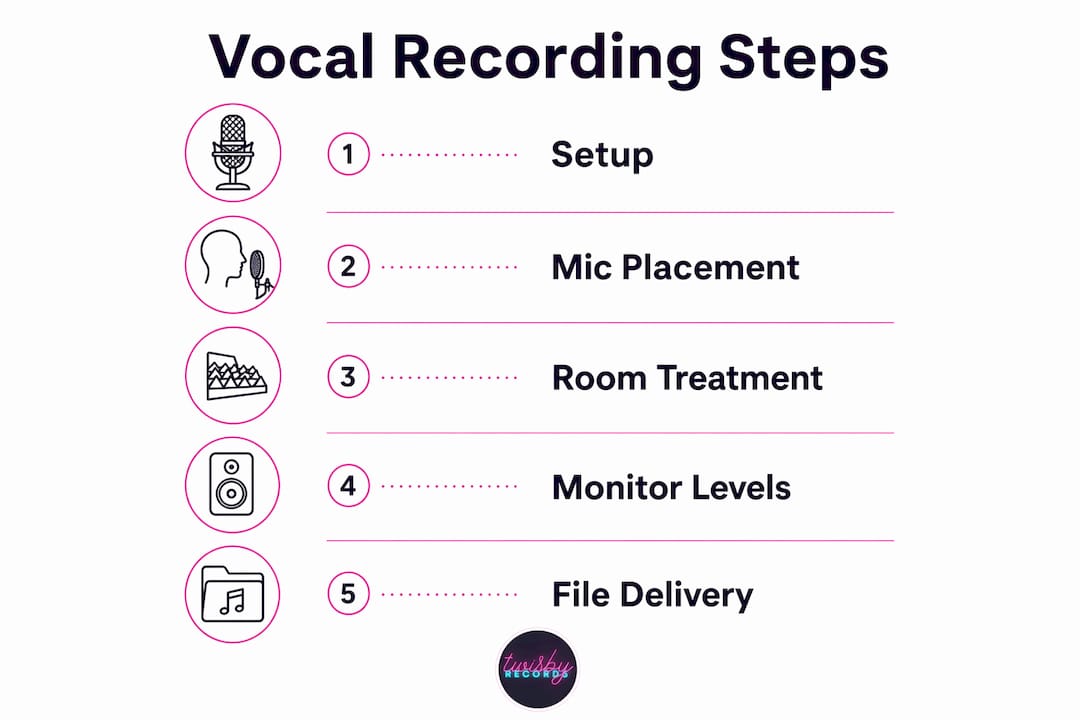
How to run a session and comp like an engineer
Warm up before you hit record. A cold voice produces inconsistent takes and strains faster. Then:
- Soundcheck first: confirm levels, headphone mix, and room tone capture
- Record 3–5 full takes of the complete song; schedule 5–10 minute breaks after every 3–4 takes to avoid fatigue
- Mark favorites in real time using your DAW’s take-lane or color system — don’t rely on memory
- Comp at breath points: crossfade between phrases at natural breath gaps, not mid-word
- Ride distance: encourage stepping back slightly on loud phrases to prevent level spikes and proximity-effect surges
Consistent mic distance is what makes comping possible. If proximity effect shifts between takes, compression and automation in the mix become exponentially harder to set. Keep that pop filter in place as your depth reference.
Pro Tip: If a section keeps going wrong, reduce the reverb in your headphone monitor mix. Too much reverb masks pitch and timing problems in real time, so you don’t hear them until playback.
For guidance on stacking doubles and harmonies once your lead is solid, the vocal layering guide walks through exactly how to build that out.
What files to send your mixing engineer
Deliver clean, dry stems — no reverb, no heavy compression printed in. The engineer’s chain is what creates the commercial sound; baked-in effects take control away from them.
Format: 24-bit WAV or AIFF, at the session’s native sample rate (44.1 kHz or 48 kHz). Confirm the engineer’s preference before exporting.
Stem naming examples:
| File | Contents |
|---|---|
voice_lead_comp_v1.wav |
Final comped lead vocal |
voice_lead_alt_chorus_v1.wav |
Alternate chorus take for reference |
voice_double_verse_v1.wav |
Doubled vocal, verse only |
room_tone.wav |
5-second silence capture from session |
Also include: a plain-text session notes file with tempo, key, tuning notes, lyrics, and your preferred vocal treatment direction. Add a reference track (a released song with the vocal sound you’re after). See the full song prep for mixing guide for a complete checklist.
DIY finishing vs. hiring a pro: a quick decision check
Run your raw vocal through these three questions:
- No room echo or boxiness? If you hear the room on playback, the stem needs treatment before mixing, not after.
- No clipping? A single clipped peak in the lead vocal usually means a re-record.
- No persistent background noise? Hum, HVAC, or traffic that runs under the vocal will fight every processing move the engineer makes.
If all three pass, DIY mixing is realistic for a demo or low-stakes release. For a commercial release, professional mixing and mastering delivers the EQ, compression, saturation, and reverb chain that streaming platforms expect — and saves weeks of trial-and-error. Small improvements in room treatment and mic technique often return more than expensive plugins. When the goal is a release that competes on Spotify or Apple Music, the case for professional finishing is strong.
How to manage headphone bleed during tracking
Bleed happens when sound from your headphones leaks into the mic. Closed-back headphones are the primary fix — their sealed ear cups contain the monitor mix. Beyond that, keep headphone volume at the lowest level that still lets you perform confidently. The louder the mix in your ears, the more signal escapes around the cups.
One technique: singers in professional sessions often wear one ear on, one ear off, so they can hear their natural voice alongside the track. This works well for pitch accuracy and reduces the urge to crank the headphone volume. If bleed persists, check that your headphone cable isn’t touching the mic stand — physical contact transmits vibration directly.
What to look for in an audio interface
For home vocal recording, the preamp quality in your interface matters more than the number of inputs. A clean, low-noise preamp captures the full dynamic range of your performance without adding hiss or coloration at moderate gain settings.
Key features to prioritize:
- Phantom power (+48V): required for condenser mics
- Low-latency direct monitoring: lets you hear yourself in real time without DAW delay
- High-impedance (Hi-Z) input: useful if you also record guitar direct
- At least one combo XLR/TRS input: handles both mic and line-level sources
- USB-C or Thunderbolt connectivity: faster data transfer and lower latency on modern computers
Interfaces from Focusrite, Universal Audio, and PreSonus cover the range from entry-level to professional. At the entry level, the Focusrite Scarlett series is the most widely used starting point among independent musicians in the US.
Vocal warm-up and health before you hit record
A cold voice is an inconsistent voice. Spend 10–15 minutes warming up before any session:
- Lip trills and humming: gentle vibration loosens the vocal cords without strain
- Sirens (gliding up and down your range): opens the full register before you push it
- Tongue twisters spoken at tempo: activates articulation muscles that affect consonant clarity on record
- Hydration: drink room-temperature water; avoid cold drinks, dairy, and caffeine before tracking — all affect mucus and cord flexibility
Keep sessions under 90 minutes of active singing. Fatigue degrades pitch accuracy and consistency faster than most musicians expect, and a tired take costs more time in editing than a short break would have. If your voice feels strained, stop. Pushing through produces takes you’ll delete anyway.
Using low-cut filters and light compression during recording
Two signal-processing moves are worth making at the tracking stage, and both are about removing problems, not adding character.
Low-cut (high-pass) filter: Engage the low-cut switch on your mic or interface, typically set around 80–100 Hz. This removes subsonic rumble, HVAC hum, and floor vibration before they hit your DAW. It does not affect vocal warmth at those frequencies — the fundamental of most voices sits well above 100 Hz. If you’re using proximity effect intentionally, be conservative with the cutoff point.
Light input compression: Optional, and only if you understand what you’re setting. A gentle ratio (2:1 or 3:1) with a slow attack and moderate release can smooth out extreme dynamic swings and help you monitor your performance more accurately. The risk: heavy compression printed to the recording is permanent. If you over-compress on the way in, the mixing engineer loses the dynamic range they need to shape the vocal. When in doubt, record clean and let the engineer handle compression in the mix.
Key Takeaways
Clean, dry, and consistent home vocal takes are the single most important thing you can deliver to a mixing engineer — everything else is fixable, but a roomy or clipped stem is not.
| Point | Details |
|---|---|
| Mic distance | Start 6–12 inches from the capsule; use pop filter 2–4 inches from the mic, angled 15–20° off-axis. |
| Room first | A treated room outperforms an expensive mic in an untreated space — hang blankets and use an open closet before upgrading gear. |
| Gain and headroom | Aim for vocal peaks between −18 and −12 dBFS; never let the signal clip. |
| Session workflow | Record 3–5 full takes, capture room tone, mark favorites, and comp at breath points. |
| Twisbyrecords | Send dry 24-bit WAV stems with session notes to Twisbyrecords for professional mixing, mastering, and Apple Digital Masters delivery. |
The one thing that changes everything about home tracking
Most of the home-recorded vocals I receive fall into two categories: takes that are ready to shape, and takes that need to be fixed before they can be shaped. The difference almost never comes down to the microphone. It comes down to whether the artist understood that clean, dry tracking is the engineer’s raw material — and treated it accordingly.
The conventional wisdom says “get a better mic.” What actually moves the needle is getting a better room and a more consistent performance. A vocal recorded in a closet with hanging clothes, at a steady 8-inch distance, with peaks sitting at −15 dBFS, gives a mixing engineer full control. A vocal recorded on a $500 condenser in a bare bedroom, with the singer drifting 4 to 14 inches from the capsule, gives them a problem.
The artists who get the fastest turnaround and the best results from Twisbyrecords are the ones who send stems that don’t require corrective work before creative work can begin. That’s not about gear. That’s about understanding what the engineer needs — and this guide gives you exactly that.
Twisbyrecords: professional finishing for your home-recorded vocals
You’ve done the hard part — captured controlled, dry, pro-ready takes at home. The next step is getting them mixed and mastered to a standard that competes on streaming platforms.

Twisbyrecords offers remote mixing and mastering services built specifically for independent musicians. Every project comes with Apple Digital Masters certification, personalized collaboration, and a fast turnaround that artists consistently highlight. Send your dry 24-bit WAV stems, a session notes file, and a reference track, and Twisbyrecords handles the rest — EQ, compression, saturation, reverb, and final master delivery in the format streaming platforms require. View the full services overview to see what’s included and get a quote for your project.
FAQ
How far should I stand from the mic when recording vocals?
Start 6–12 inches (15–30 cm) from the capsule. Closer adds low-end warmth via proximity effect; farther captures more room sound, which is harder to remove in the mix.
Should I use compression while recording vocals at home?
Light compression (2:1 to 3:1 ratio) is fine for monitoring comfort, but record clean with headroom between −18 and −12 dBFS. Heavy compression printed to the stem is permanent and limits what a mixing engineer can do.
What’s the best mic type for home vocal recording?
It depends on your room. A dynamic mic handles untreated spaces better because it rejects reflections naturally. A large-diaphragm condenser captures more detail but requires acoustic treatment to sound its best.
What file format should I send to a mixing engineer?
Deliver 24-bit WAV files at your session’s native sample rate (44.1 kHz or 48 kHz), dry and without printed effects. Include a session notes text file and a reference track alongside your stems.
When should I hire a professional mixing engineer instead of doing it myself?
If your vocal stems pass three checks — no room echo, no clipping, no persistent background noise — DIY mixing is viable for demos. For commercial releases, professional mixing and mastering from a service like Twisbyrecords delivers the processing chain that streaming platforms expect.