
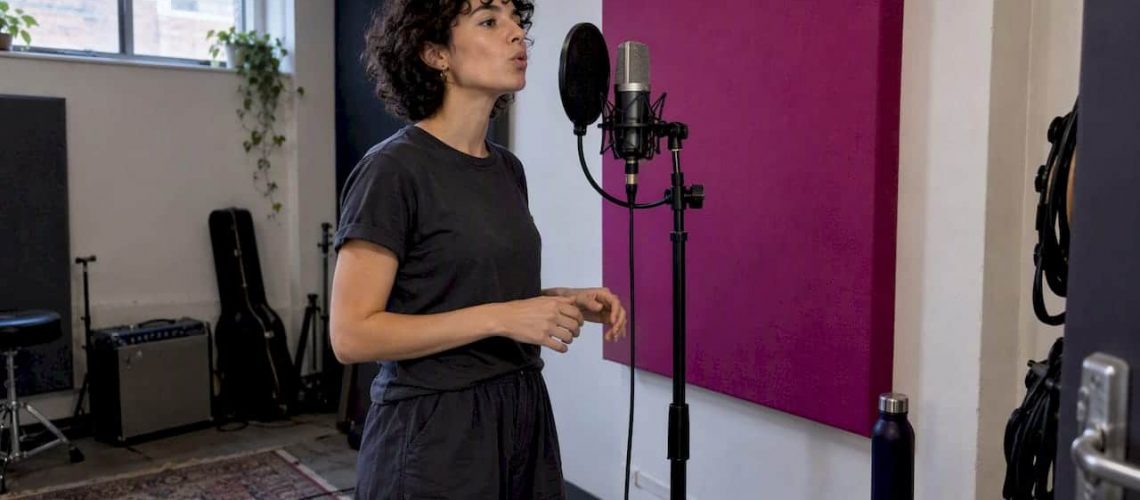

Before any recording or creative session, run through seven categories: logistics, materials, technical settings, room prep, performer readiness, monitoring, and deliverables. We built a copyable one-page checklist below that follows UMG archival guidance and studio practices, so paste it into your notes app now and fill it in as you prep.
TL;DR:
- Lock down session logistics, including date, timing, rates, and attendee contacts, with written confirmation at least a day in advance to prevent delays.
- Send all reference tracks, lyrics, instrumental files, and guide vocals ahead of time to avoid wasting studio hours on unclear or missing assets.
- Confirm technical settings such as sample rate, gain, routing, and check for clipping through test recordings before capturing the final performance.
- Prepare the room by muting noise sources, treating reflections with soft furnishings, and ensuring consistent monitoring to support clear vocal recordings.
- Prioritize performer hydration, rest, and warm-up routines, as they directly impact vocal quality far more than equipment or environment adjustments.
Table of Contents
- 1. Confirm session logistics and administration
- 2. Get your materials and creative assets ready
- 3. Lock in technical settings and audio levels before you track
- 4. Prep the recording environment and room
- 5. Help performers arrive vocally and mentally ready
- 6. Check the headphone mix and monitoring setup
- 7. Agree on deliverables, file naming, and session documentation
- 8. Your one-page printable session checklist
- 9. Twisby Records: practical workflow tips from studio practice
- What this checklist gets right, and where most advice falls short
- Let Twisby Records handle the technical side for you
- FAQ
- Sources
1. Confirm session logistics and administration
Nail down the business side before anyone touches a fader. A session that starts late or runs over budget wastes everyone’s time and money, and most of those problems trace back to details nobody confirmed in writing.
Here’s what to lock down the day before:
- Date, start time, end time, and total booked hours, written down where both sides can see them.
- Rate, deposit paid, overtime policy, and cancellation terms, confirmed in writing.
- Who’s attending (engineer, producer, featured performers) with working contact numbers for each.
- Arrival protocol for in-person sessions, or platform login details and a backup contact method for remote ones.
A five-minute confirmation email prevents the awkward conversation about who owes what when the clock runs past the agreed hours.
2. Get your materials and creative assets ready
Your engineer can only move as fast as the files you hand over. Walking in with scattered voice memos and no reference point forces the engineer to guess at your intent, which burns studio time you’re paying for.
Send these ahead of the session, not during it:
- Reference tracks and a short note on the mood or energy you’re chasing.
- Finalized lyrics, with alternate versions or ad-libs clearly labeled.
- Instrumental files in WAV format with BPM and key marked on the file name.
- Demos or guide vocals, with the specific parts you plan to record flagged.
Our guide on recording vocals like a pro walks through how to organize these assets so your engineer can start tracking the moment you arrive. If you’re layering harmonies or doubles, our breakdown of vocal layering explains which parts to prep and how to label them so nothing gets lost between takes.
3. Lock in technical settings and audio levels before you track
This is the step that causes the most irreversible damage when skipped. Get it wrong and you can’t fix it later, no matter how good the mix engineer is.
Work through this order every time:
- Agree on sample rate and bit depth before anyone presses record. SoundGirls’ recording hygiene guidance recommends 48kHz when there’s any chance the track lands in video or film, while 44.1kHz works fine for music-only releases. Pick one and stick with it across every collaborator’s session, since mismatched rates cause pitch and timing artifacts when files get consolidated later.
- Set your preamp gain and run a loud-section test take before the real performance.
- Confirm routing, clocking, buffer size, and available disk space so nothing stalls mid take.
- Record a short test file and listen for clipping, hum, or latency artifacts before committing to a full take.
According to SoundGirls, preamp peaks should land around -12 dB to -6 dB to leave headroom without inviting noise into quiet passages. For a deeper look at how clipping happens and how to avoid it, see our piece on stopping vocals from clipping.
4. Prep the recording environment and room
A quiet room matters as much as a good microphone. Every bit of noise you capture now is noise your mix engineer has to fight later, and some of it never fully comes out.
Before anyone sings or plays:
- Listen for HVAC hum, computer fans, and outside traffic, then pause or mute what you can.
- Add rugs, curtains, or blankets to tame reflections when real acoustic treatment isn’t available.
- Turn off phones and mute notifications, and schedule the session away from known noisy windows like trash pickup or rush hour.
- For remote sessions, confirm bandwidth, the platform you’re using, and a file-transfer fallback in case the connection drops.
Pro Tip: Clap once in the room before you record. If you hear a sharp, ringing echo, add soft furnishings until the clap sounds flat and dry.
Our gear recommendations for home recording cover affordable treatment options if your space needs more than blankets and rugs.
5. Help performers arrive vocally and mentally ready
The voice doesn’t respond to last-minute fixes the way gear does. According to the University of Minnesota’s Lions Voice Clinic, vocal fold hydration is a systemic process, so drinking water in the booth doesn’t substitute for hydrating well in the days leading up to the session.
Build these habits in before you ever walk in:
- Hydrate steadily for several days before tracking, not just the morning of.
- Sleep well and skip dairy or heavy meals right before you record.
- Warm up gently with humming, lip trills, and easy scales, and pace vocal-heavy sections with real breaks.
- Tell your engineer ahead of time what temperature, seating, and break schedule you need to perform your best.
A short prep call or email covering expectations and expressive notes, as one vocal coach puts it, cuts down on confusion and helps the engineer set mic placement and pacing before you even start.
6. Check the headphone mix and monitoring setup
A cluttered cue mix is one of the most overlooked reasons a performance sounds stiff. If the instrumental buries the vocal in the performer’s headphones, they’ll push too hard or drift off pitch trying to hear themselves.
Before the first real take:
- Simplify the cue mix and pull down mastered instrumentals that mask the voice.
- Confirm talkback and headphone levels, and keep reverb on the vocal cue minimal.
- Check for headphone bleed when tracking multiple sources and adjust isolation as needed.
Our post on vocal pocketing explains how arrangement and headphone balance affect timing and feel, which matters just as much as the mic you’re using.
7. Agree on deliverables, file naming, and session documentation
Decide what you’re walking away with before you start recording, not after. Stems, session files, and a rough mix all take different time to prepare, so settling this early avoids a scramble on delivery day.
- Agree on exact deliverables (stems, full session file, rough mix) and a delivery date.
- Use a consistent naming pattern like songtitle_part_take_BPM_SR across every file.
- Export consolidated stems with contributor metadata and take notes included.
- Mark used and unused takes clearly and keep a simple, consistent folder structure.
| Deliverable | Format | Naming example |
|---|---|---|
| Lead vocal stem | WAV, consolidated | track_vocLead_take_take_BPM_SR |
| Session file | DAW native file | track_sessionFile_48k |
| Rough mix | WAV or MP3 | track_roughMix_v1 |
UMG’s archival asset guide notes that labeling contributor names and take numbers directly in the session makes future credits and remixes far easier to sort out. Our step-by-step stem export guide and our piece on preparing stems from home both walk through this process in detail.
8. Your one-page printable session checklist
Copy this into your notes app or print it and bring it to the session.
- Logistics: date, time, rate, deposit, and attendee contacts confirmed.
- Materials: references, lyrics, instrumental WAVs, and guide vocals sent ahead.
- Tech: sample rate agreed, gain set, test file checked for clipping.
- Room: noise sources muted, reflections treated, notifications off.
- Performer: hydrated, rested, warmed up, breaks scheduled.
- Monitoring: cue mix simplified, levels confirmed, bleed checked.
- Deliverables: format and delivery date agreed, naming convention set.
- Final checks: soundcheck done, loud-section headroom test passed.
- What I leave with: fill in after the session, stems or files received, and any revision notes for the engineer.
9. Twisby Records: practical workflow tips from studio practice
We’ve built this checklist around habits that hold up across extensive engineering experience, including the file discipline required for Apple Digital Masters certification. A few things we stand by in our own sessions:
- Export stems from the earliest used position in the timeline through the end of the performance, so everything stays aligned when it reaches a mixing engineer.
- Keep a short written take log during the session rather than reconstructing it afterward.
- Our Pro Tools stem export walkthrough covers the exact steps for consolidating and labeling files so they arrive mix-ready.
What this checklist gets right, and where most advice falls short
Most session prep guides treat technical settings as the whole story, as if the right sample rate and a clean gain stage guarantee a good take. They don’t. We’ve watched technically perfect recordings fall flat because the performer was dehydrated, under-rehearsed, or stuck wearing headphones pumping a cluttered mix into their ears.
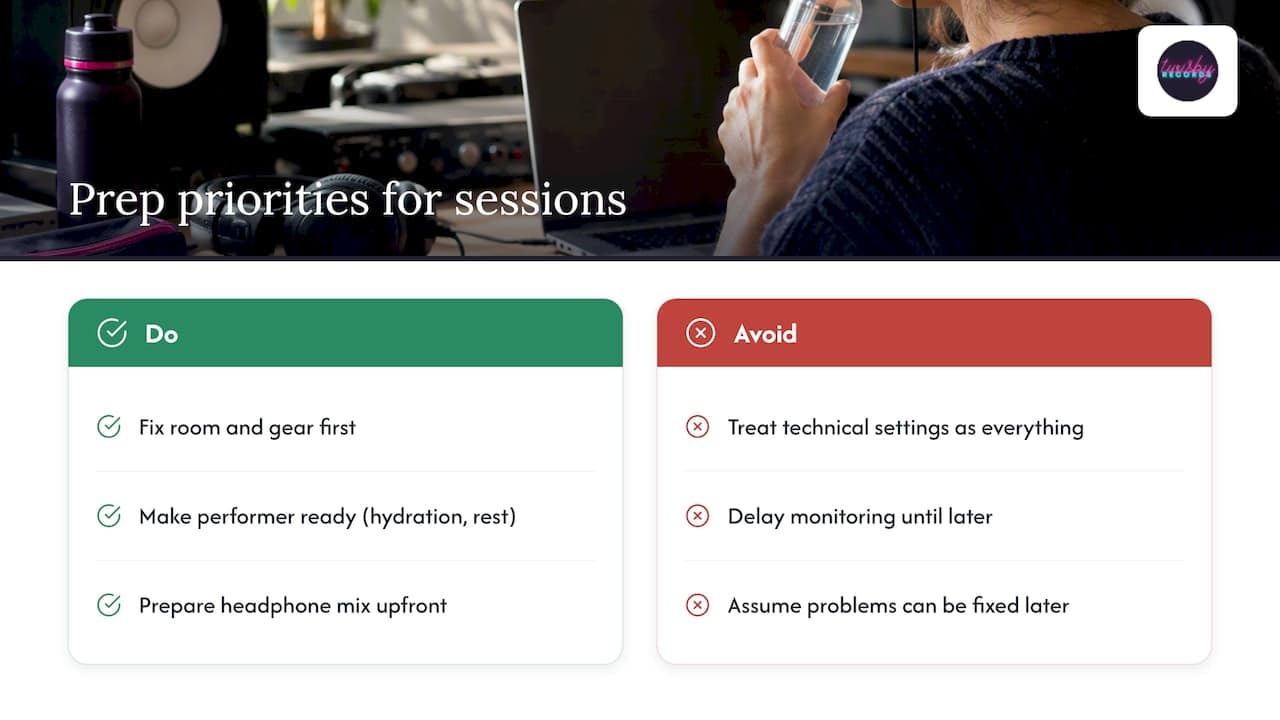
The order matters more than most checklists admit. Fix the room and the gear first, because those mistakes are unfixable later, but treat performer readiness and monitoring as equally non-negotiable, not an afterthought you handle if time allows. A flat, dry room and a clean gain stage mean nothing if the singer can’t hear themselves clearly or hasn’t slept.
If you only have time to prep three things, prep the room, the hydration, and the headphone mix. Everything else can be adjusted on the fly. Those three can’t be fixed after the session ends.
— Kreg
Let Twisby Records handle the technical side for you
If prepping all seven categories feels like more than you want to manage solo, we offer mixing, mastering, and recording services built for exactly this stage of the process. We work with Apple Digital Masters certification and deliver stems organized the way this checklist describes, so nothing gets lost between your session and the final release.

Our remote vocal production clients send us files prepped using the same habits outlined above, and we turn around mixes fast because the groundwork is already done. If you’d rather skip the guesswork on preamp settings and file naming, request a mix quote and we’ll take it from there.
FAQ
What should I send my engineer before a recording session?
Send reference tracks, finalized lyrics, instrumental WAV files labeled with BPM and key, and any guide vocals or demos. Mark which sections or parts you expect to record so your engineer can plan mic setup and pacing in advance.
What sample rate should I use for a recording session?
SoundGirls recommends 48kHz if there’s any chance your track will be used alongside video, and 44.1kHz works fine for music-only releases. Agree on one rate with everyone involved before tracking starts, since mismatched rates cause pitch and timing issues later.
How much should I hydrate before a recording session?
Hydrate steadily for several days before the session rather than relying on water during the takes. The University of Minnesota’s Lions Voice Clinic explains that vocal fold hydration is a systemic process, so drinking in the booth doesn’t replace it.
What should I receive after a recording session?
Deliverables typically include consolidated stems, a session file, and a rough mix, agreed on before the session starts. Twisby Records’ mixing and mastering services organize these with contributor metadata and clear take notes for easier handoff.
How do I avoid clipping during a session?
Set your preamp gain so peaks sit around -12 dB to -6 dB, according to SoundGirls, and run a loud-section test take before recording the full performance. Our guide on stopping vocals from clipping covers the setup steps in more detail.
Sources
- Soundgirls
- Stereo Audio Archival Asset Best Practices – UMG Content Guide
- Maintaining vitality (voice health) — University of Minnesota Lions Voice Clinic
- I Asked a Pro Vocal Coach How to Prepare a Singer for a Recording Session (ft. Rich Bozic)









