


Before you touch a fader, run through eight prep steps: build a folder system, name every file and track consistently, color-code and order tracks by instrument, consolidate clips, set up routing and buses, drop markers, save a template, and plan your stem exports. This work takes about 30 minutes and can save you hours once you’re inside the mix. The approach works the same whether you’re in Pro Tools, Logic Pro, Ableton Live, or Reaper.
TL;DR:
- Consistent file naming with type, descriptor, variant, and version ensures files remain organized and import in the correct order across different DAWs.
- Building a predictable folder structure with separate directories for audio, MIDI, exports, reference, and archive maintains session portability and reduces file loss risk.
- Using distinct colors and track order by instrument family speeds up navigation, reduces visual clutter, and improves workflow efficiency during mixing.
- Setting up clear routing with labeled buses, creating subgroups, and segregating processing stages prevents routing errors and simplifies complex sessions.
- Preparing and sharing a comprehensive session including metadata, plugin details, and compatibility checks minimizes troubleshooting and ensures seamless collaboration.
Table of Contents
- Build a simple project folder and file system before you open the DAW
- Name every file and track with a consistent, import-safe convention
- Color-code and order tracks by instrument family, keep FX visible
- Clean up the session: delete, deactivate, consolidate, and gain-stage
- Routing and buses: create subgroups, label every bus, set up aux returns
- Use folders, track stacks, or folder tracks to collapse high-count sessions
- Markers, tempo map, and song sections: set navigation points before mixing
- Save templates and implement version control to protect progress
- Exporting stems and track-outs: how to prepare deliveries and session metadata
- Quick pre-mix checklist you can run in 10 to 30 minutes
- Practitioner tips from Twisby Records for independent artists
- Standardizing plugin usage and session plugin management
- Recommended organization practices for session automation lanes
- Checklist for session compatibility and system requirements
- Guidelines for exchanging session files with collaborators
- Why session organization protects your creative momentum
- How Twisby Records can help with mixing, mastering, and delivery
- FAQ
- Sources
Build a simple project folder and file system before you open the DAW
A mix session is only as portable as its folder structure. Start at the root level with five folders: Audio, MIDI, Exports (with Stems, Mixes, and Masters inside), Reference, and Archive, plus your session file sitting at the root where you can find it fast. This DAW-agnostic layout keeps your project portable no matter which program opens it next.
Inside Audio, break things down further by instrument family: Drums, Bass, Guitars, Vocals. Drop a README.txt in the root folder that notes your tempo, key, sample rate, and any quirks a collaborator should know about.
- Root folders: Audio, MIDI, Exports, Reference, Archive.
- Subfolders inside Audio organized by instrument family.
- A README.txt with session metadata at the root level.
This structure matters because “collect all and copy” or “save as” functions behave inconsistently across DAWs. When your files already live in a predictable place, nothing gets orphaned when you move the project to another machine or hand it to a mixer.
Name every file and track with a consistent, import-safe convention
Loose file names are where sessions start to fall apart. Adopt a fixed pattern: TYPE_DESCRIPTOR_VARIANT_VERSION.wav. A kick sample might read DRM_Kick_In_v02.wav, and a doubled guitar might read GTR_Rhythm_DoubleL_v01.wav. The format tells you what the file is without opening it.
- Use a file naming template like TYPE_DESCRIPTOR_VARIANT_VERSION.wav for every audio file.
- Add numeric track prefixes (01_Kick, 02_Snare_Top, 03_Bass_DI) so tracks import in the same visual order every time.
- Include version numbers and initials for multi-user sessions, such as Project_v02_JD_20250610.
Numeric prefixes matter more than they seem to. Most DAWs sort tracks alphabetically on import, so without a 01, 02, 03 system, your carefully arranged session can scramble the moment someone else opens it. Versioning with initials and dates keeps a trail when more than one person touches the same project.
Color-code and order tracks by instrument family, keep FX visible
Color is a navigation tool, not decoration. Assign one color per instrument family and keep it consistent across every project you work on: reds for drums, oranges for bass, blues for guitars, greens for keys, yellows for vocals, and purples for buses and FX returns.
- Group and order tracks top to bottom by family: drums, bass, guitars, keys, vocals, then buses and returns.
- Place aux and FX returns in the same spot in every session, usually right below the instrument groups or at the very bottom.
- Reuse the same color scheme project after project so your eye finds things without reading labels.
A consistent color and numbering system scaled across your catalog cuts the mental load of reopening an old session. You stop hunting for the vocal bus and start mixing.
Clean up the session: delete, deactivate, consolidate, and gain-stage
A cluttered session fights you at every turn. Before anything else, delete unused tracks, deactivate and hide the ones you might still need, and reorder what’s left into logical groups. Fewer visible tracks means fewer decisions competing for your attention and less strain on your CPU.
- Delete tracks you know you’ll never use; deactivate and hide ones you might revisit.
- Consolidate clips on each track so they start from the same timeline point, which keeps imports aligned across DAWs.
- Batch-apply fades at clip edges to remove clicks, and gain-stage so nothing clips before it hits a plugin.
Pro Tip: Aim for peaks around minus 18 dBFS on individual tracks before any processing. That headroom gives plugins room to work without distorting.
Consolidating clips into continuous files that begin at the same timeline point is the safest way to keep a session in sync when it moves between programs.
Routing and buses: create subgroups, label every bus, set up aux returns
A minimal bus structure turns a wall of tracks into something you can actually mix. Build a drums bus, a bass bus, a guitar bus, a vocal bus, and a master bus, and name each one exactly what it is. “Bus 3” tells you nothing three weeks from now.
- Route every instrument family into its matching bus, then route all buses into the master.
- Keep tracking-stage processing (de-noise, tuning correction) separate from mix processing unless you intend to print it permanently.
- Decide upfront what belongs on the subgroup, like glue compression on the drum bus, versus what stays on individual channels, like a de-esser on a single vocal take.
Labeling every bus clearly, rather than relying on default names, is one of the fastest ways to avoid routing mistakes when you come back to a session after a break.
Use folders, track stacks, or folder tracks to collapse high-count sessions
Once a session passes 30 or 40 tracks, scrolling becomes the enemy. Every major DAW has a way to collapse related tracks into one controllable unit. Logic Pro offers folder stacks for visibility and summing stacks for actual audio subgrouping. Pro Tools uses folder tracks with show and hide controls, and Reaper relies on its own folder track system.
- Use folder stacks (or their equivalent) when you just want fewer rows on screen.
- Use summing stacks or bus routing when you want one fader to control the combined signal, not just the view.
- Learn your DAW’s expand and collapse shortcut. It will get used more than almost any other command in a mixing session.
Markers, tempo map, and song sections: set navigation points before mixing
Markers turn a long timeline into a map. Drop one at the start of every section and name them consistently: Intro, Verse 1, Chorus 1, Bridge, Outro. This alone saves you from scrubbing through four minutes of audio every time you need to check how the second chorus compares to the first.
- Place a marker at every section boundary with a plain, consistent name.
- Confirm or build a tempo map, especially for live-played material, so delays and sync-based effects track the actual groove.
- Assign a keyboard shortcut to jump between markers to speed up editing and automation passes later.
A tempo map matters even on a session that feels steady. Time-based effects calculated against the wrong tempo drift audibly, and you won’t always catch it by ear until the mix is further along.
Save templates and implement version control to protect progress
A good template does the setup work once so you never repeat it. Build one with pre-colored, pre-named tracks, your standard bus layout, aux sends already routed, a handful of favorite plugins loaded but bypassed, and your usual markers in place. The next session you open from that template starts closer to mix-ready than blank.
- Template should include named and colored tracks, pre-built buses, routed auxes, and bypassed go-to plugins.
- Use a clear versioning rule for collaborative files, such as ProjectName_v03_JD_20260610.
- Save a dedicated “mix” copy once tracking is locked, so you always have an untouched version to return to.
Pro Tip: Turn on autosave or incremental backups so a crash never costs you more than a few minutes of work.
Exporting stems and track-outs: how to prepare deliveries and session metadata
How you export determines whether a mixer or collaborator can actually use what you send. Exported track-outs should start at the same timeline point, share a consistent bit depth and sample rate, and carry peaks around minus 6 to minus 3 dBFS so there’s headroom to work with.
- Decide whether to send processed or clean stems, and make that choice explicit to whoever receives them.
- Build a stems folder with a README.txt that lists BPM, key, sample rate, DAW name and version, and any notes on intent.
- Keep every track-out aligned to the same start point and name files using your established convention so nothing gets mismatched on import.
Our step-by-step export and stem-delivery checklist walks through the same process in more detail, and if you’re working in Ableton specifically, our Ableton stem export guide covers the program-specific settings.
Quick pre-mix checklist you can run in 10 to 30 minutes
Once the full setup is done once, future sessions need only a short pass. Save a fresh “mix” copy, import your reference track, confirm markers are in place, hide inactive tracks, check that groups and buses are assigned, run a quick gain-staging pass, and flag any CPU-heavy plugins before you start.
- Save-as a mix copy and import a reference track for comparison.
- Confirm markers, hidden tracks, and group assignments are correct.
- Do a fast gain-staging check and note any plugin that’s taxing your CPU.
Budget 10 to 30 minutes for this pass. If a mix needs more revision rounds than that prep should allow, or your sessions feel chronically behind schedule, that’s usually the point to bring in outside help rather than keep troubleshooting alone.
Practitioner tips from Twisby Records for independent artists
Working remotely with independent artists for over 35 years taught us that most revision requests trace back to missing context, not a bad mix decision. A short README with your reference tracks and creative intent, sent alongside the session, prevents more back-and-forth than almost anything else we recommend.
- Write a one-paragraph README describing your reference tracks and what you want the mix to feel like.
- Set export expectations in advance, like sample rate, bit depth, and whether you want stems or a stereo bounce.
- Flag any section you’re unsure about directly in the session notes rather than waiting for a revision round.
Standardizing plugin usage and session plugin management
Plugin chaos is one of the quietest ways a mixing session goes sideways. If every track has a different combination of random third-party plugins, your CPU load becomes unpredictable and your session becomes nearly impossible for anyone else to open and trust.
Start by settling on a small, consistent plugin kit for recurring jobs: one EQ you default to, one compressor you reach for first, one reverb you use as a send on most buses. Load these into your template already bypassed so they’re ready without cluttering the session before you need them.
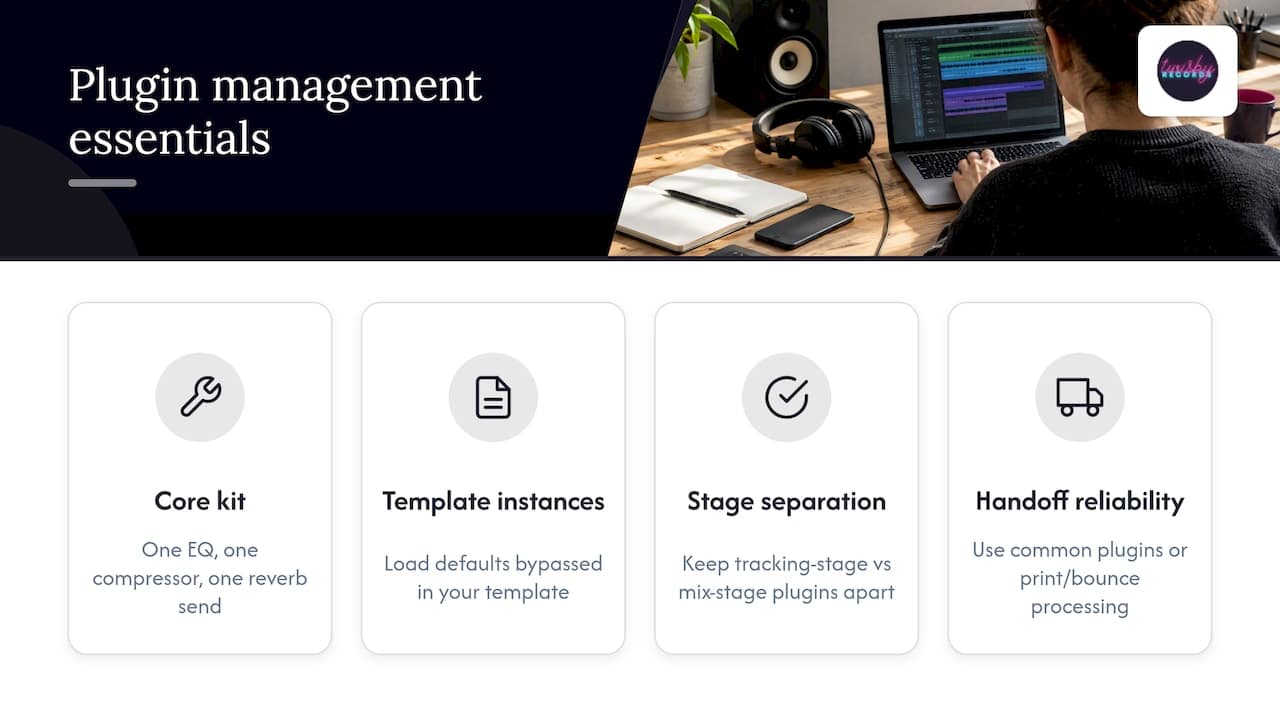
Keep tracking-stage plugins, like a tuning correction tool or a noise gate used during recording, clearly separated from mix-stage processing. If a plugin was used to shape the performance and needs to stay, print it and note that in your README rather than leaving an active instance that a collaborator might not have installed.
Watch for plugin availability across machines. A session built with a rare or discontinued plugin becomes a liability the moment it needs to open somewhere else. When you plan to hand a session off, stick to widely available stock or common third-party plugins, or bounce the processed audio so the mix translates regardless of what’s installed on the receiving end.
Label plugin instances on buses and important tracks in the plugin window itself when your DAW allows it. A compressor simply labeled “Comp” tells you nothing six months later, but “Comp: Drum Bus Glue” tells you exactly what it’s doing.
Recommended organization practices for session automation lanes
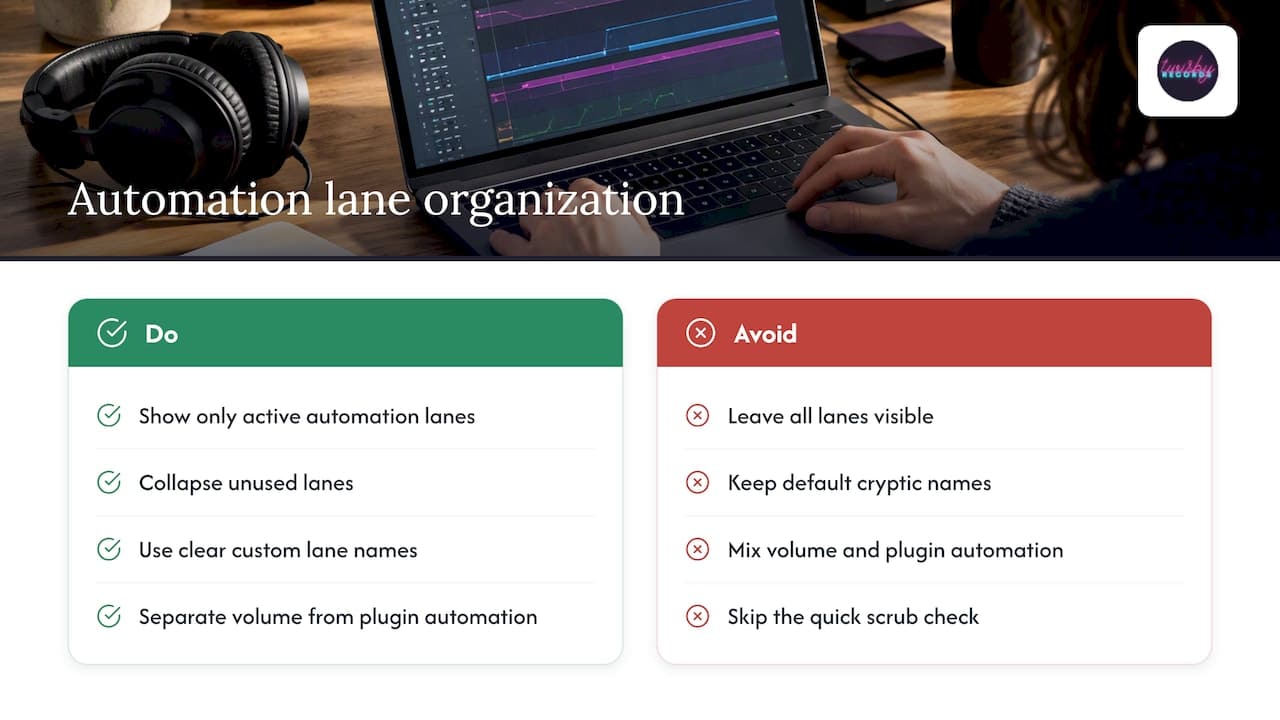
Automation gets messy fast, especially on vocal tracks and busy buses carrying multiple parameter changes. The fix is mostly discipline: keep automation lanes visible only for the parameters you’re actively working on, and collapse the rest.
Name automation lanes clearly when your DAW supports custom labeling, particularly on sends and plugin parameters where the default name is cryptic. A reverb send automated for a chorus lift should read as that, not as “Send 3.”
Separate volume automation from plugin-parameter automation visually where possible, since they serve different purposes: one manages level, the other manages tone or effect intensity at specific moments. Mixing the two together on a crowded track makes it hard to tell what’s doing what.
Before finalizing a section, scrub through with automation lanes expanded to confirm nothing jumps unexpectedly at a marker boundary. This is a fast check, usually under a minute per section, and it catches the kind of automation glitch that’s otherwise easy to miss until playback.
If you’re automating the same move across multiple similar tracks, like riding backing vocals in a chorus, consider whether a bus-level automation pass would accomplish the same goal with fewer lanes to manage.
Checklist for session compatibility and system requirements
Before a session leaves your machine, a few compatibility checks prevent a frustrating first few minutes for whoever opens it next. Confirm your sample rate and bit depth are consistent across every audio file in the session, since a mismatch is one of the most common reasons imported audio plays back at the wrong speed or pitch.
Check that your DAW version is noted in your README, since plugin formats and session file structures occasionally change between major updates. If you’re sending a session rather than stems, confirm the receiving system has enough storage and processing headroom, particularly if your session is plugin-heavy or uses a large sample library.
Run through this short list before sending or archiving a session:
- Confirm consistent sample rate and bit depth across every file.
- Note your DAW name and version number in the README.
- Flag any third-party plugin that might not be installed on the receiving system.
- Check available storage space before exporting a large stems package.
This kind of system check takes a few minutes and avoids the kind of last-minute troubleshooting that eats into actual mixing time. A post-production archival checklist covers similar ground if you want a broader framework for long-term storage and retrieval.
Guidelines for exchanging session files with collaborators
Handing a session to someone else, whether a mixer, a co-producer, or a bandmate, works best when you treat it like a small delivery rather than a casual file transfer. Zip the full project folder, including Audio, MIDI, Exports, and your README, rather than sending individual files piecemeal.
Confirm with your collaborator which DAW they’re using before you send anything. If it’s different from yours, exported stems with a clear README are almost always more reliable than the raw session file itself, since plugin formats and session structures don’t always translate across programs.
Include a short note on what stage the project is at: rough mix, revision round two, final approval pending. This single line of context prevents a surprising amount of confusion, especially on projects that stretch across weeks.
- Zip the entire project folder rather than cherry-picking files.
- Confirm the collaborator’s DAW and send stems if it differs from yours.
- Note the project’s current stage directly in your message or README.
A music submission checklist built for artists preparing deliverables follows a similar logic. Treat every handoff like it needs to make sense without you in the room.
Why session organization protects your creative momentum
I’ve watched artists lose an entire evening hunting for a missing vocal take that got buried under a vague file name, and that’s an hour of creative energy that never comes back. Organization isn’t busywork. It’s the thing standing between you and staying in the mix instead of fighting your own session.
— Kreg
How Twisby Records can help with mixing, mastering, and delivery
When a session is clean and your prep work is done, you’ve already saved the hardest part of the process. For the final polish, our mixing and mastering service pairs experienced engineers and real analog gear with the personalized attention independent releases deserve, and mastering runs $50 one-off once your mix is locked.

If you’d rather hand off the mix entirely and keep your energy for writing and performing, reach out through our services page and let’s talk turnaround and timeline.
FAQ
What is the rule of 32 in DJing?
The rule of 32 is a DJ mixing convention, not a session-organization standard, referring to blending tracks in beat-based phrases so transitions land on musical boundaries. It doesn’t apply directly to structuring a DAW session for mixing a recorded song.
How do I mix my own songs?
Start by preparing the session itself: organize folders, name and color-code tracks, consolidate clips, and set up buses before you touch a single fader. From there, gain-stage your tracks, build rough balances by instrument group, and use a reference track to check your decisions against a finished record you know well.
Is there a way to record and listen to music at the same time?
Most DAWs support monitoring through a track while recording, letting you hear the live input alongside already-recorded parts in real time. Latency can be an issue depending on your interface and buffer settings, so a lower buffer size during recording usually gives more reliable real-time monitoring.
Which app is best for audio mixing?
Pro Tools, Logic Pro, Ableton Live, and Reaper are the four most widely used programs for mixing, and each supports the same core organizational principles: folders, buses, markers, and templates. The right choice usually comes down to your workflow preference and platform rather than one program outmixing another.
Sources
- Ready, Set, Mix! Tips for Prepping Your Mixing Session – Universal Audio
- Organize DAW Sessions: 10 Steps to Faster Mixing | LordReverb
- In The Studio: 5 Prep Steps To Improve Your Mix Workflow – ProSoundWeb









